
User Profile Matching
User Profile Matching strengthens identity verification by helping ensure that a verified CLEAR user matches the correct user record in your system. This functionality compares verified identity data - such as first name, last name, and optional additional attributes like date of birth or address - against the information clients have on file in their existing systems of record.
By cross-validating the verified attributes with your existing records, CLEAR reduces ambiguity in name-based matching and increases confidence that accounts are connected to the correct individual.
Considerations
CLEAR profile matches on fields pulled off of the government document, and does not match against self-attested fields (e.g. SSN).
CLEAR profile matching requires at a minimum matching to legal First Name and Last Name. If and when date of birth (DOB) is available, CLEAR recommends adding that to help disambiguate users.
CLEAR uses fuzzy logic on name matching to account for document typos, abbreviations, and alternative spellings (e.g., Jon vs. John).
Profile matching failures may be driven by inconsistencies between government documents and existing systems profile data, like:
- Existing systems not requiring legal names (e.g. nicknames, preferred names)
- Documents including only partial names (e.g. Aadhaar having single letter surnames)
- Compound first names (e.g. María José, Mary Ann, Anna Maria, Jean Paul, Tommy Lee, José Luis)
- Compound last names (e.g. matrilineal + patrilineal [español], patrilineal + matrilineal [português])
- Hyphenated names (e.g. Mary-Jane, Jean-Baptiste, Rosa-María, Mary-Catherine, Jean-François, Jean-Pierre, Juan-Carlos, Billy-Joe)
First-time match: When linking a CLEAR user to a profile for the first time, CLEAR recommends storing the CLEAR User ID (user_id). After that, you can use PSUID for deterministic matches on future verifications.
How To Configure
CLEAR offers two methods to match profile data (using POST /verification and PUT /verification) or client may build their own algorithm (using GET /verification).
To leverage the User Profile Matching API, the session's Project ID must have User Profile Matching enabled on the Project setup in the CLEAR admin console. Administrators need to select the desired fields to match against for the Project, and then make a request to CLEAR Support or Solution Engineering to request that the Project be pushed to Production with those configuration changes.
Please connect with your dedicated CLEAR point of contact or make a request to CLEAR Support to enable User Profile Matching within your CLEAR organization
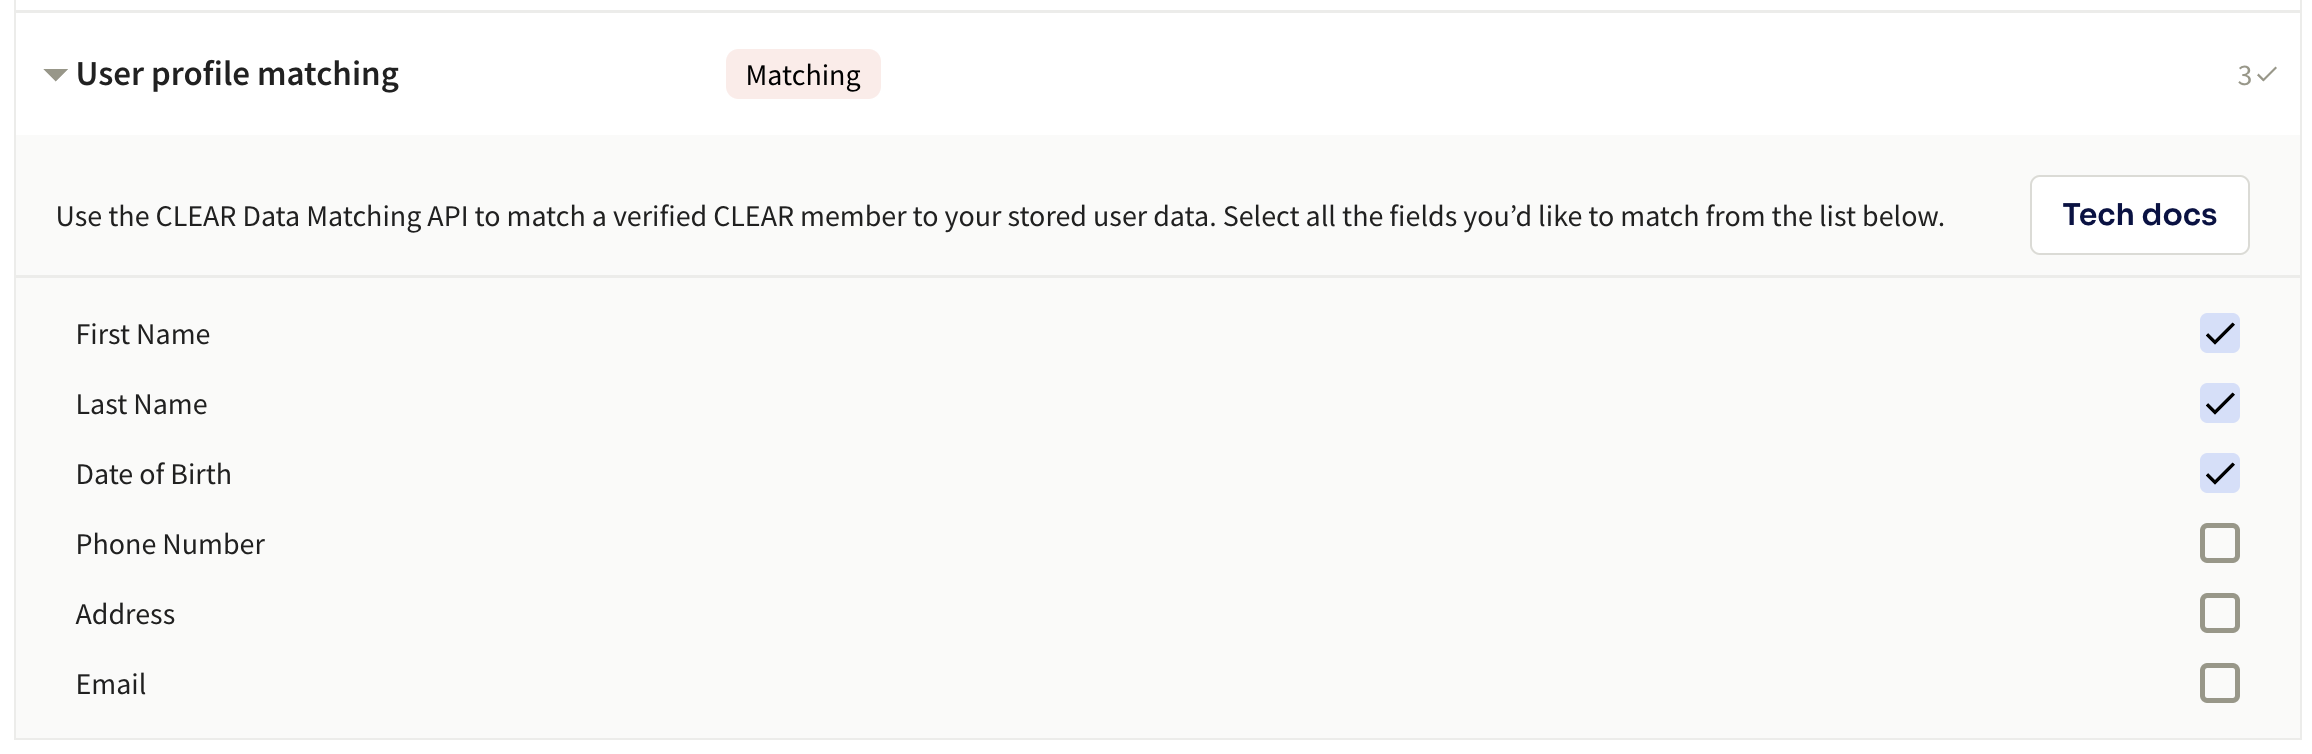
This Project has enabled User Profile Matching on First Name, Last Name, and Date of Birth._
How It Works
There are two ways to implement CLEAR's user profile matching:
( Recommended Approach for Standard Integration ) Option A: Add user_profile_information within create_verification_session POST API_
https://docs.clearme.com/reference/create_verification_session#/
( Recommended Approach for oAuth Integrations ) Option B: Supply user_profile_information parameters within Submit User Profile Information for Verification Session PUT API
To test and configure a mock API please reference our API reference and test using the APIs listed below. To see mock responses add your projectID, and API key from the CLEAR console, and type in mocked supplied data in the body parameters
Option A: Add user profile information within create verification session
user profile information within create verification sessionhttps://docs.clearme.com/reference/create_verification_session#/
Step 1: Supply User Data
When creating a new verification session using create_verification_session, Supply data user data elements by passing data stored within your systems to CLEAR through user_profile_information
Example
curl --request POST \
     --url https://verified.clearme.com/v1/verification_sessions \
     --header 'accept: application/json' \
     --header 'content-type: application/json' \
     --data '
{
  "user_profile_information": {
    "name": {
      "first_name": "John",
      "last_name": "Doe"
    },
    "dob": "1990-04-05",
    "phone": "8172222323",
    "address": {
      "line1": "85 10th Ave ",
      "city": "New York",
      "state": "New York",
      "postal_code": "10016",
      "country": "USA"
    },
    "email": "[email protected]"
  }
}
'
Step 2: Store VerificationID to retrieve data
After Step 1 is complete the verificationID returned in the response will be utilized to pull the user data from CLEAR using the Get_Verification_Session Now that user_profile_information has been supplied the verification result will be impacted by 1. Did this user pass the verification and the configured checks for the project. 2. Did the users data from the verification and government issued ID match the supplied data within user_profile_information
Step 3: Retrieve data from CLEAR
As mentioned in in Part A of Step 1 (Standard Integration section Phase 3: "Decide How to Know When Verification Is Complete"), after the session is completed, and a pre-defined mechanism will assist your application in retrieving results using the GET_verification_session The session information will include:
- overall verification status
- the individual checks the user passed and failed
- the traits or personal data that was extracted from the users government issued ID
- the user profile information that was supplied
- the user_profile_match_status which denoted if the match was successful or not
the “user_profile_match_status” listed above will either be success or failure based on the outcome of the match. The overall verification status will match this status, but CLEAR provides an additional field to add insight that the match is specifically what failed in the verification.
Example: a user might fail a check like "name": "Selfie matches portrait on Gov ID" and fail user profile matching. In this model a partner can refer to "user_profile_match_status": "string" and the "name": "Selfie matches portrait on Gov ID" to understand where in the session the user failed.
Step 4: Handle Users Accordingly
Once results are retrieved, move on to phase C of the integration "Data Storage"
Option B: Supply user profile information within Submit User Profile Information
user profile information within Submit User Profile Informationhttps://docs.clearme.com/reference/update_verification_session#/
Step 1: Supply user_profile_information within Submit User Profile Information for Verification Session
user_profile_information within Submit User Profile Information for Verification SessionDuring an OAuth/OIDC integration flow. A verification session is created when a user clicks the OAuth url within your application API, this creates a token. After the session is complete the authorization code+ token exchange process will still occur. After the OAuth flow is complete. Use the verificationID within the access token and supply user data elements by passing data stored within your systems to CLEAR through user_profile_information
Example
curl --request PUT \
     --url https://verified.clearme.com/v1/verification_sessions \
     --header 'accept: application/json' \
     --header 'content-type: application/json' \
     --data '
{
  "user_profile_information": {
    "name": {
      "first_name": "John",
      "last_name": "Doe"
    },
    "dob": "1990-04-05",
    "phone": "8172222323",
    "address": {
      "line1": "85 10th Ave ",
      "city": "New York",
      "state": "New York",
      "postal_code": "10016",
      "country": "USA"
    },
    "email": "[email protected]"
  }
}
'
Step 2
After you append user_profile_information to a verificationID listed above. CLEAR will facilitate a match and provide results in the Submit User Profile Information for Verification Session API response.
Step 3: Handle Users Accordingly
Once results are retrieved, move on to phase C of the integration "Data Storage"
Example Response
Regardless of implementation approach: option A and option B - the results returned from CLEAR within the GET verification session and the Submit User Profile Information for Verification Session will be structured the same
CLEAR will return the following information:
 "user_profile_information": {
    "name": {
      "first_name": "John",
      "last_name": "Doe",
    },
    "dob": "1990-04-05",
    "phone": "8172222323",
    "address": {
      "line1": "85 10th Ave",
      "city": "New York",
      "state": "NY",
      "postal_code": "10016",
      "country": "USA"
    },
    "email": "[email protected]"
  },
  "custom_fields": {},
  "user_profile_match_status": "success",
Updated 19 days ago