
Microsoft Entra SSO Setup
To set up an application to use OpenID Connect (OIDC) with Microsoft Entra for Single Sign-On (SSO), you'll need to configure both your Microsoft Entra (Azure AD) tenant and the application you're integrating. Below is a step-by-step guide on how to set this up. After setting up SSO there are also steps for setting up and configuring SCIM provisioning.
Step 1: Register the Application in Microsoft Entra
-
Sign in to the Microsoft Entra
Go to https://entra.microsoft.com/#home and log in with your Entra administrator account. -
Navigate to Microsoft Entra ID
In the left-hand menu, select Microsoft Entra ID.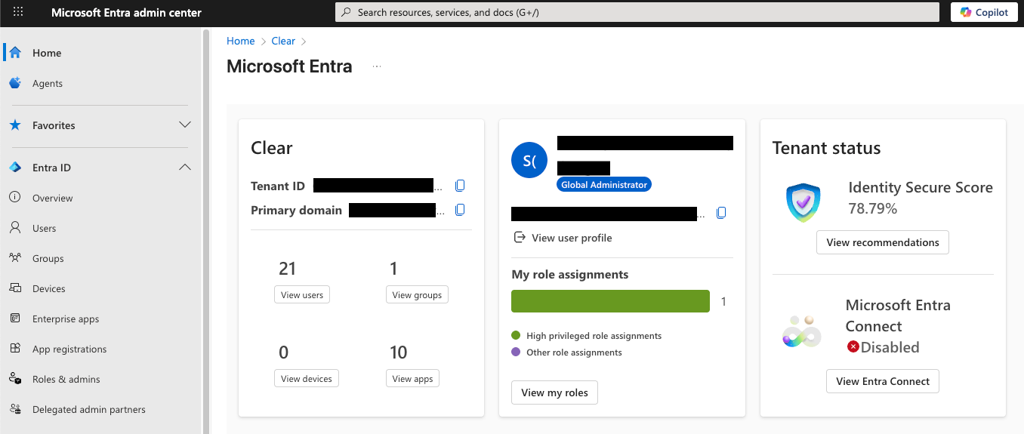
-
Register a New Application
-
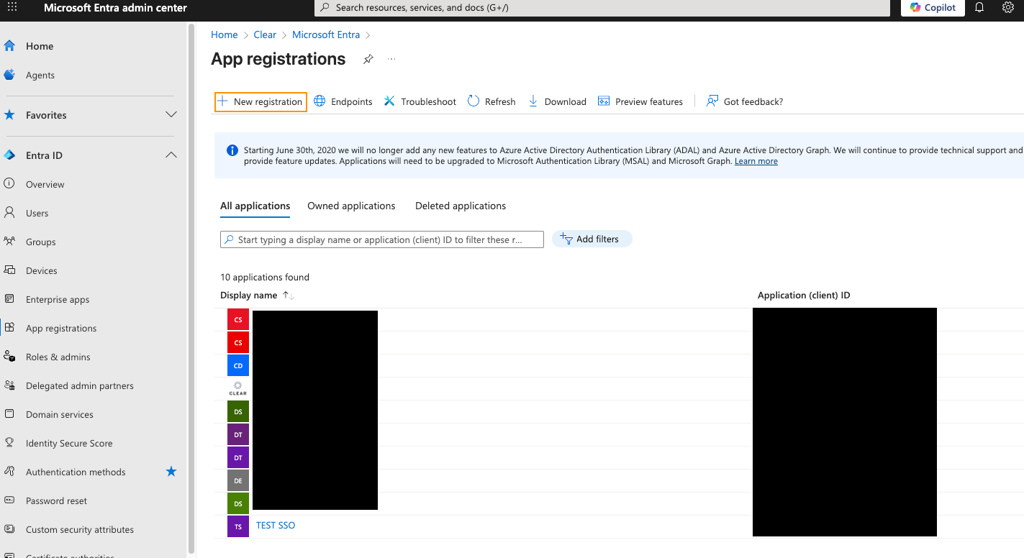
From the Microsoft Entra admin center Home screen, go to App registrations in the left side menu bar
-
Click New registration.
-
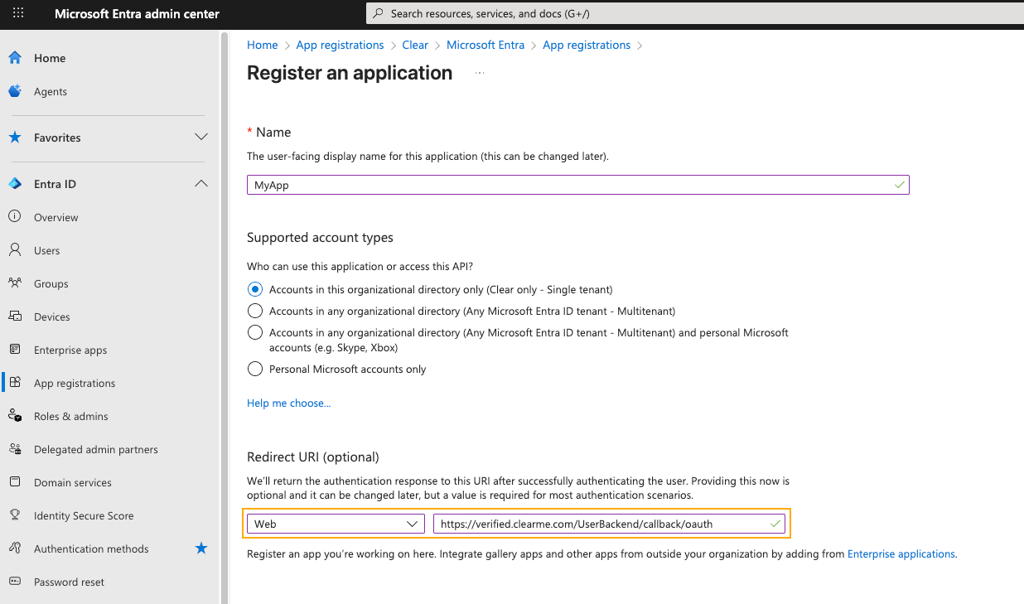
Provide a name for your application (e.g., "MyApp").
-
Choose the supported account types:
- Accounts in this organizational directory only (single tenant).
- Accounts in any organizational directory (multi-tenant).
- Accounts in any organizational directory and personal Microsoft accounts (multi-tenant + personal Microsoft accounts).
-
In the Redirect URI (optional) section, select Web and provide a URL where the app will receive the authentication response (e.g., https://yourapp.com/oidc/callback).
-
https://verified.clearme.com/UserBackend/callback/oauth
-
-
Click Register
-
Step 2: Configure API Permissions (Optional)
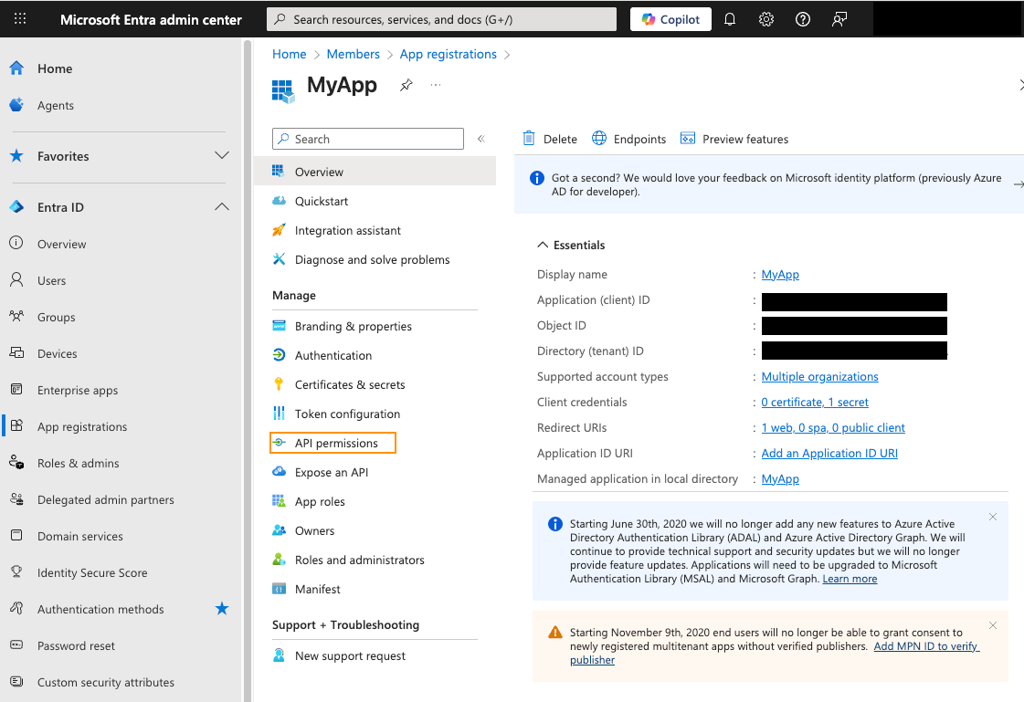
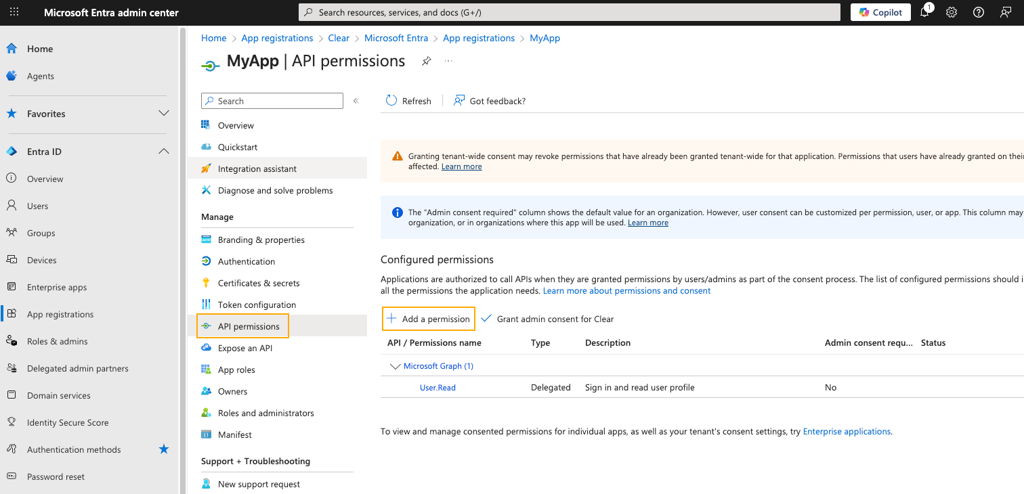
After registering the app, go to the app's API permissions page.
-
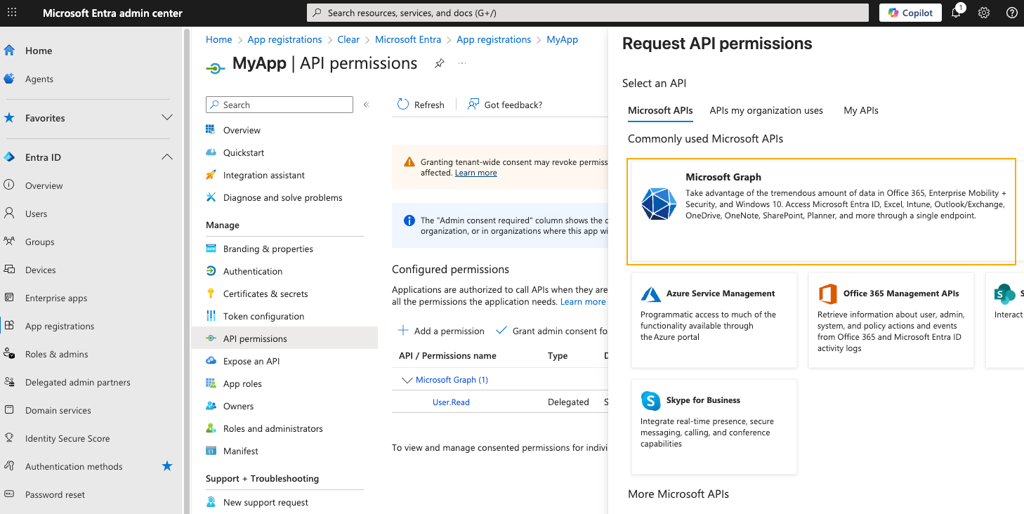
Click Add a permission and select Microsoft Graph or any other required API.
-
Choose the permissions your app needs (e.g., User.Read to access user profile information).
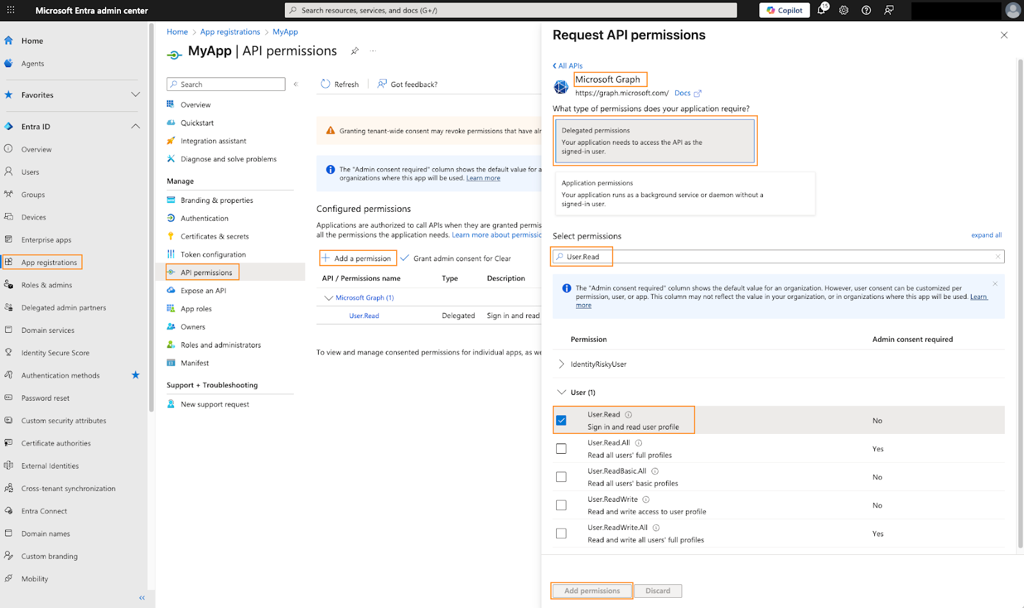
Click Add permissions and ensure to Grant admin consent if necessary.
Step 3: Configure the Authentication (OIDC)
- Set up OIDC Authentication
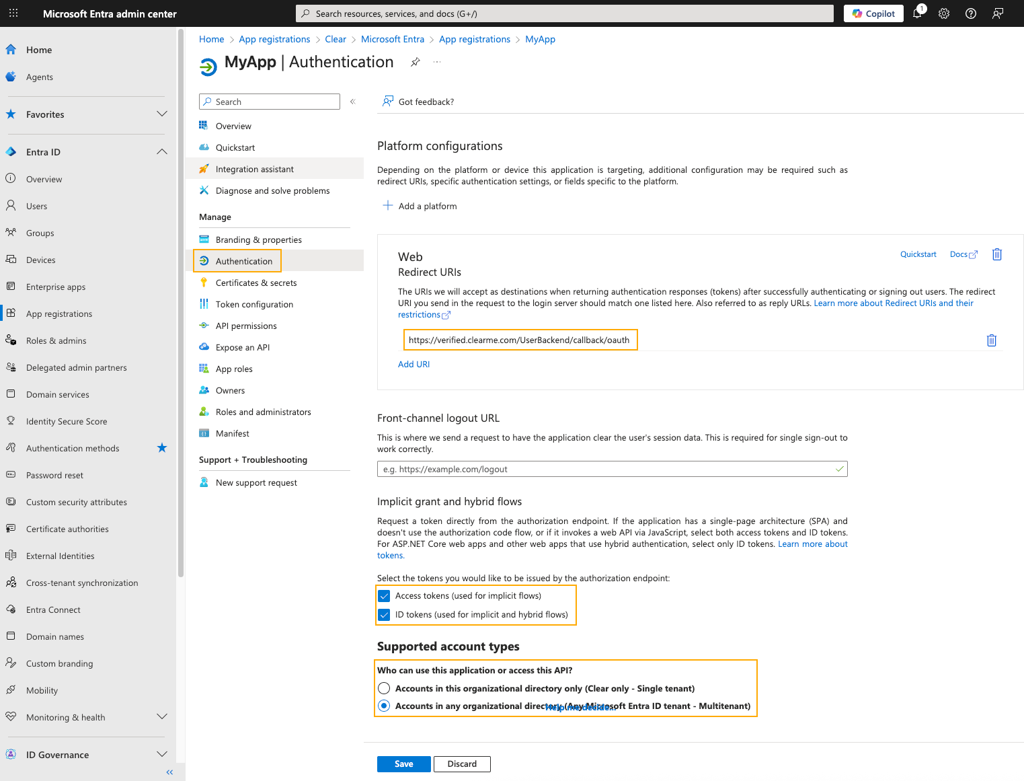
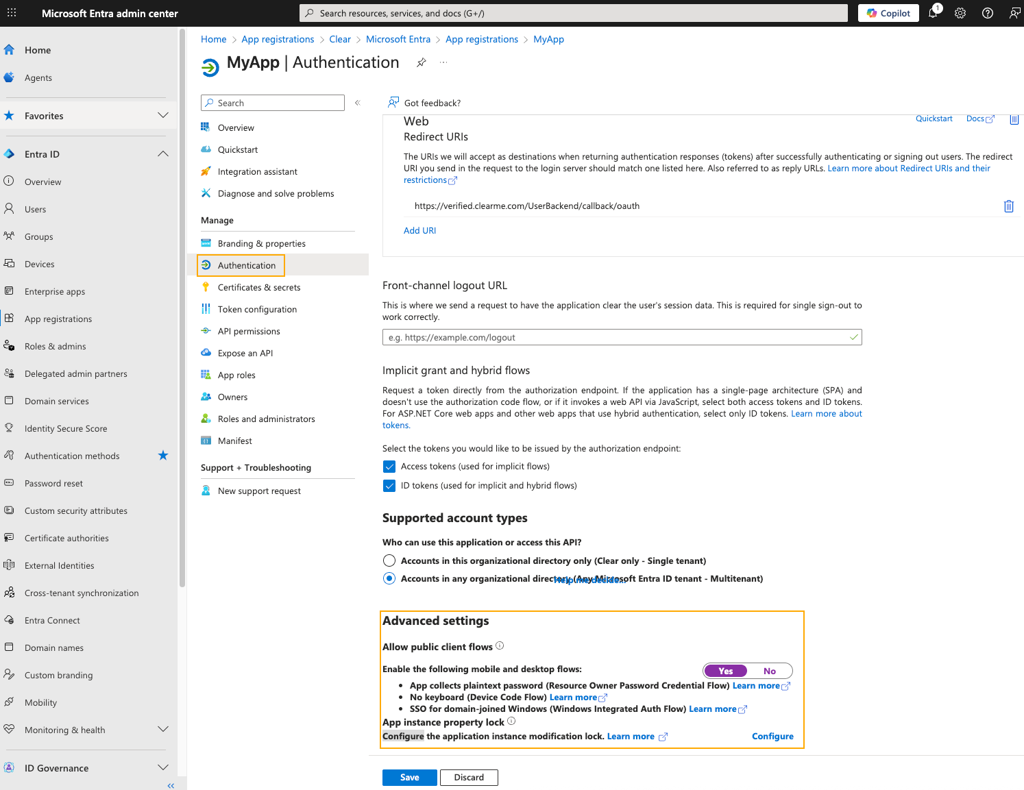
- Go to the Authentication section under your app registration.
- Under Platform configurations, click Add a platform and select Web.
- Provide the redirect URIs (where the OIDC authentication response will be sent after a successful login) under the Redirect URIs field.
-
For example, https://yourapp.com/oidc/callback.
-
- Enable ID Token (OIDC)
-
Scroll down to the Implicit grant and hybrid flows section.
-
Check the box for ID tokens (this allows OIDC authentication).
-
Optionally, enable Access tokens if needed for access to APIs.
-
- Save the Configuration
Step 4: Configure Client Secret (for Confidential Applications)
Create a Client Secret
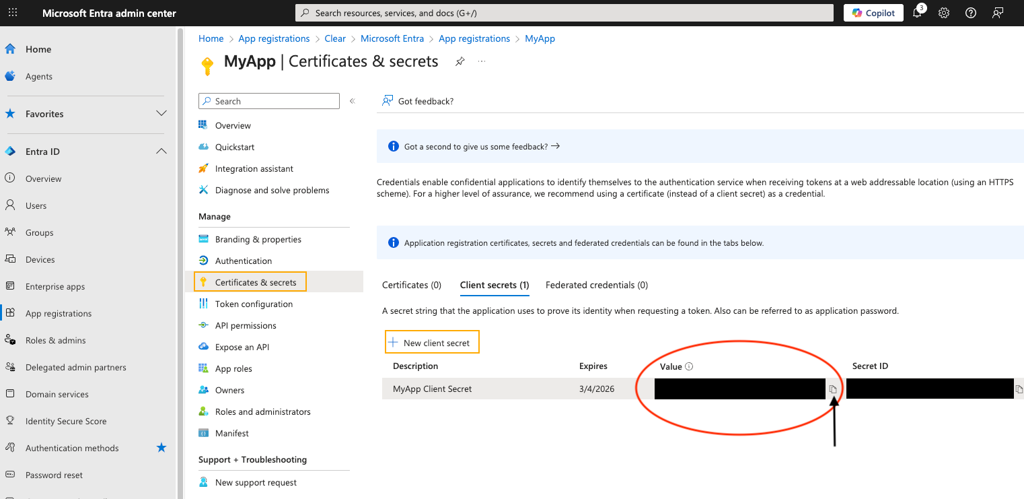
- In the Certificates & secrets section, click New client secret.
- Provide a description and set an expiration period.
- Click Add and make sure to copy the Value of the client secret immediately because it will not be shown again. You will need this later to input into the Client Secret field in the CLEAR app.
Step 5: Gather Necessary Information
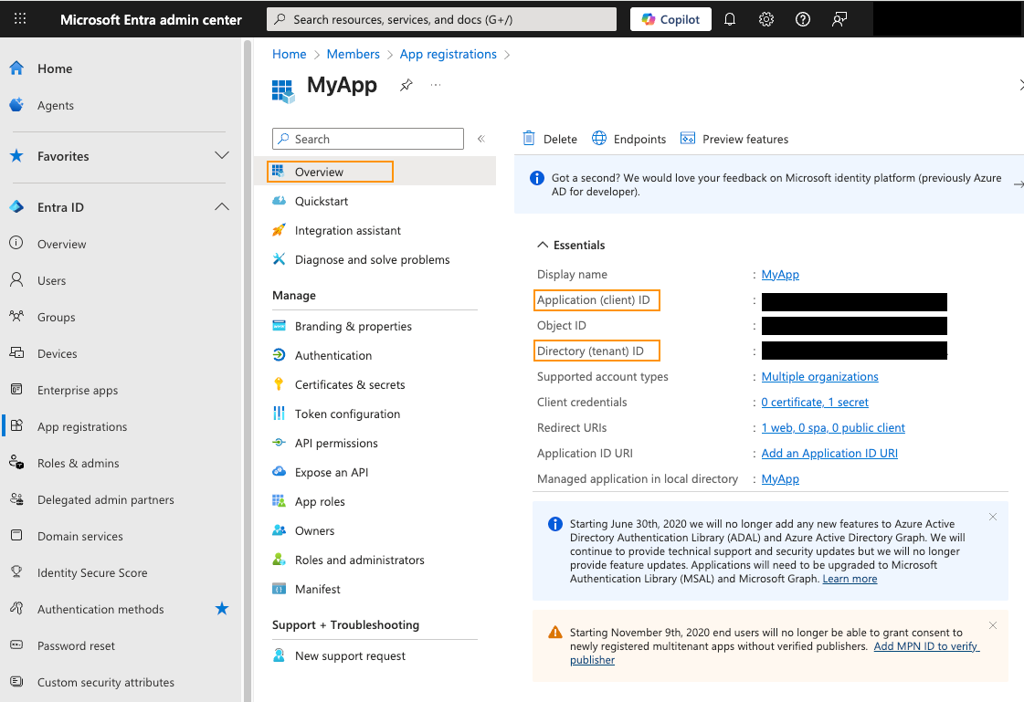
- Client ID
From the Overview section of your app registration, copy the Application (client) ID. - Tenant ID
Copy the Directory (tenant) ID from the Overview section. - Client Secret
You already copied the client secret in step 4. (picture above)
Step 6: Configure the Application to Use OIDC
Note: This is done in the CLEAR Console.
Now that you have the necessary information (client ID, tenant ID, client secret, and redirect URIs), you need to configure your application (CLEAR) to use OIDC for authentication.
- Login to your CLEAR Organization Dashboard with your Admin account (Solutions Engineering should have set up an initial Admin account)
- URL to CLEAR Dashboard: https://verified.clearme.com/dashboard
- Click on User Management
- Click on Single Sign-on (SSO)
- Click on the Microsoft Entra Tile
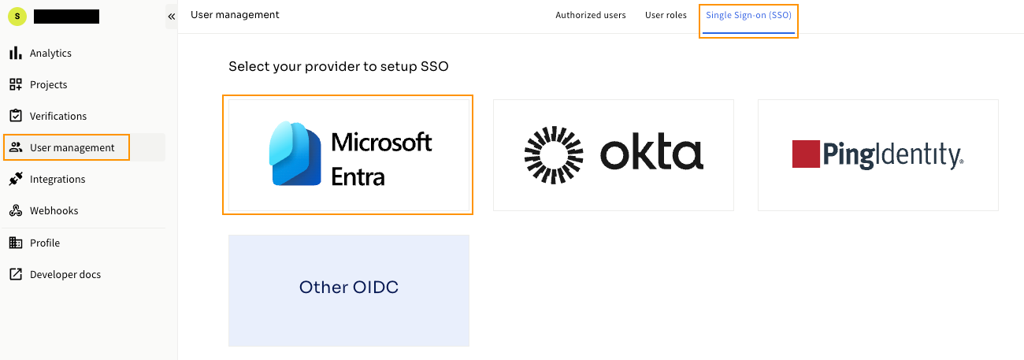
- Fill out the configuration information using the Client ID and Tenant ID from Step 5 above.
- The Client Secret is from Step 4 above.
- Enter the OIDC Endpoint:
https://login.microsoftonline.com/{Tenant ID}/v2.0/.well-known/openid-configuration- Where Tenant ID is from Step 5 above
- Click the Get URI endpoints to fill in the
authorization_endpoint,token_endpoint, anduserinfo_endpoint- If the host is not login.microsoftonline.com please let Solutions Engineering know so they can allowlist the host.
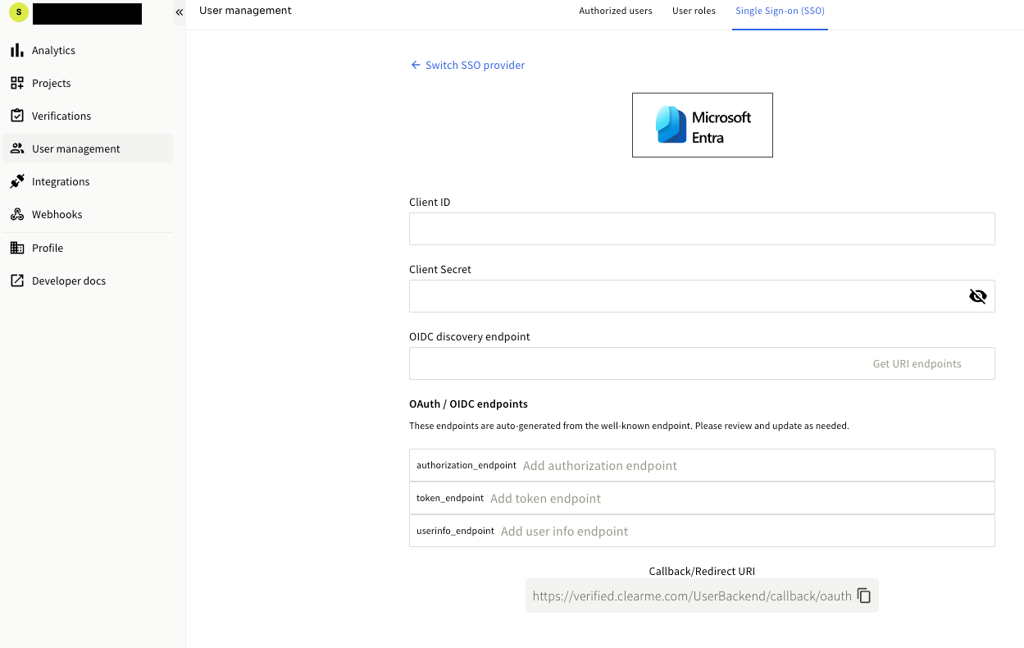
- Click the Publish button to save your changes
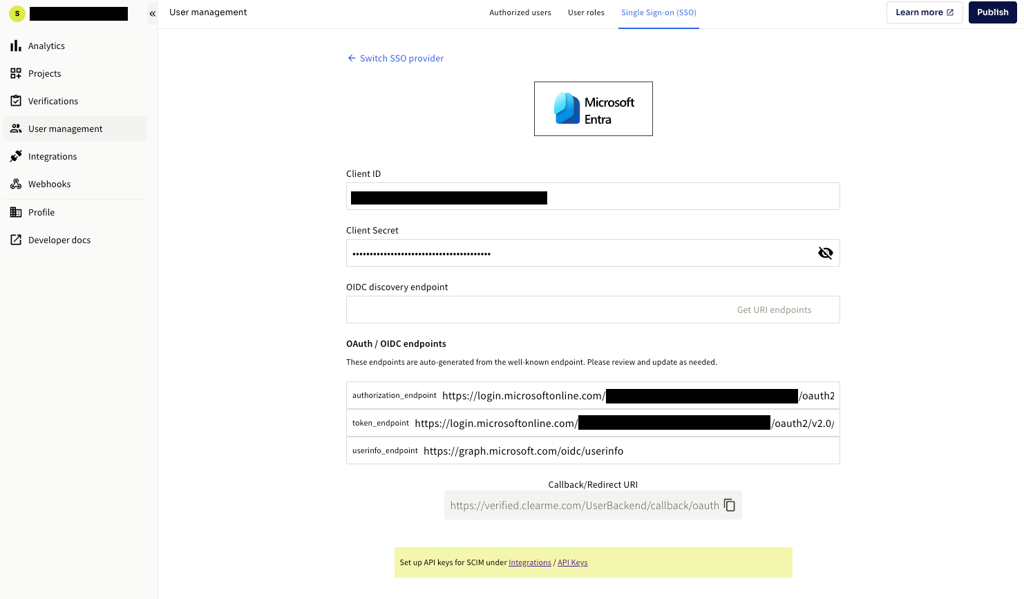
- The end points below should be automatically filled in if the discovery endpoint was used.
- Set the Authorization Endpoint:
https://login.microsoftonline.com/{tenant_id}/oauth2/v2.0/authorize - Set the Token Endpoint:
https://login.microsoftonline.com/{tenant_id}/oauth2/v2.0/token - Set the Userinfo Endpoint:
https://graph.microsoft.com/oidc/userinfo
- Set the Authorization Endpoint:
- The Callback/Redirect URI above is used when doing app registration in Step 3.
- Make sure the user is defined in CLEAR 1 User Management with the correct role
Note: This can be done by adding the user under the User management/Authorized users section of CLEAR dashboard or by using SCIM to send your users and roles to CLEAR (setup in Step 10).
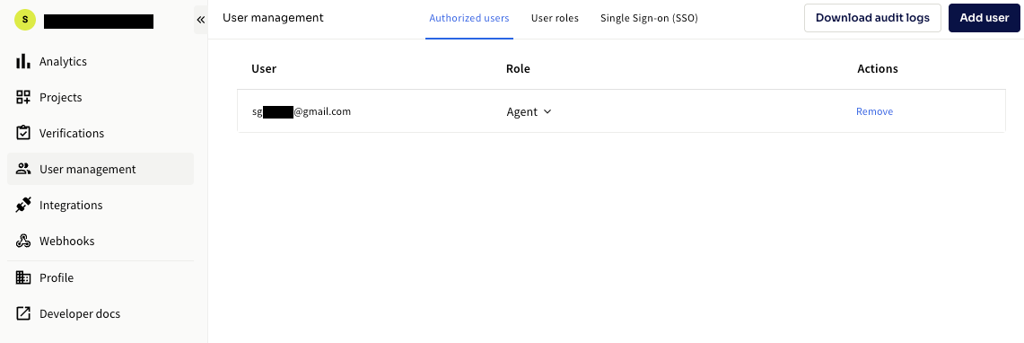
Step 7: Define a Group for SSO and SCIM (if needed)
-
Define a group for SSO login and SCIM (if needed).
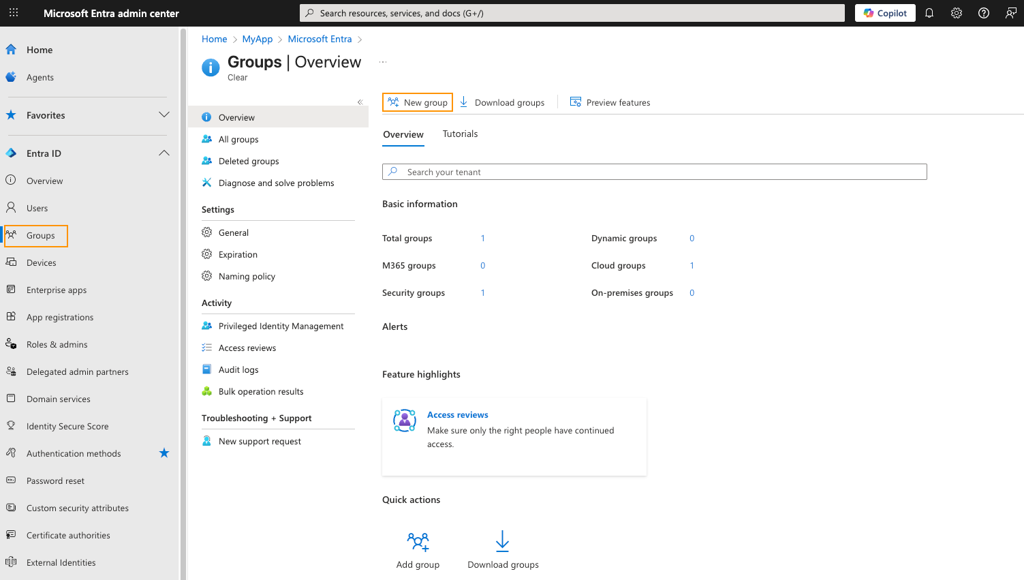
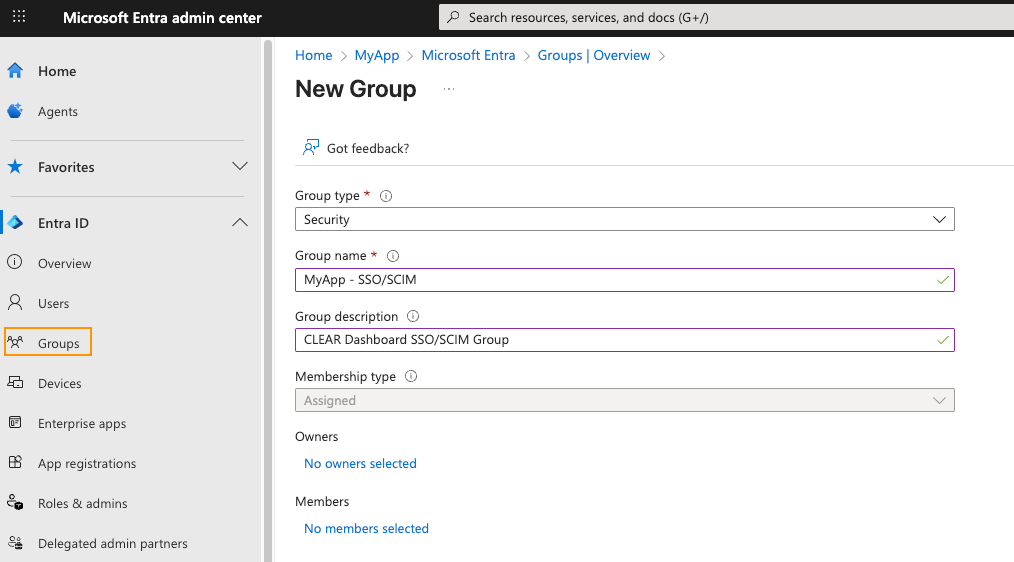
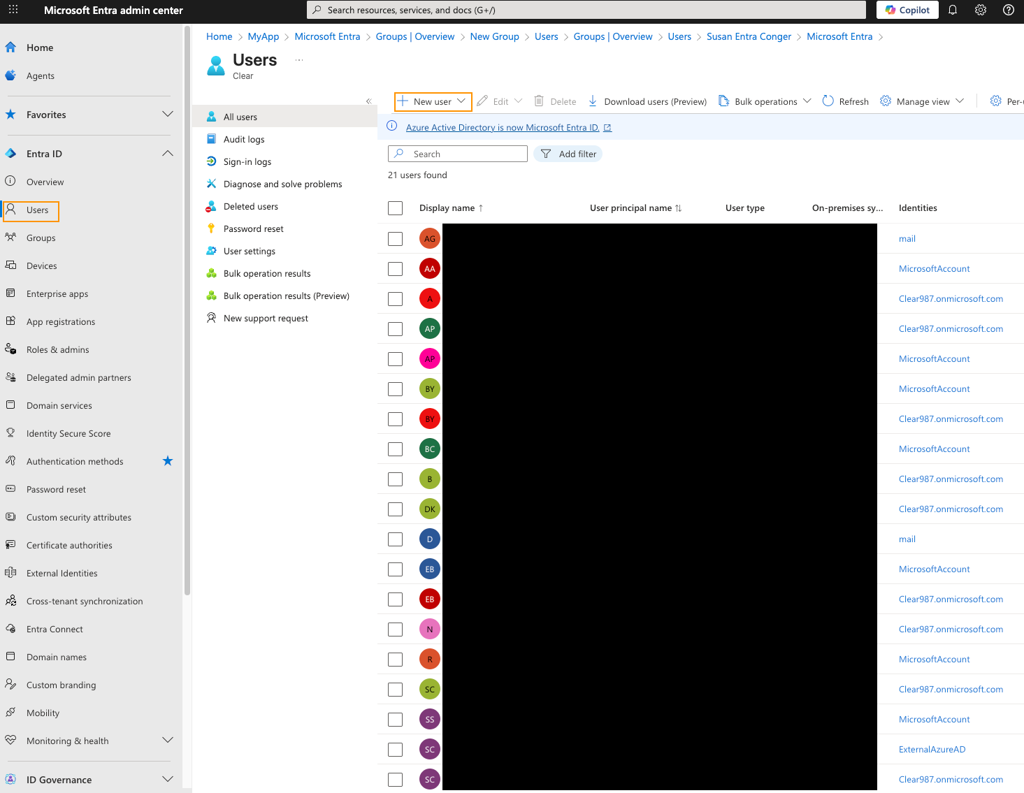
-
Assign the user to the group
-
Click on the user (see picture above)
-
Click on Group or the number after Group memberships to select the group to assign to the user
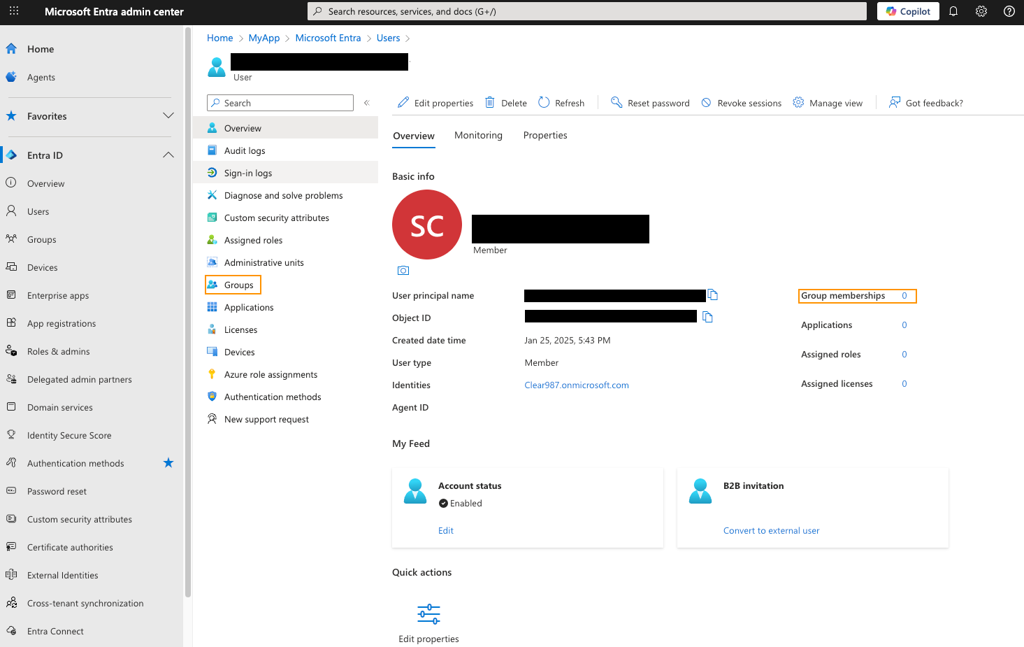
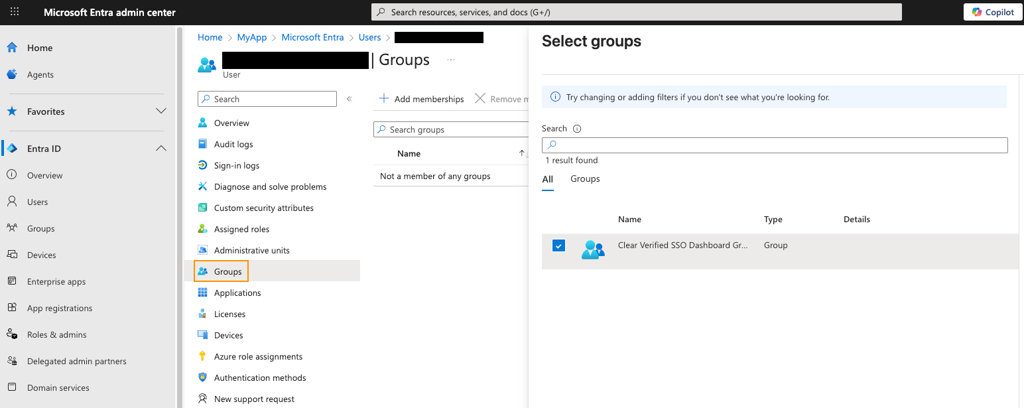
-
-
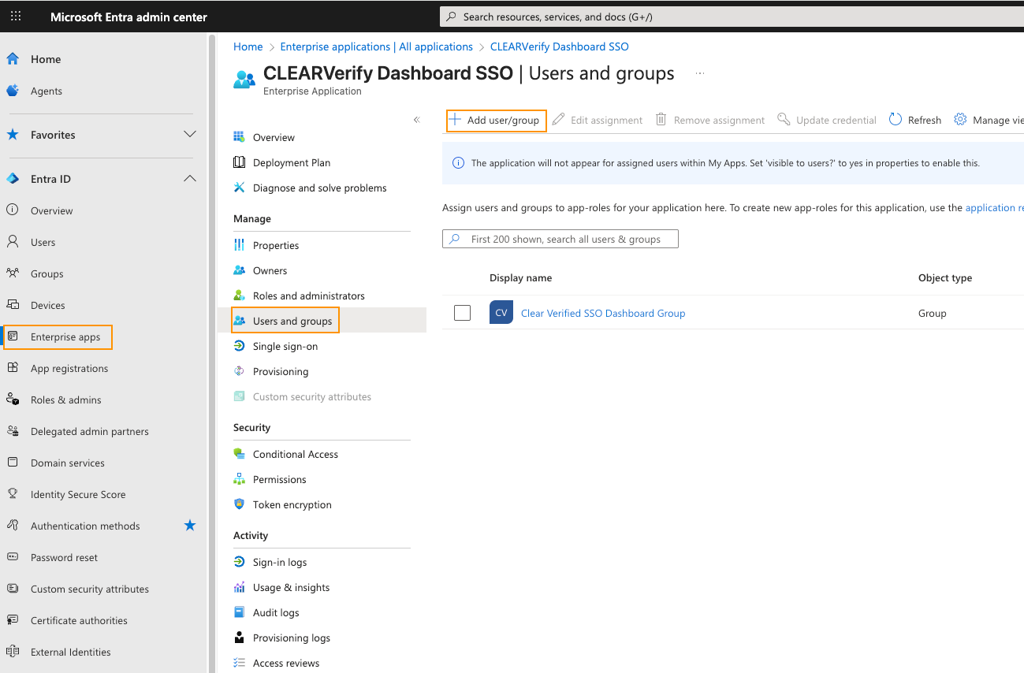
Assign the group to the SSO Application
- Click on Enterprise apps
- Click on the app you wish to assign a group to
- Click on Users and groups
- Click on Add user/group
- Select the group and save
Step 8: Test the Integration
- Launch your Application
Navigate to your application and initiate the login process. It should redirect you to Microsoft's login page for authentication.- URL to CLEAR Dashboard: https://verified.clearme.com/dashboard
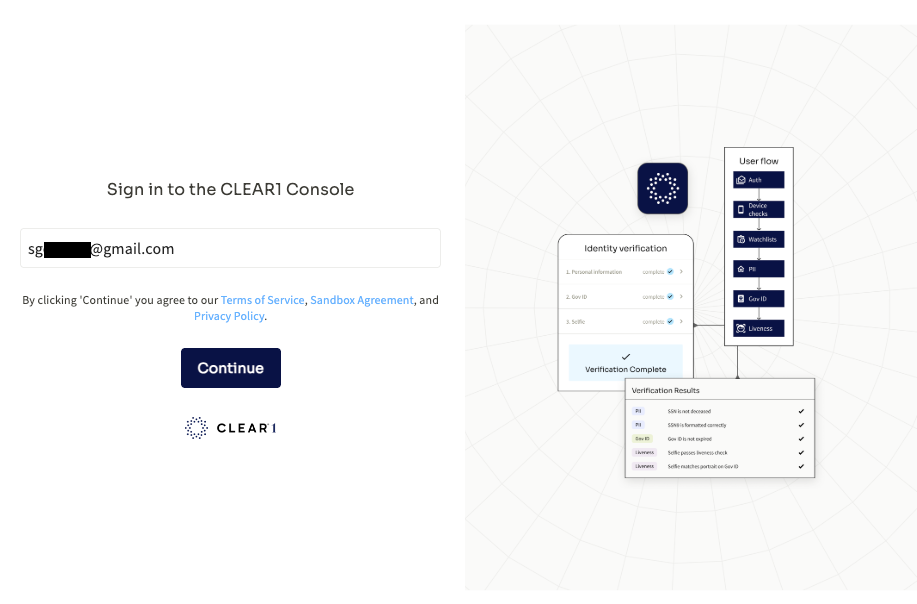
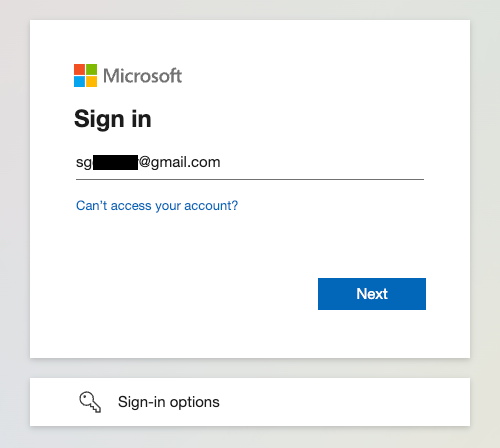
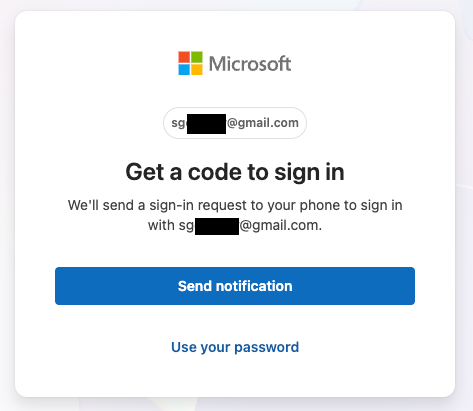
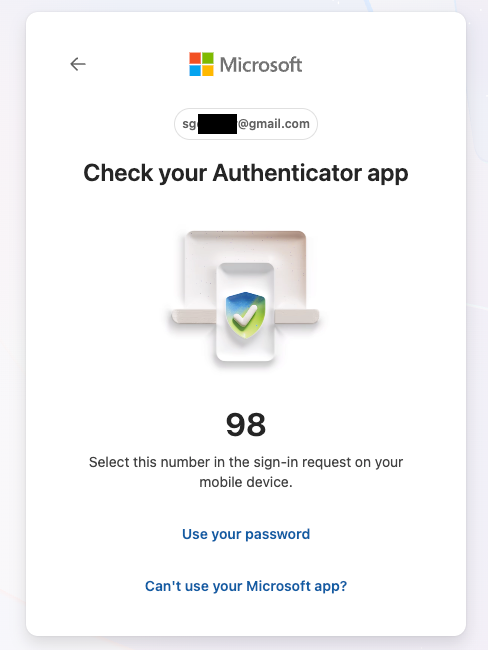
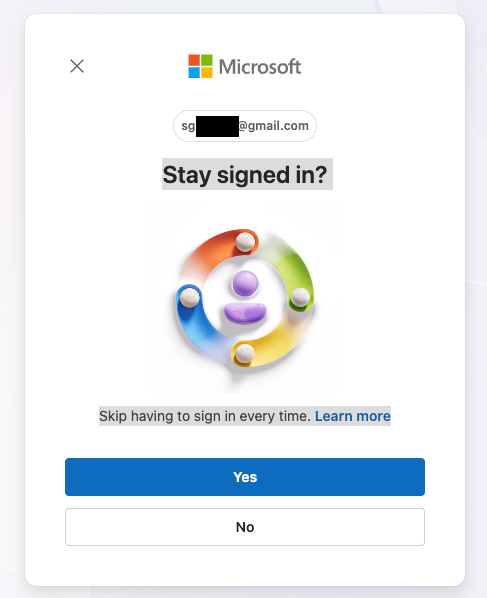
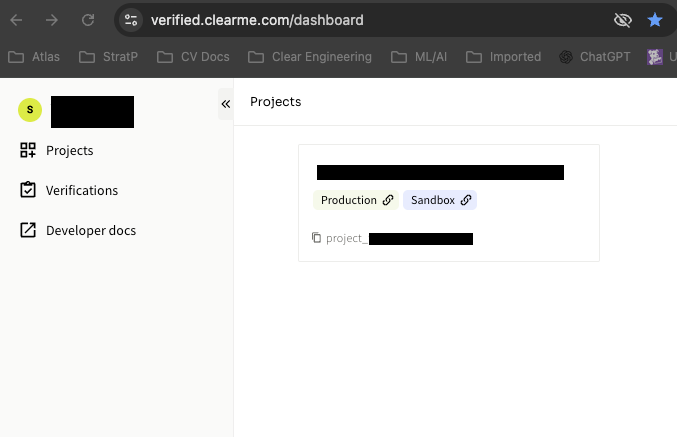
As long as the authentication token has not expired, once the user has logged in they will not be prompted for their login credentials again.
Troubleshooting
- Ensure that the Redirect URI in the Azure portal exactly matches the one used in your application.
- Verify the correct permissions have been granted.
- Make sure your app handles the token exchange flow properly, including validating tokens on the backend.
- Verify that hosts are not being blocked
Final Thoughts
Setting up OIDC SSO with Microsoft Entra (Azure AD) allows you to leverage secure authentication for your applications. Make sure to test thoroughly and follow security best practices for handling tokens.
Updated about 1 month ago