
Ping SCIM Setup
SCIM allows Ping to automatically create and manage users and roles in CLEAR.
Create a SCIM API Key in CLEAR
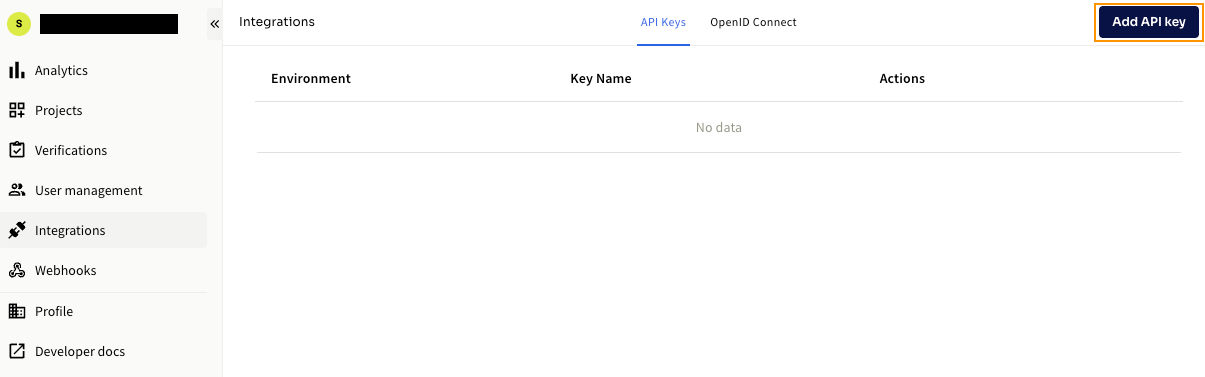
- In the CLEAR dashboard, go to Integrations
- Click Add API Key
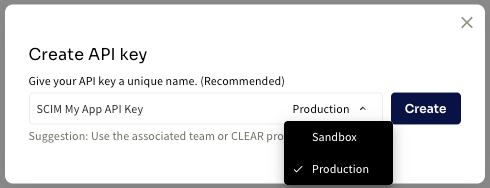
- Name the key
- Choose Sandbox or Production
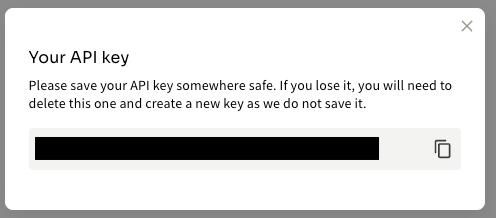
- Copy the API key
This is the only time the API key can be copied.
Create SCIM App in Ping
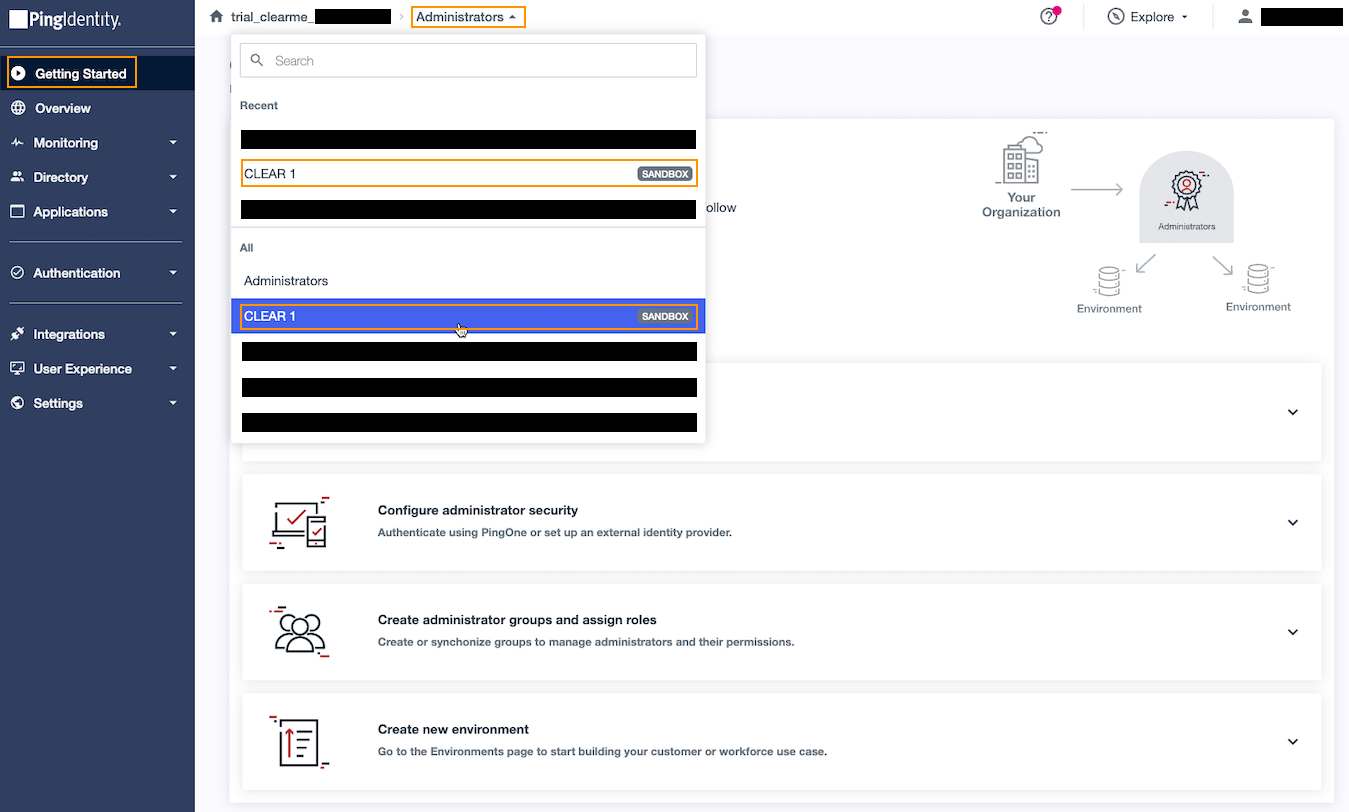
- Log in to Ping Admin
- Select your Environment
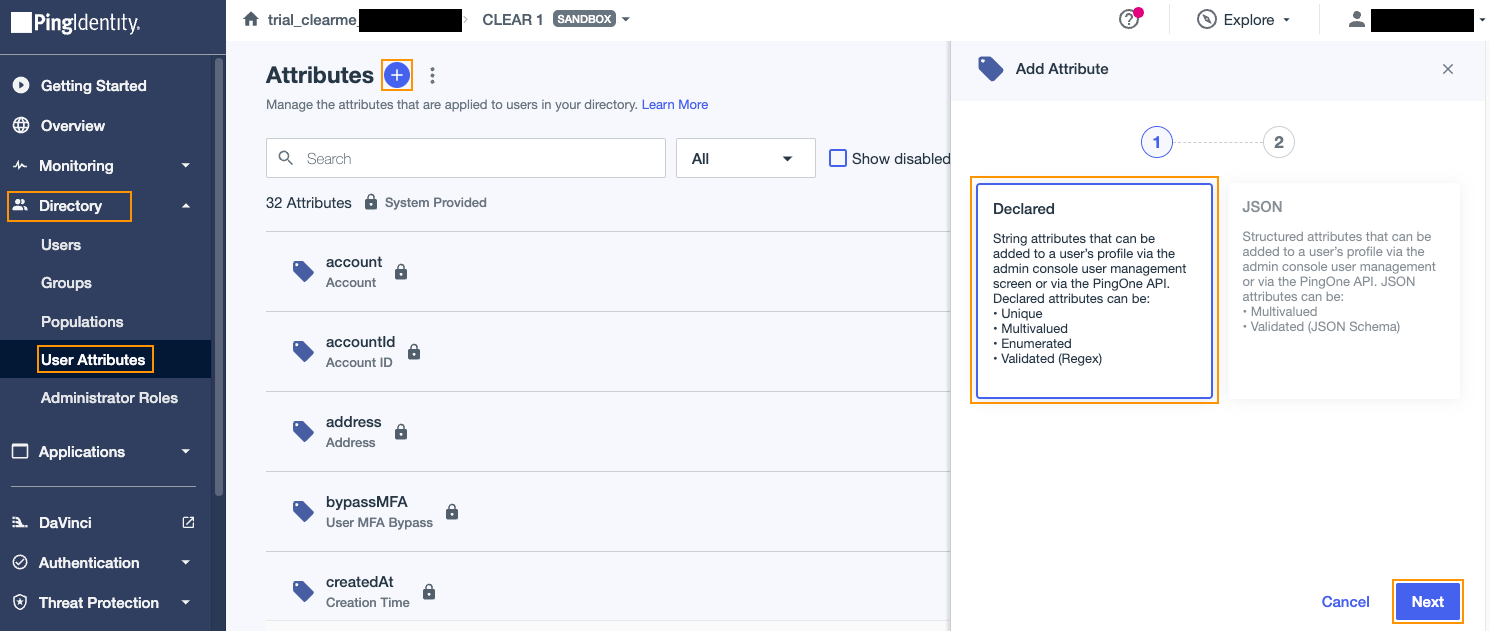
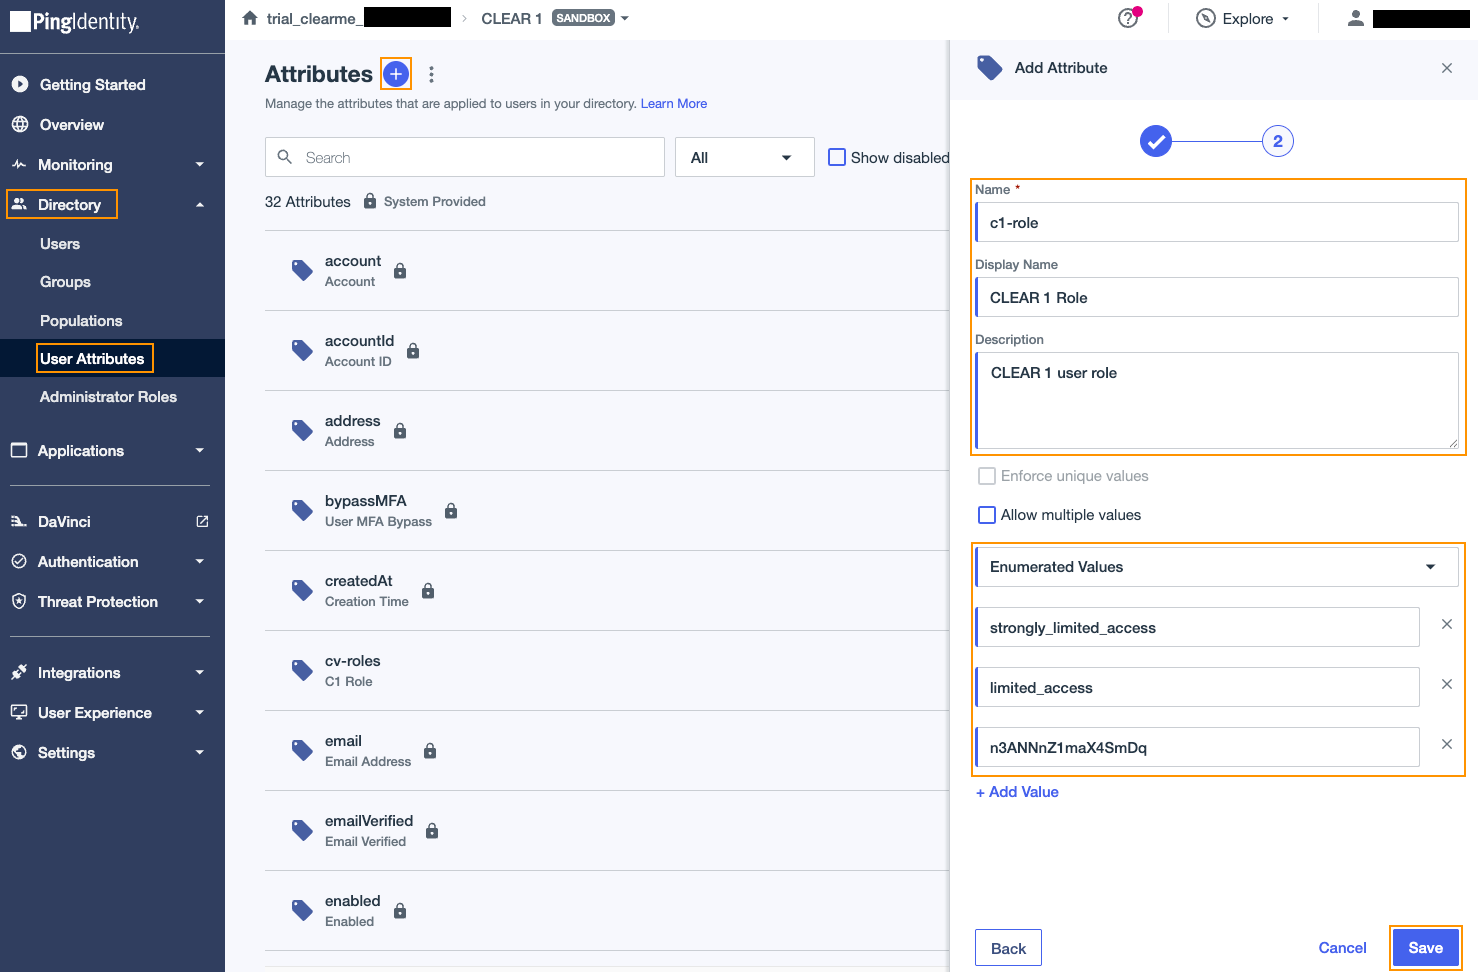
- Create a custom attribute:
- Name:
cv_roles - Type: Enumerated Values or No Validation
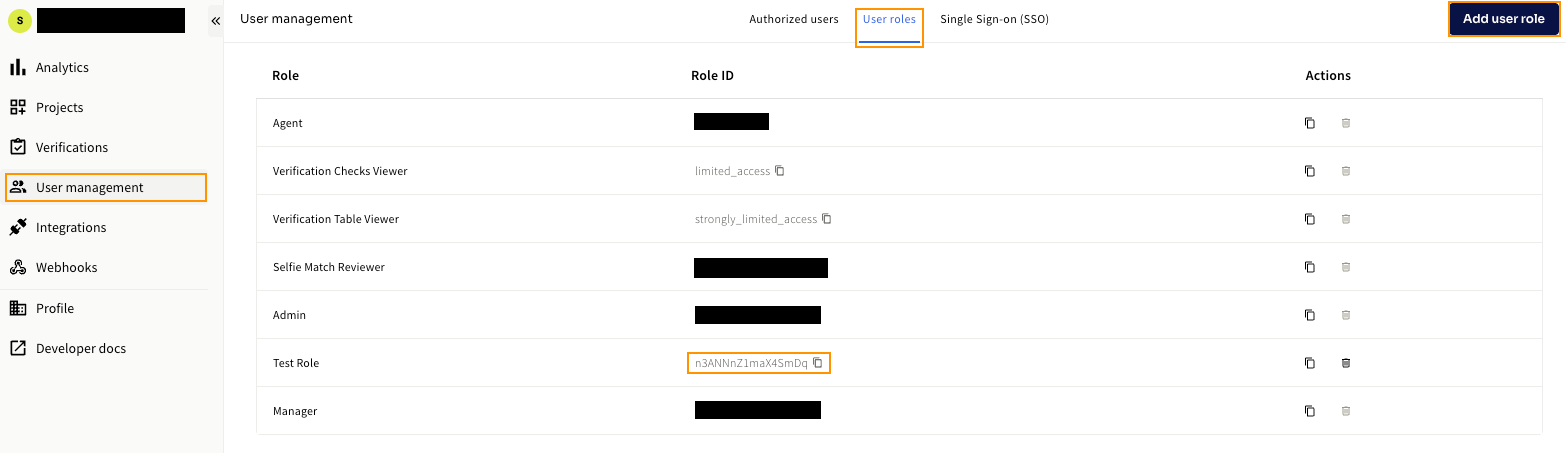
- Use CLEAR Role IDs as values
- Name:
Configure SCIM Provisioning
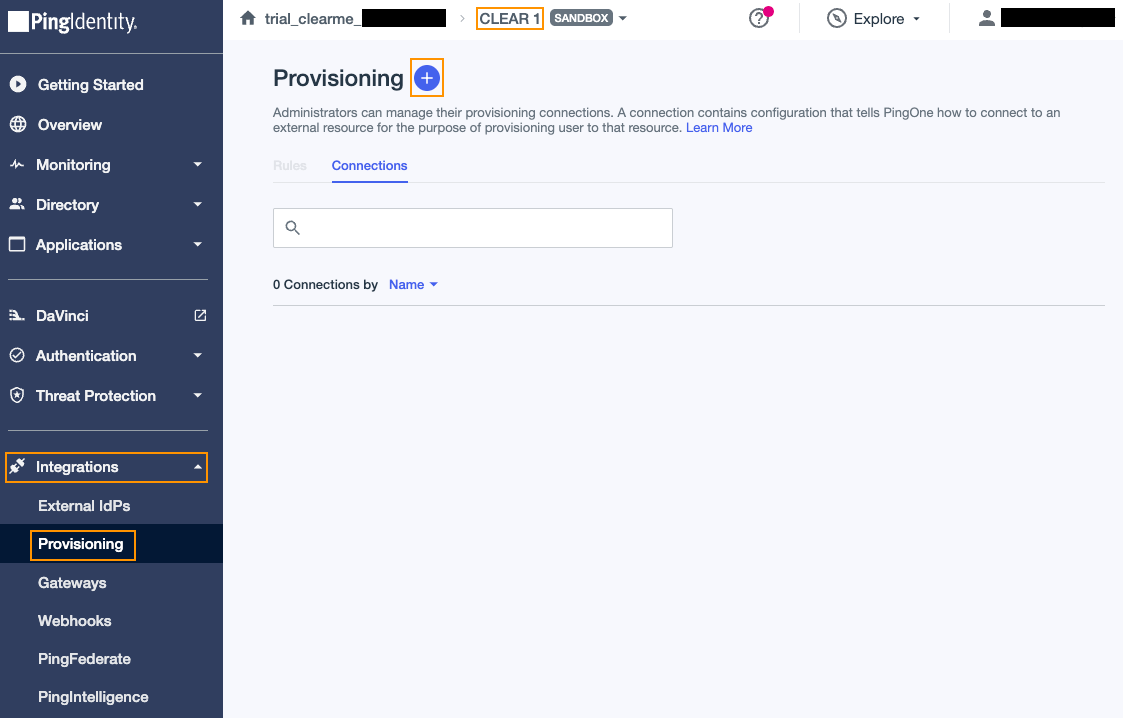
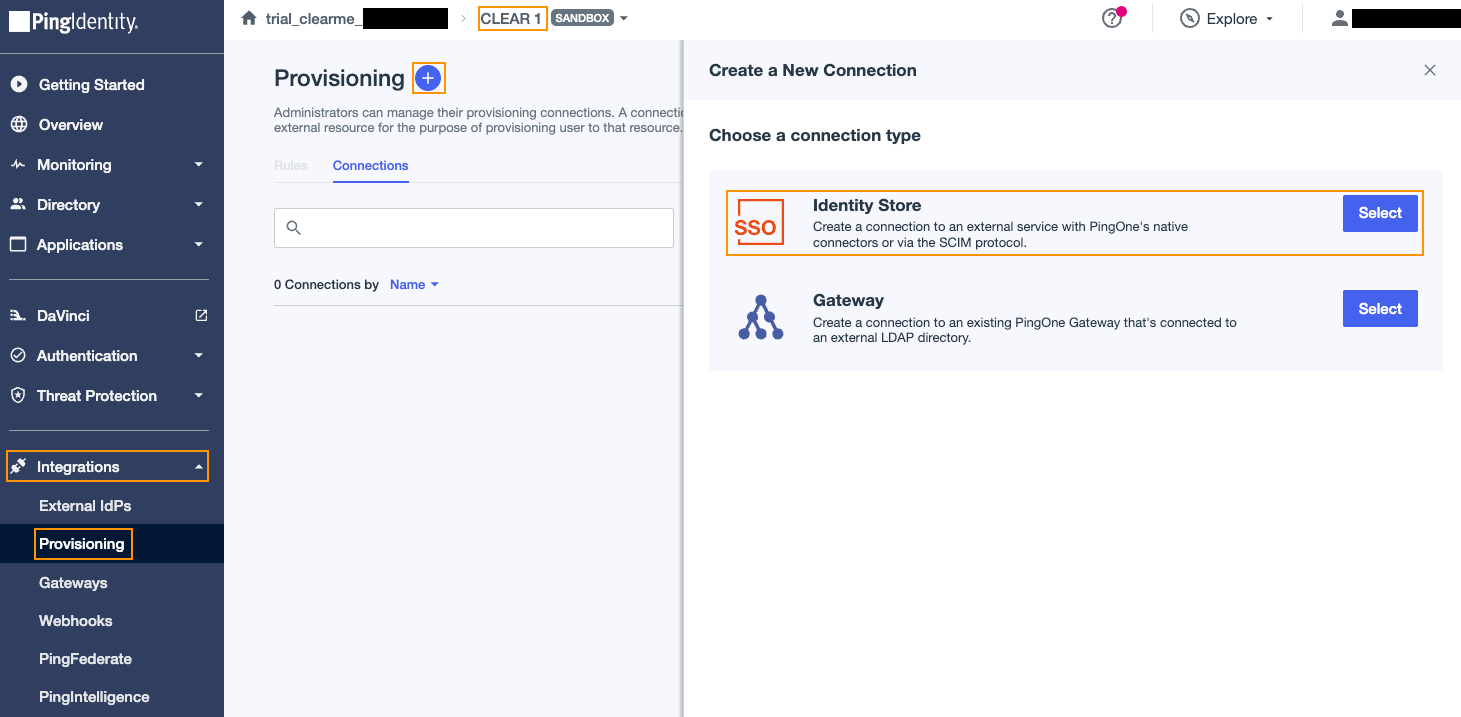
- Go to Integrations → Provisioning
- Create a new connection
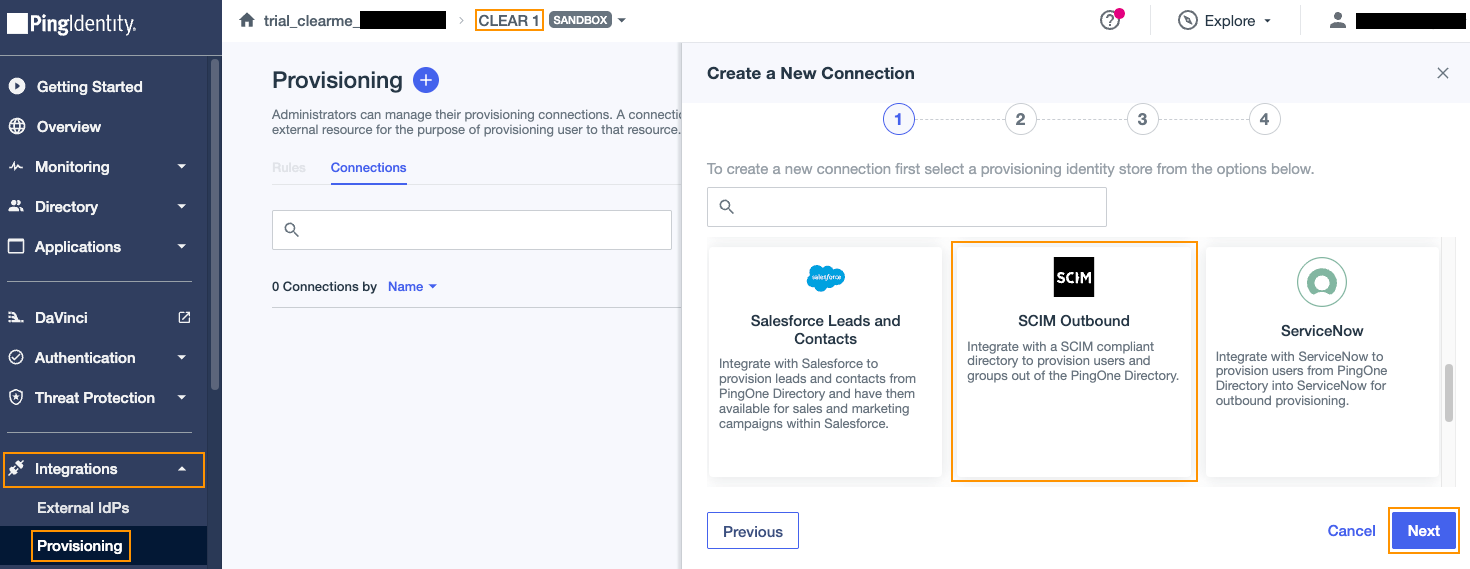
- Choose Identity Store then SCIM Outbound
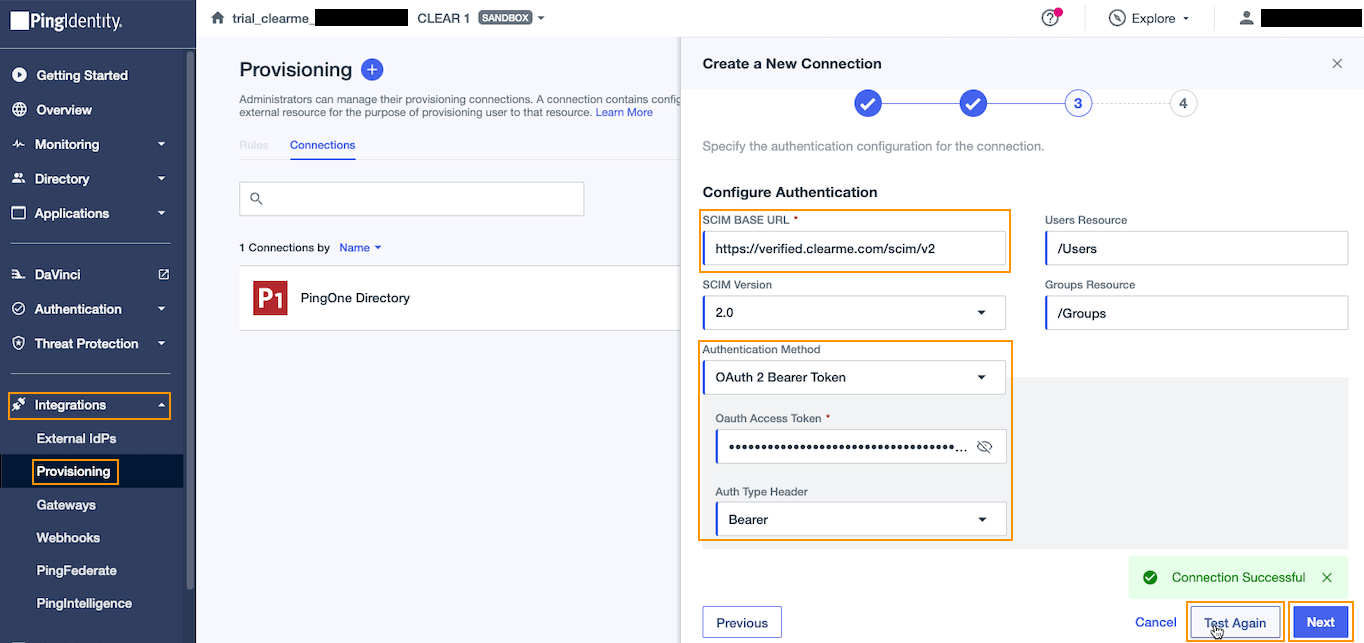
- Enter:
- SCIM Base URL: https://verified.clearme.com/scim/v2
- Auth Method: OAuth2 Bearer Token
- Token: CLEAR SCIM API Key
- Test the connection
- Save if successful
Create Provisioning Rules
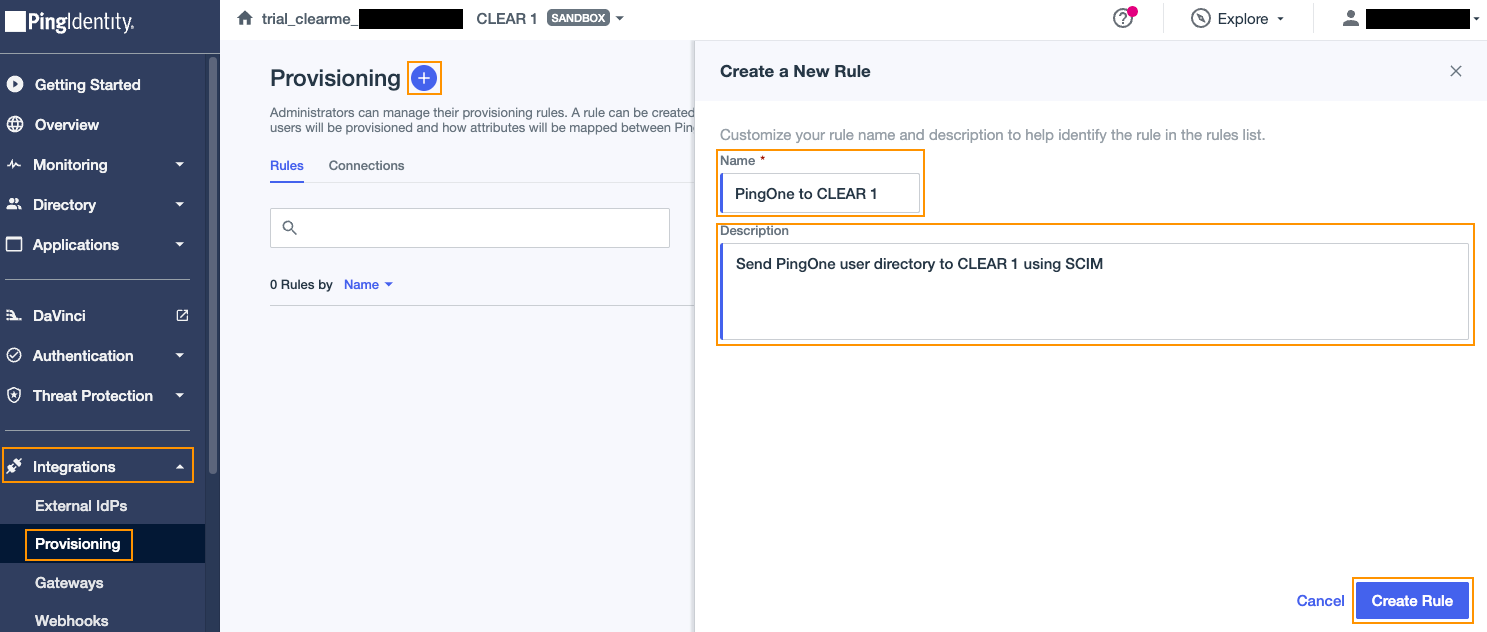
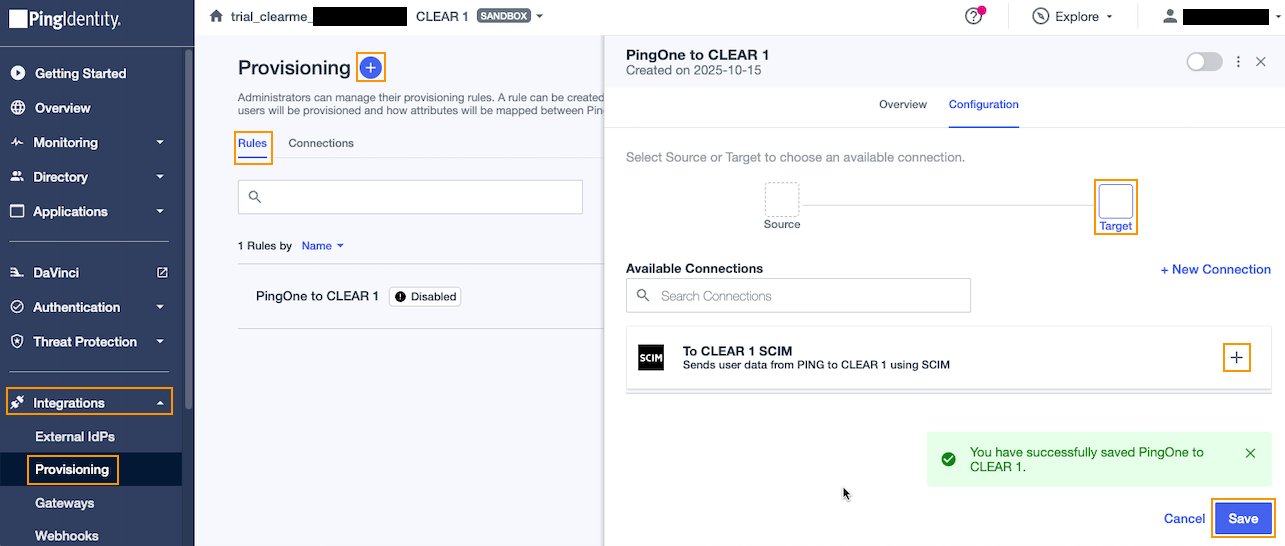
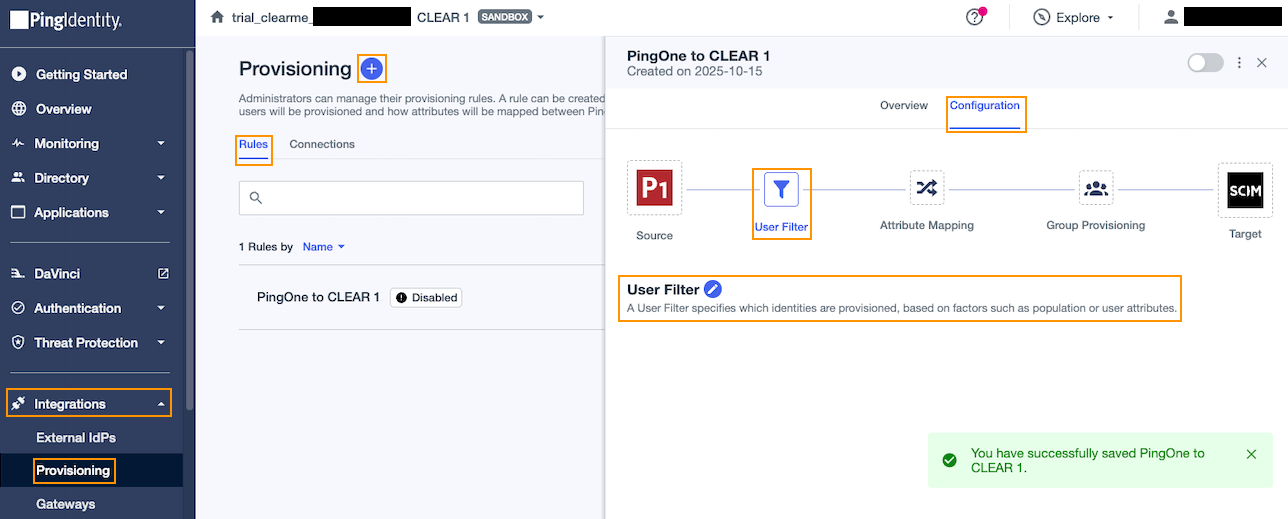
- Create a new rule
- Set source and target
- Configure user filters
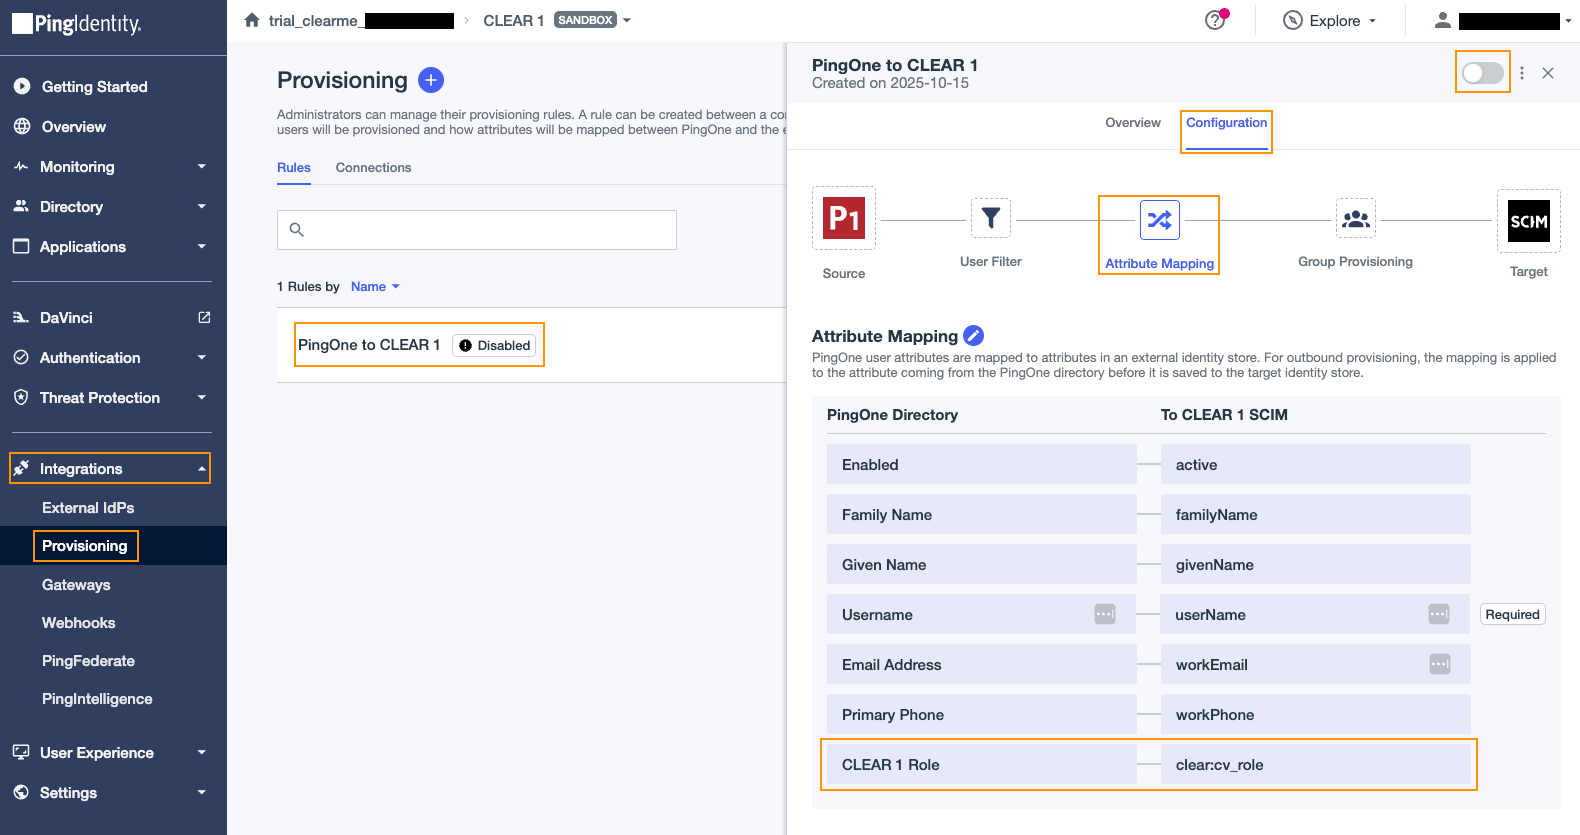
- Map attributes:
- Ping attribute: CLEAR 1 Role
- CLEAR attribute:
clear:cv_role
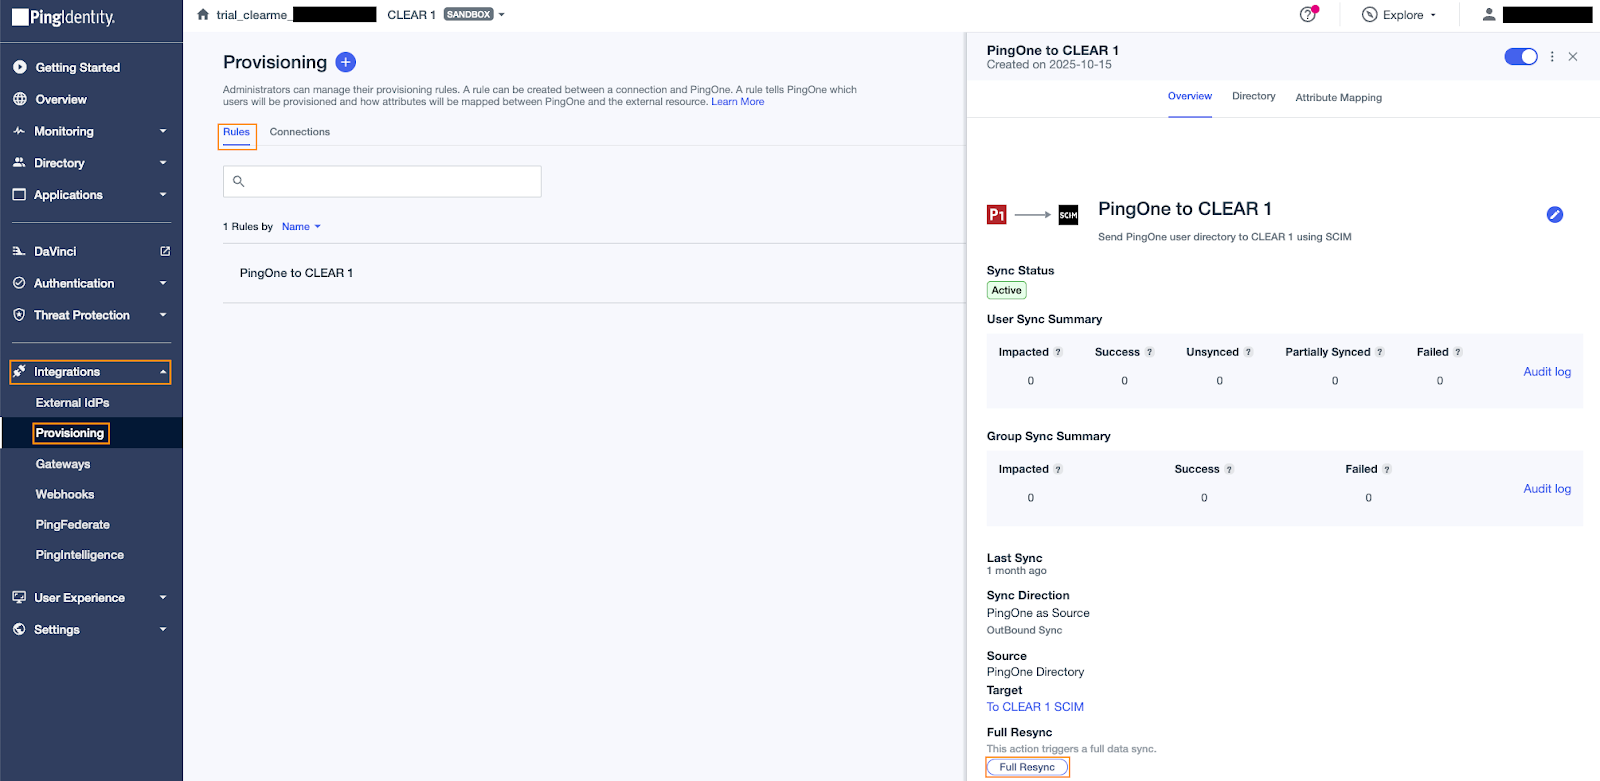
- Enable the rule
- Sync users
Troubleshooting
If SCIM provisioning is not working as expected, check the following:
-
Users not provisioning:
Ensure the provisioning rule is enabled, the user matches the rule filter, and the user is assigned to the correct Ping group. -
SCIM connection fails:
Verify the SCIM API key is valid, the Base URL is correct, and authentication is set to OAuth2 Bearer Token with headerBearer. -
Roles missing in CLEAR:
Confirm attribute mapping is set from CLEAR 1 Role → clear:cv_role, and the user has a valid role value assigned. -
No changes syncing:
Check that the rule targets the correct source (Ping directory) and target (CLEAR SCIM connection), and that filters are not overly restrictive. -
Updates or deprovisioning not applied:
Review enabled provisioning actions and confirm the expected behavior is supported by CLEAR.
If issues persist, contact CLEAR Solutions Engineering with your Ping environment ID and example user.
Updated about 1 month ago