
Microsoft Entra SCIM Setup
Learn how to set up SCIM in Microsoft Entra to automate user provisioning, keep accounts in sync, and simplify access management.
Create an API Key for SCIM in the CLEAR Dashboard
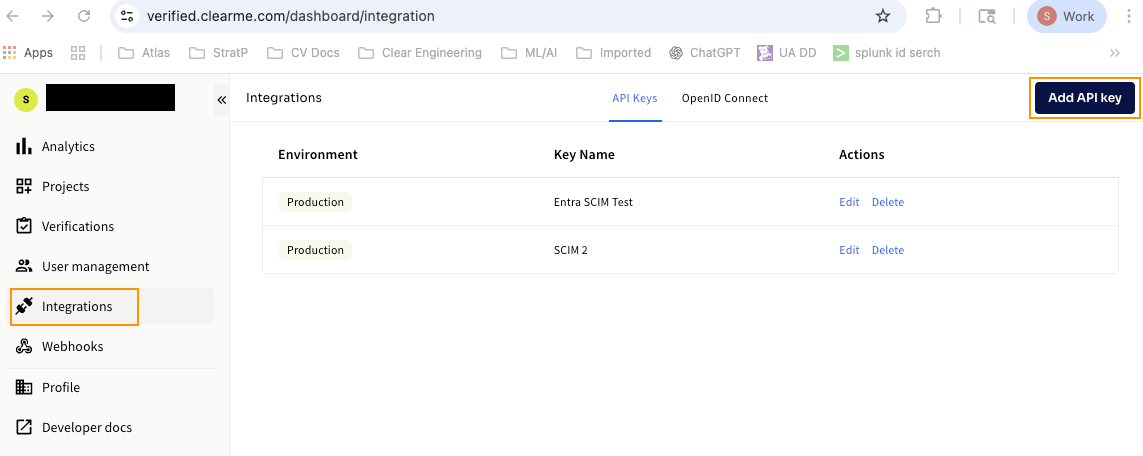
Log into the CLEAR Dashboard and click on Integrations, then Add API Key.
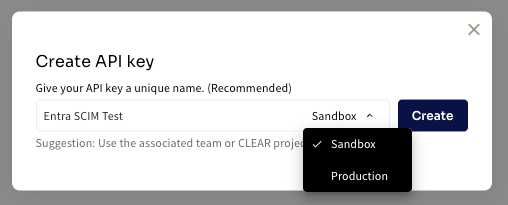
Name your API Key and select if it is for the Sandbox Environment or the Production Environment.
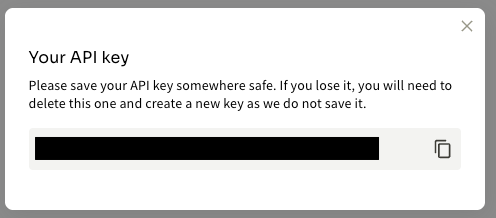
Note: This will be the only time you can copy your API key. Please make a copy for later use.
Register the Application in Microsoft Entra
Sign in to Microsoft Entra
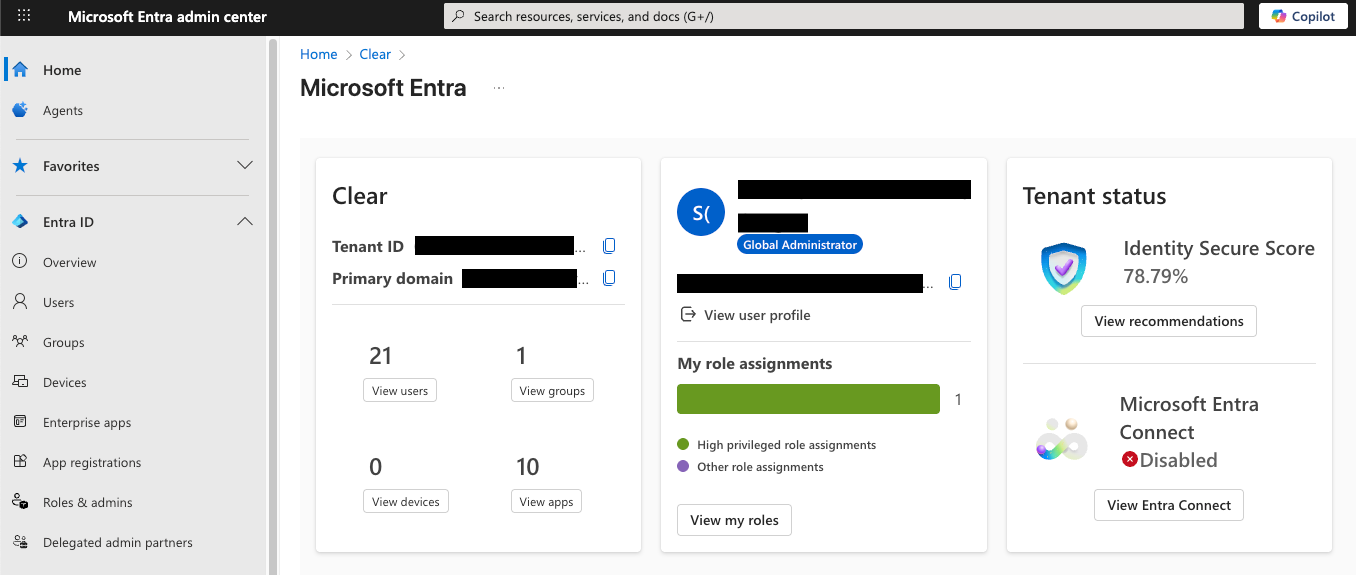
Go to https://entra.microsoft.com/#home and log in with your Entra administrator account.
Navigate to Microsoft Entra ID
In the left-hand menu, select Microsoft Entra ID.
Create a New Enterprise Application
From the Microsoft Entra admin center Home screen, go to Enterprise apps in the left side menu bar.
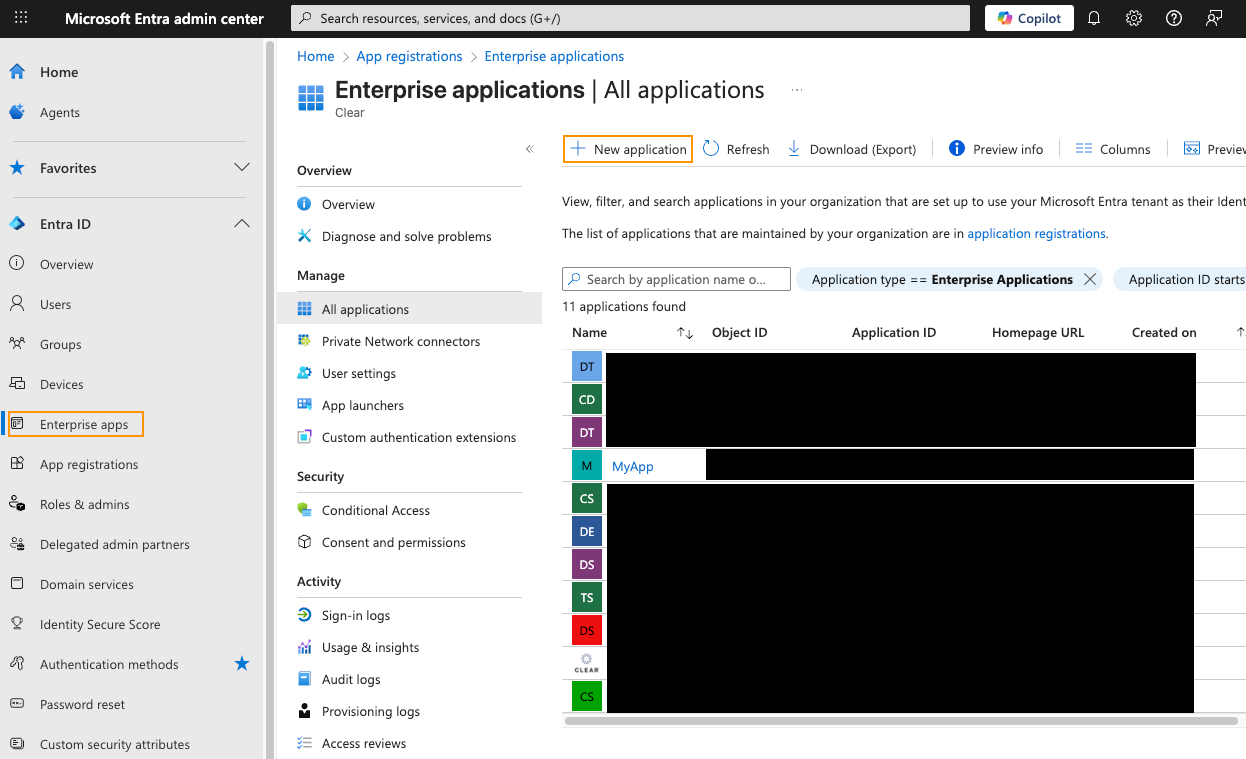
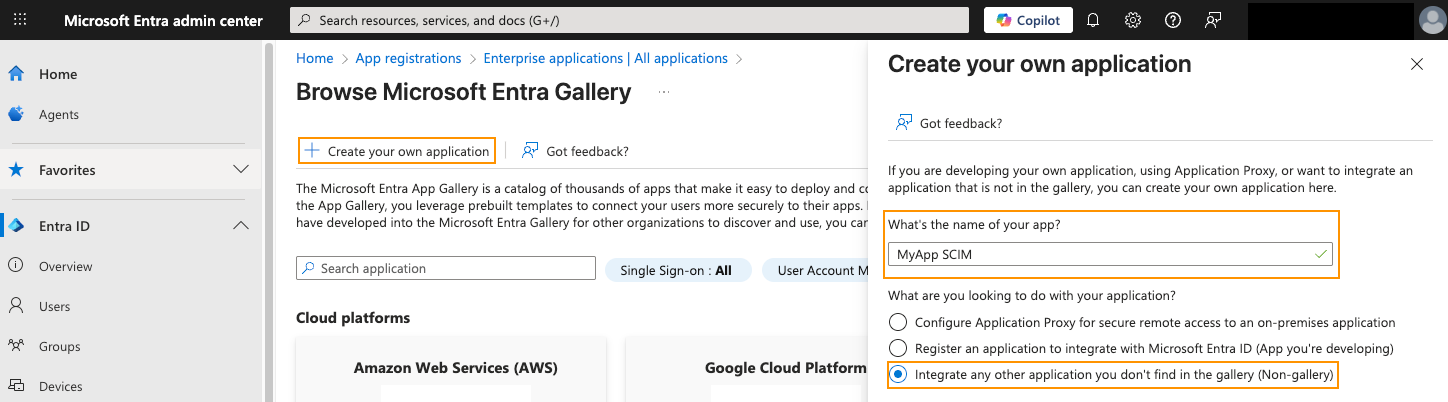
Click New application and then click Create your own application.
Provide a name for your application (e.g., "MyApp SCIM") and select the Integrate any other application you don’t find in gallery (Non-gallery) radio button.
Click Create.
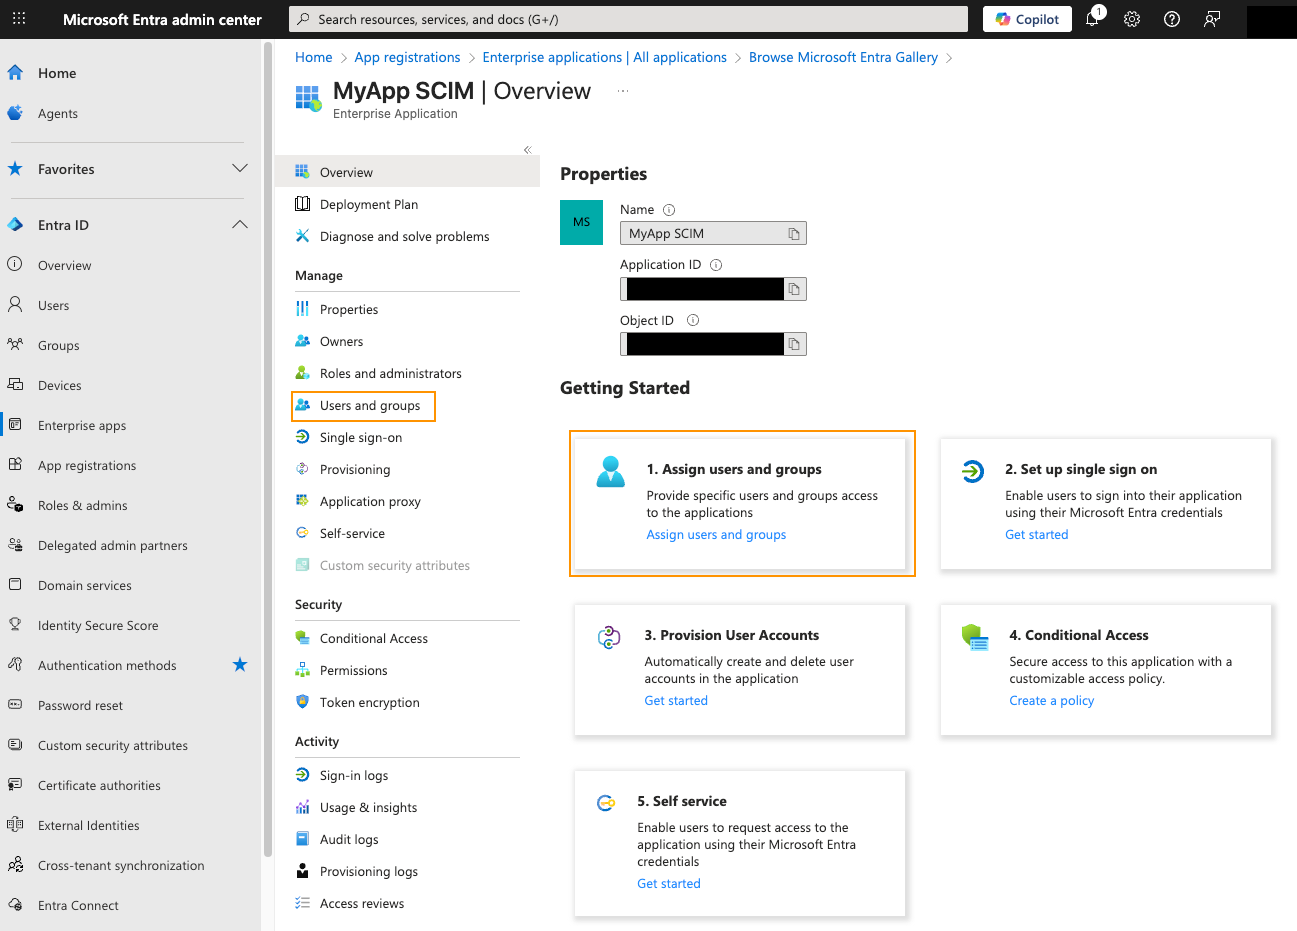
Assign Users and Groups
Assign groups or individual users to the newly created application:
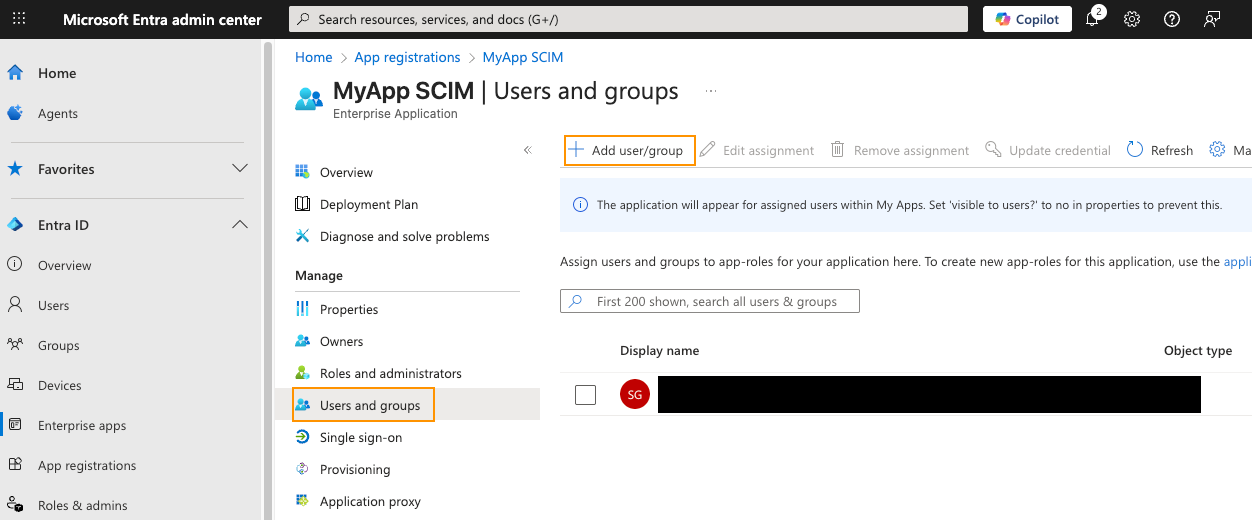
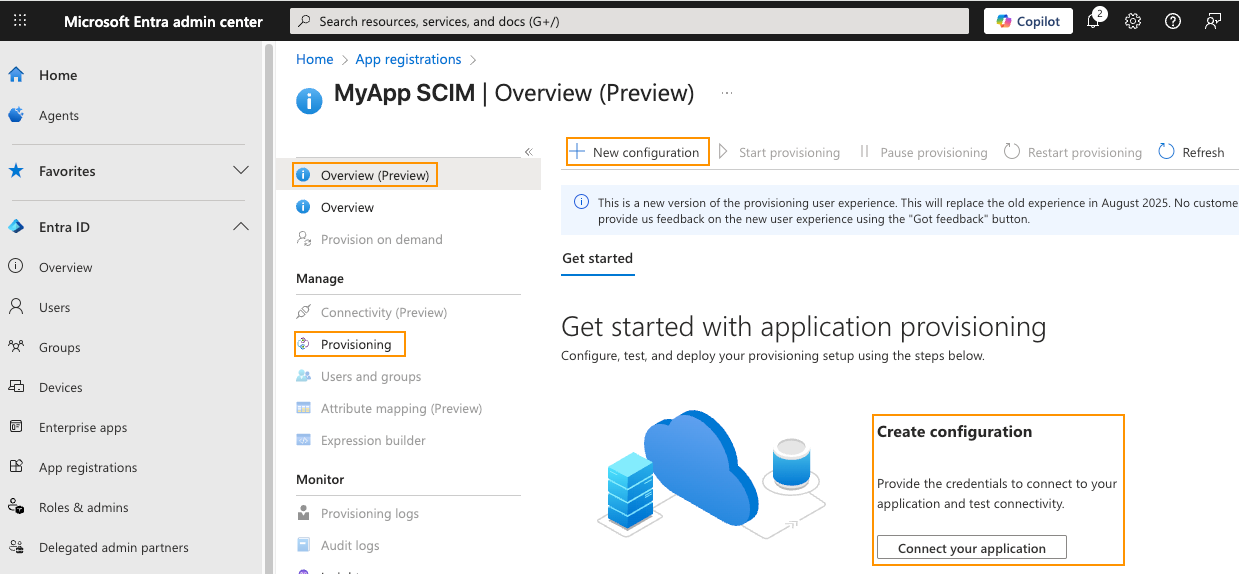
Create a New Configuration to connect your application
This is under the Provisioning side bar menu option.
-
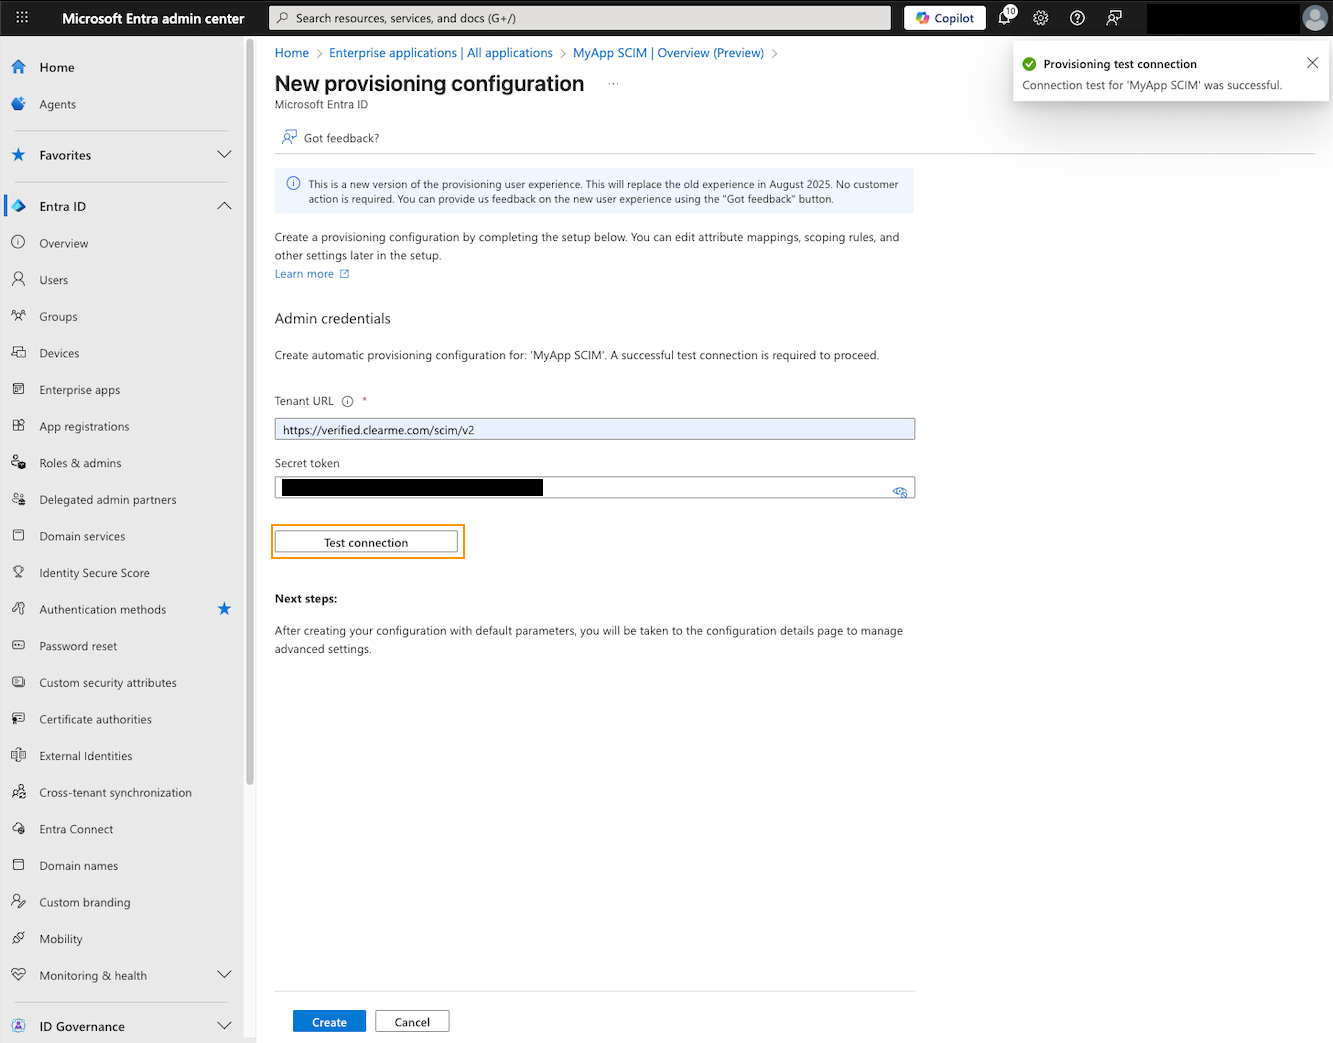
Enter the Tenant URL (which is CLEAR’s URL for SCIM): https://verified.clearme.com/scim/v2
-
Enter the Secret Token created above in step 1.
-
Click the Test Connection button
-
The provisioning configuration must pass the test connection step in order for the Create button to be enable.
-
Click the Create button, once it is enabled.
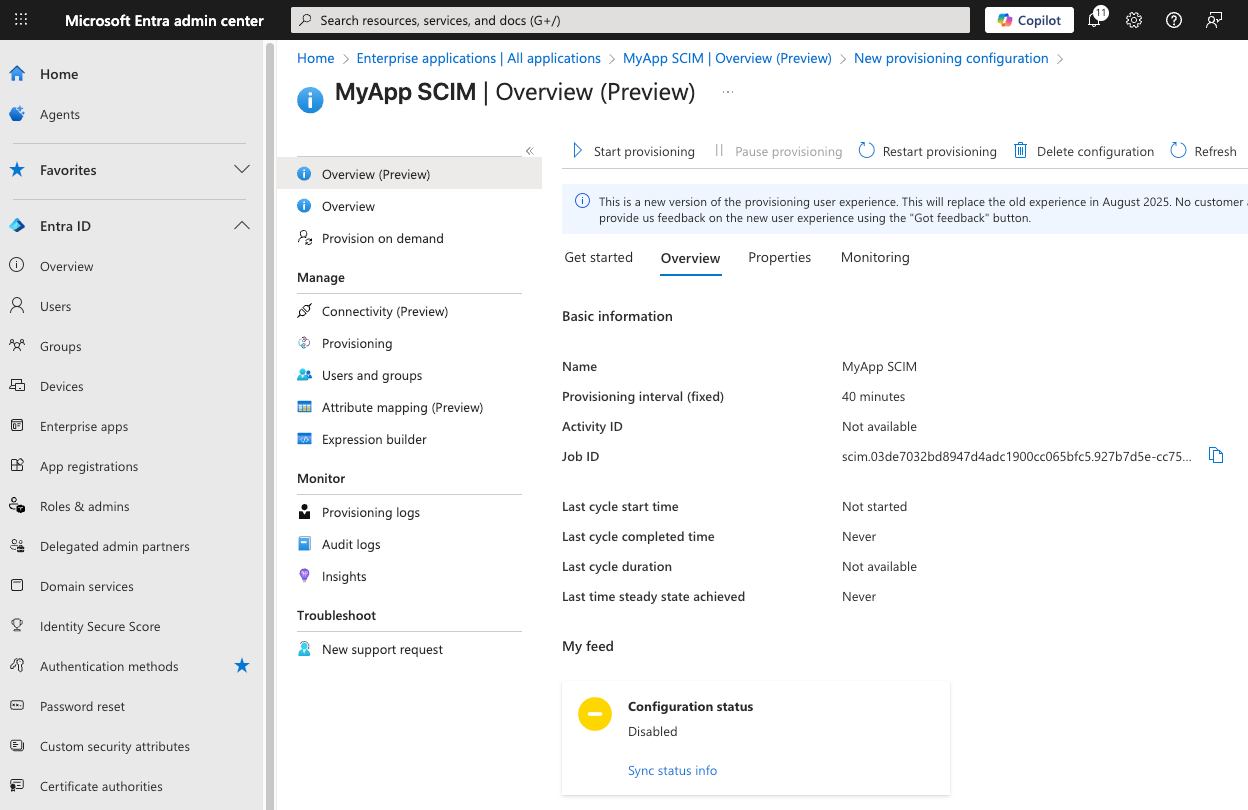
Test Provisioning using Provision on Demand
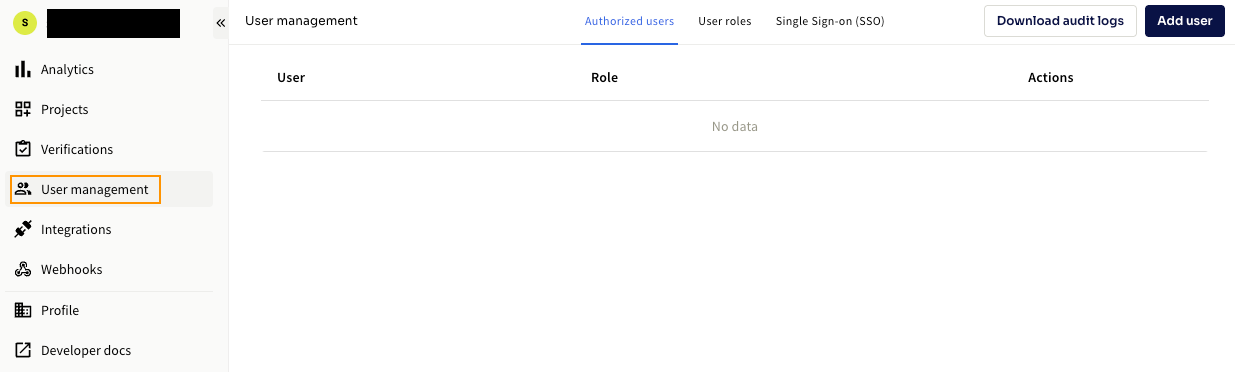
Before we test out provisioning using Provision on Demand, ensure that the user does not currently exist in your CLEAR Console:
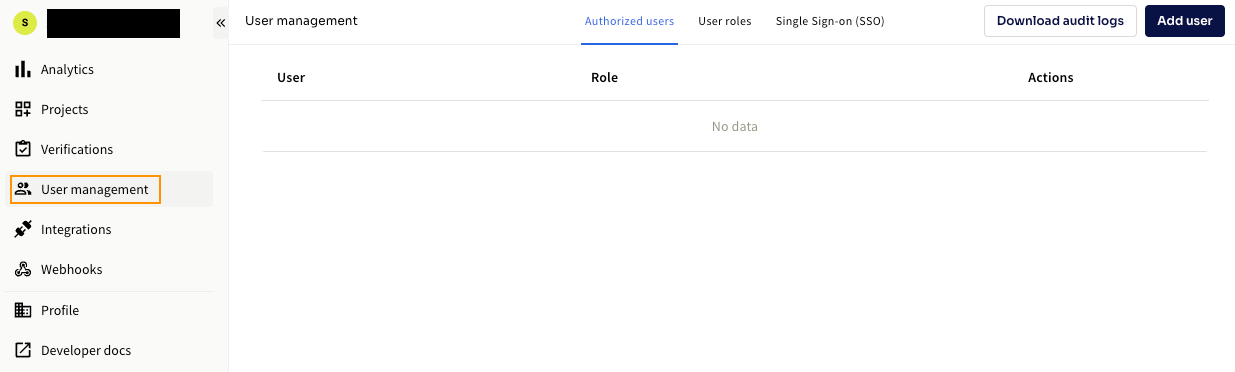
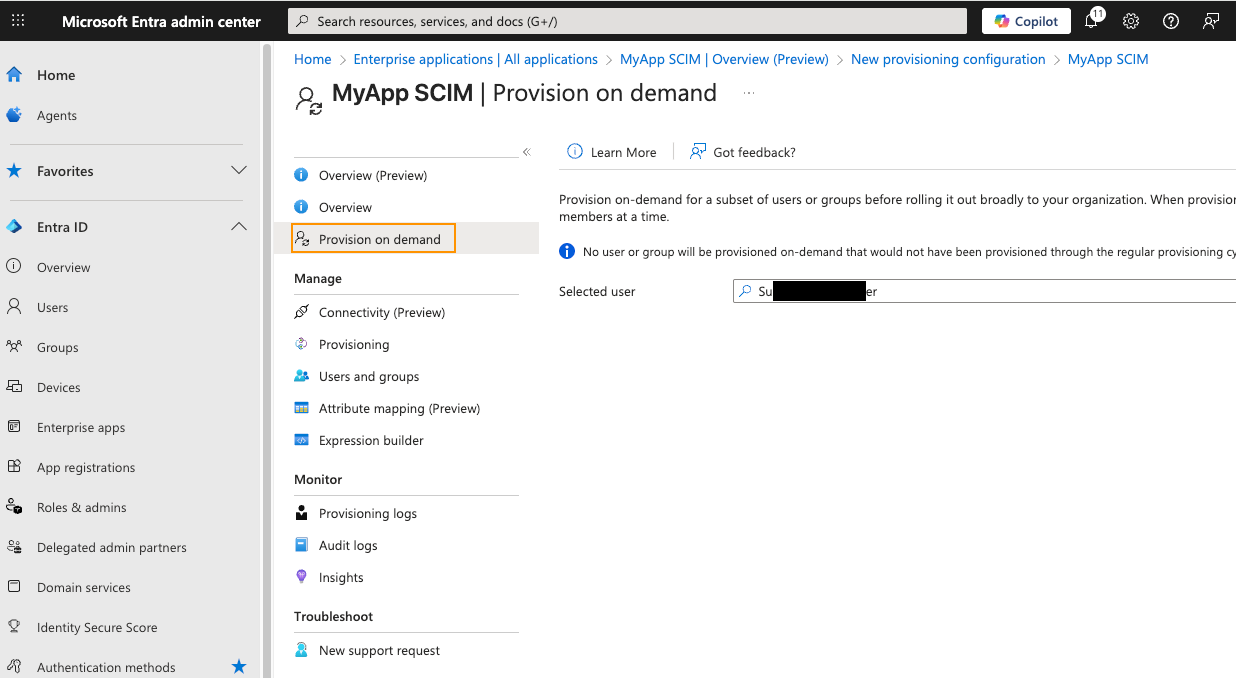
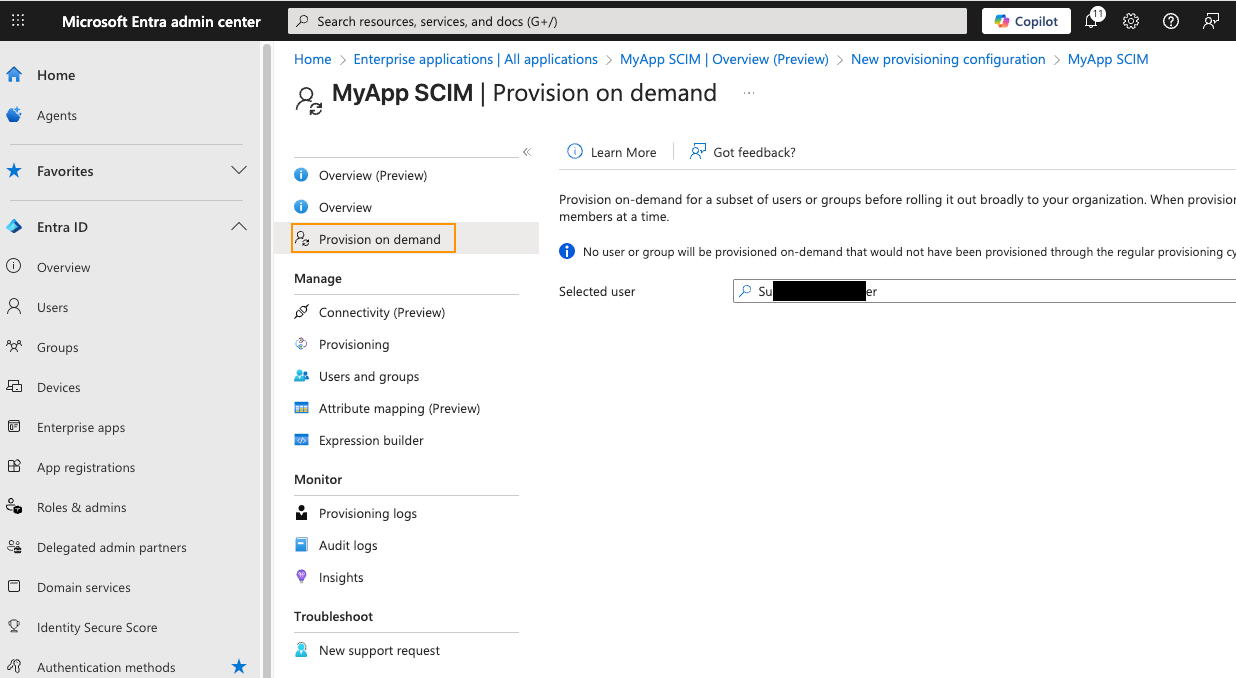
Then, navigate back to Entra and click Provision on demand in your appSelect the user for testing provisioning. Note: If no roles are set up then the user will be created with the Agent role.
Click Provision.
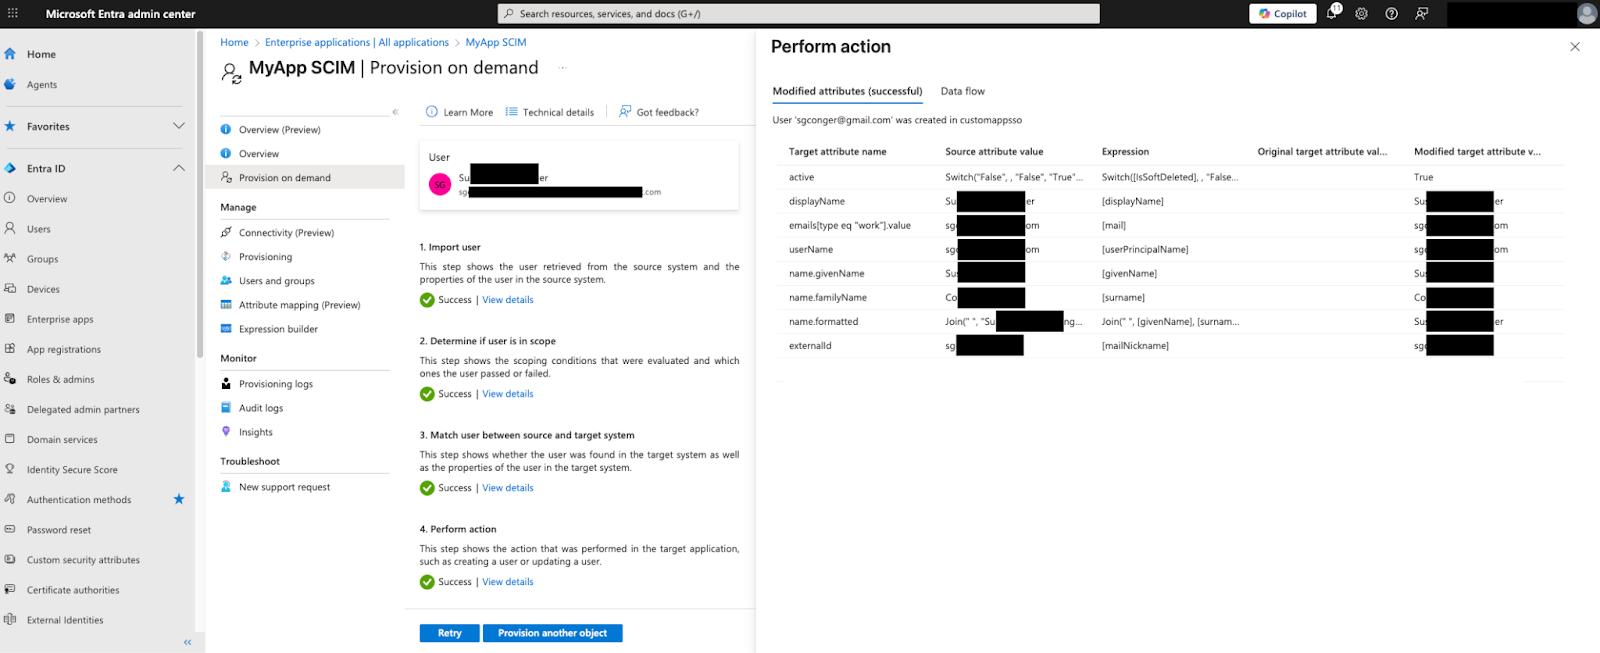
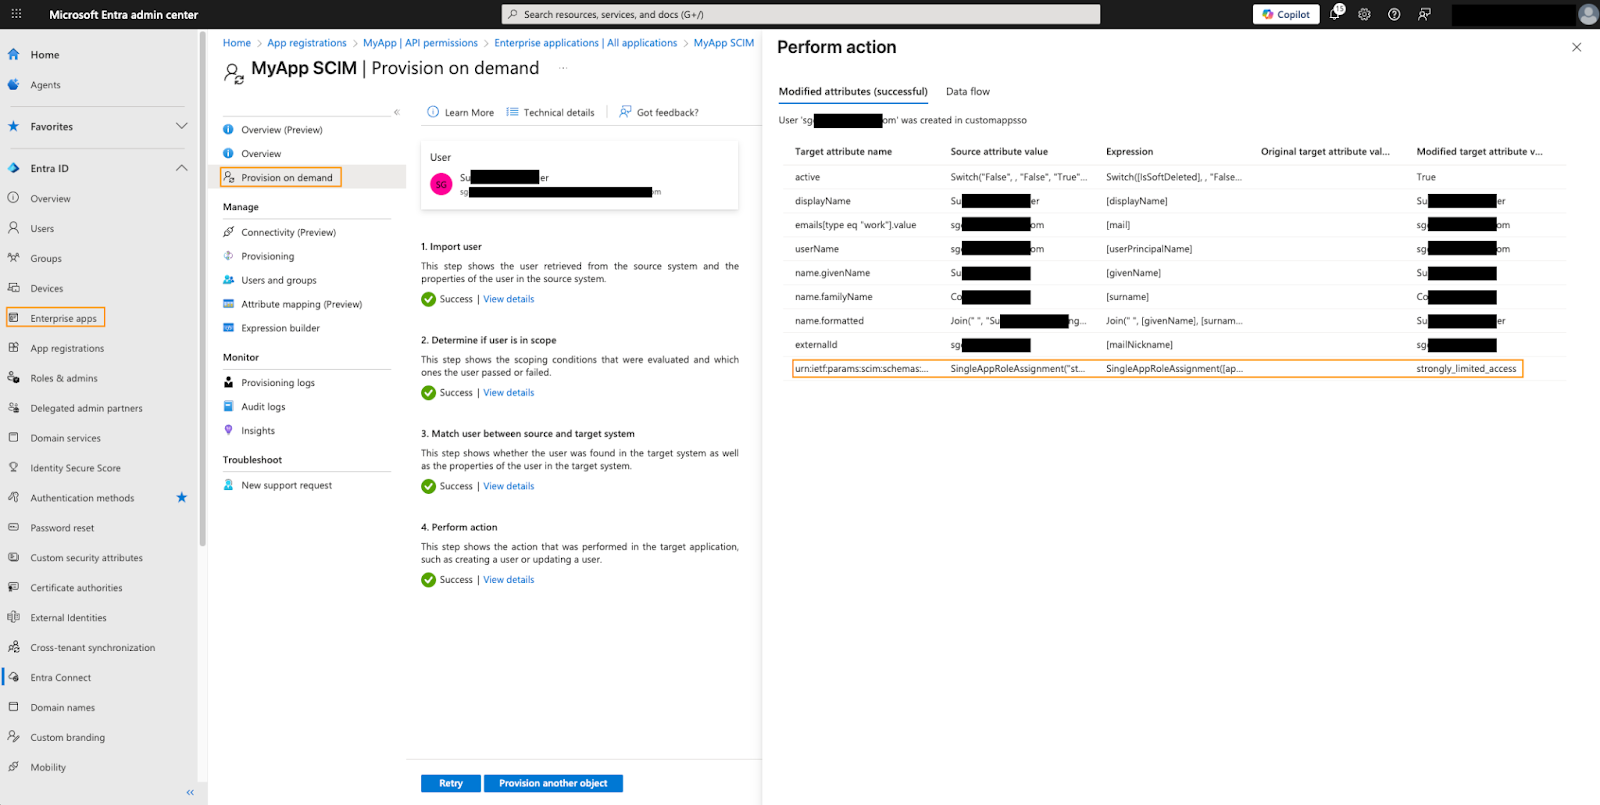
Messages from Provision on Demand:
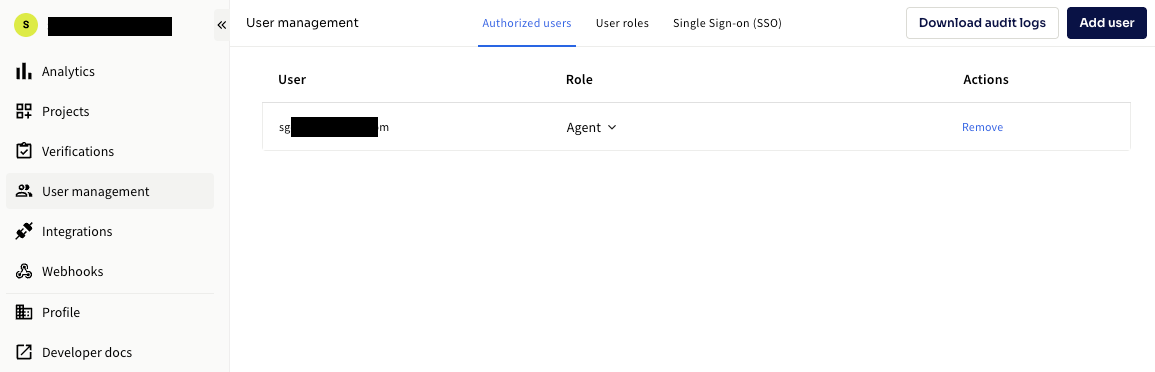
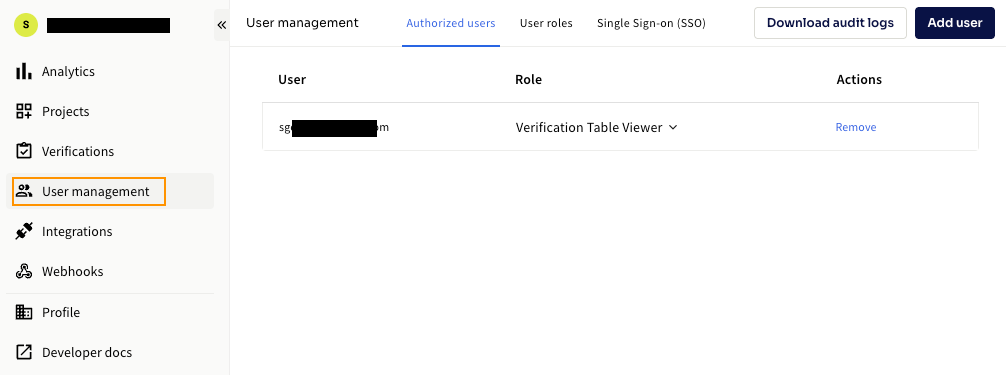
The user you just provisioned should now be in your CLEAR Console under Authorized users:
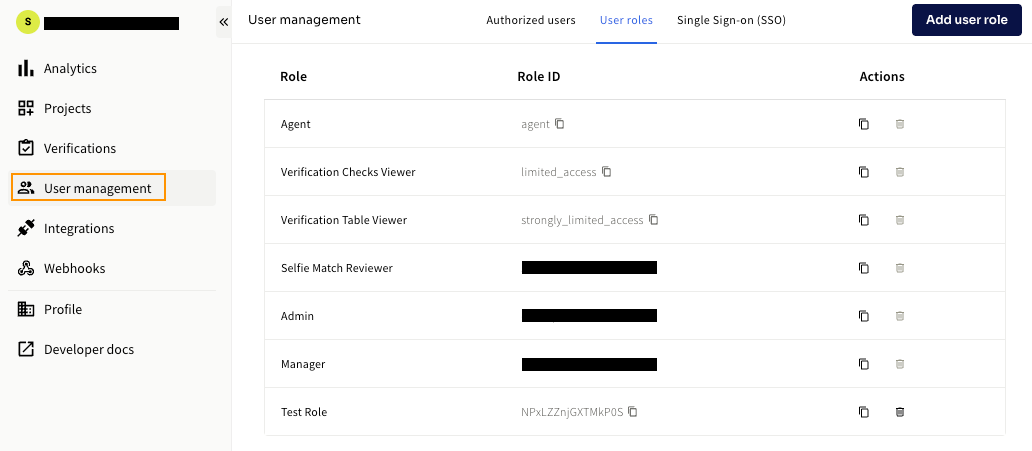
CLEAR Roles
CLEAR Roles can be specified when using SCIM to provision users.
The following CLEAR Roles are defined: Agent, Verification Checks Viewer, Verification Table Viewer, Selfie Match Reviewer, Admin, Manager
Note: Agent is the default role if no role is specified
Custom Roles can also be defined.
Specifying the Custom CLEAR Role in Entra
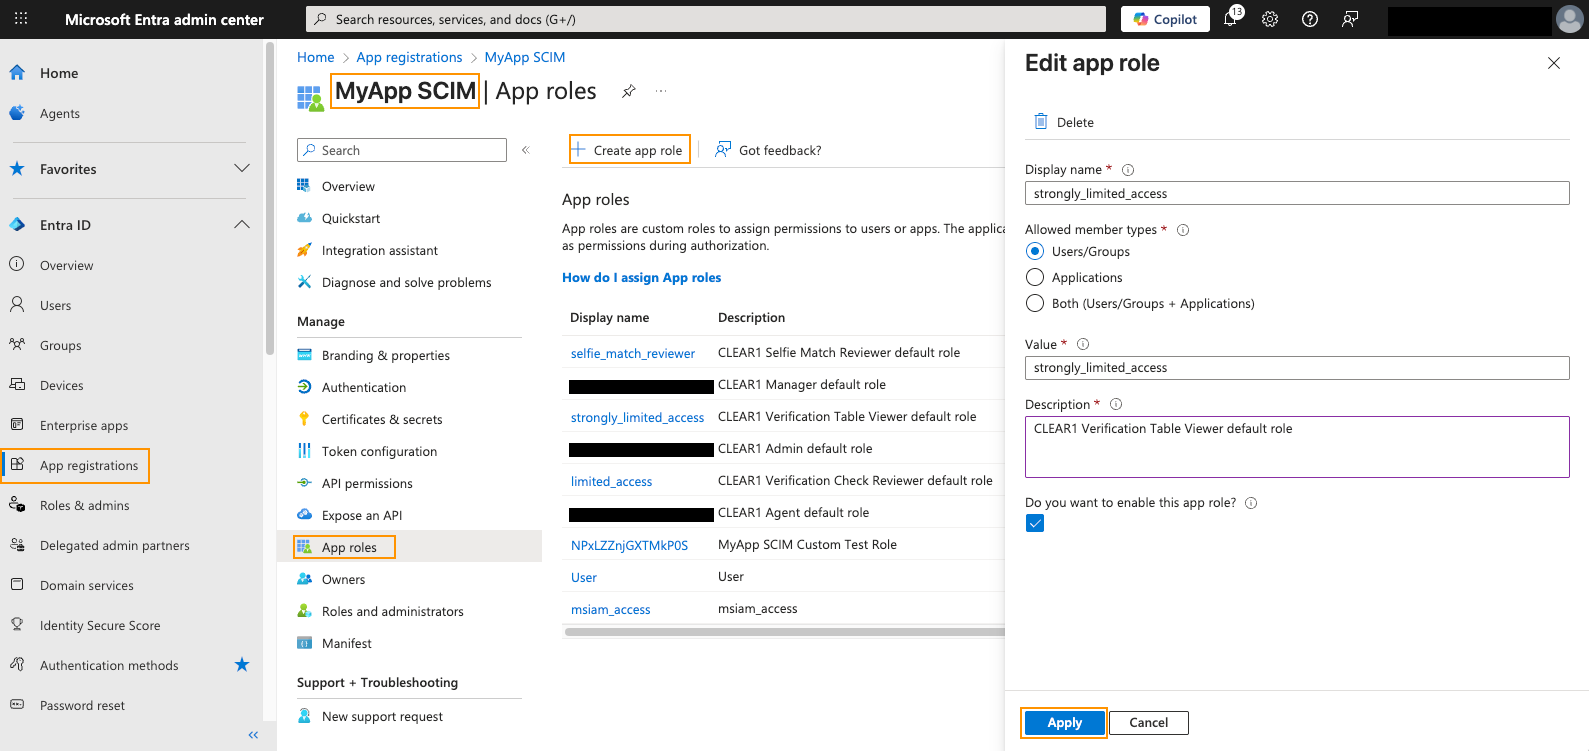
Define App Roles for CLEAR Default Roles and Custom Roles.
Enter the Display Name. NOTE: This has to be the Role ID from the User Roles in CLEAR.
Select the User/Groups radio button.
The Value should be the Role ID from above. For example, Verification Table Viewer role above would be strongly_limited_access. For Test Role, it would be NPxLZZnjGXTMkP0S
Please ensure that the Display Name Matches the Value.
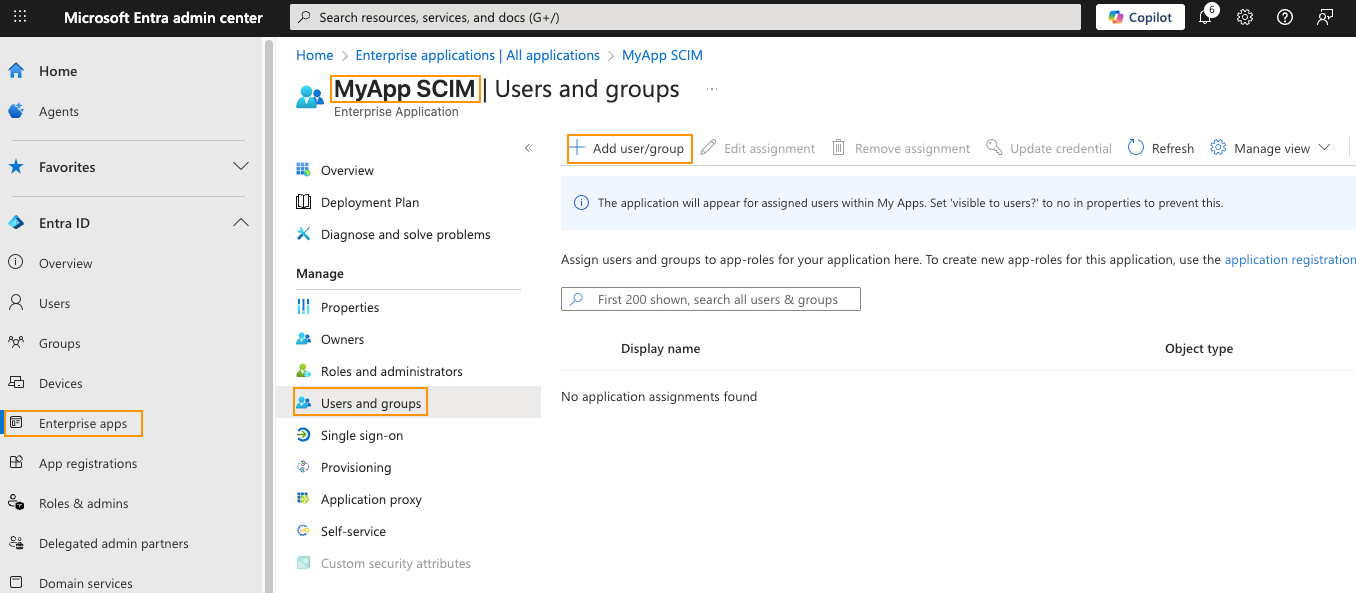
To Assign App roles to group or user, click the Add user/group button.
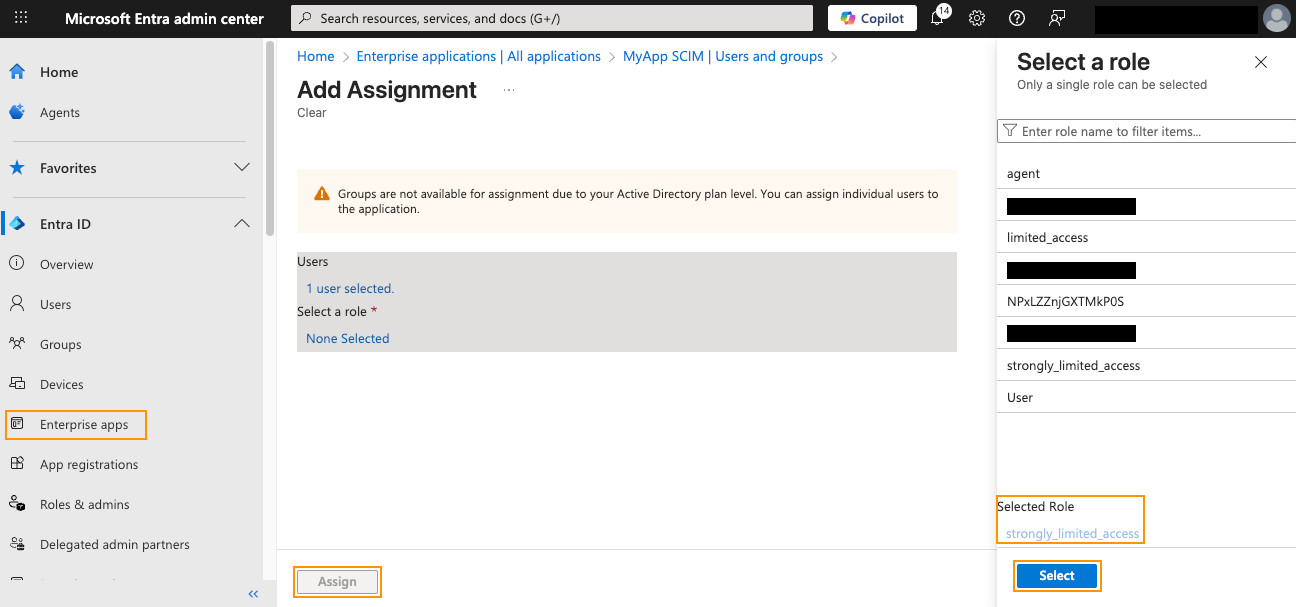
Then, select a user or group and add an assignment and then click Assign button.
Adding Customer Attributes
To add custom attributes, you will want to go to the Provisioning Attribute Mapping Screen by clicking Attribute mapping (Preview).
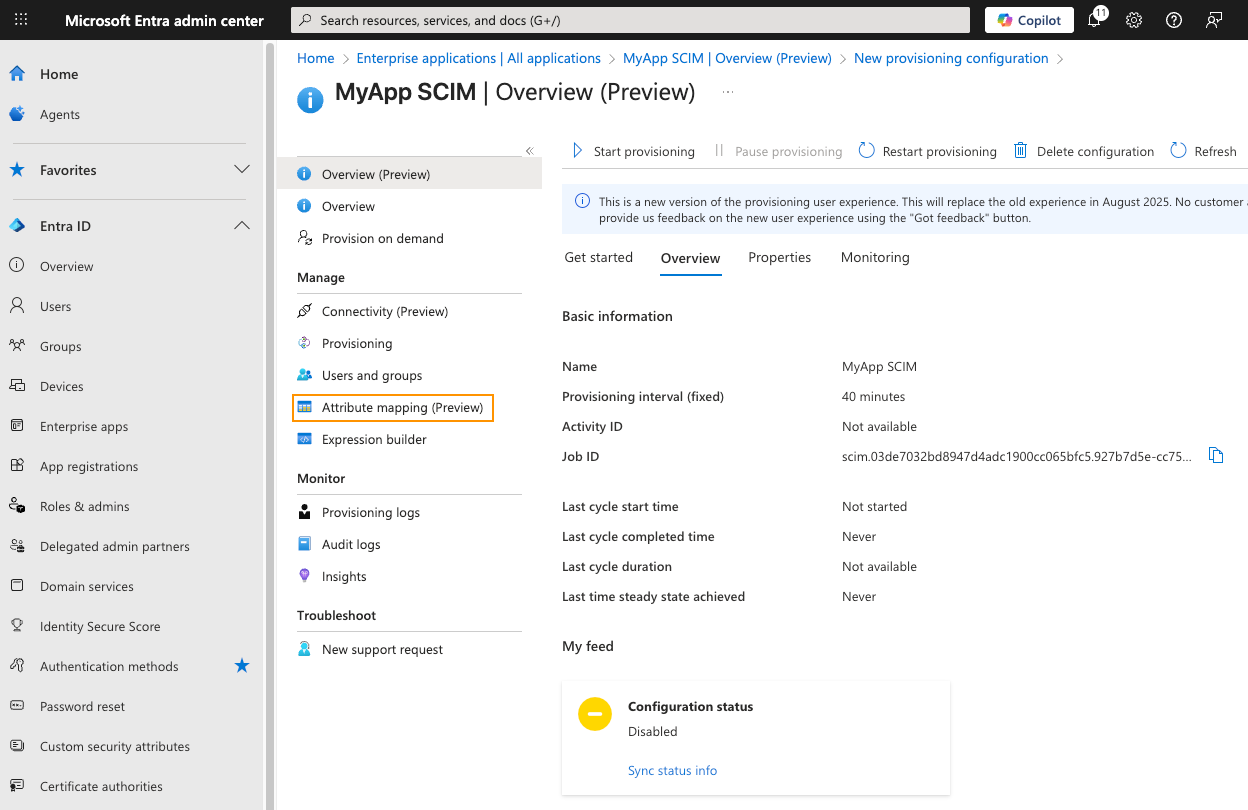
Then Users:
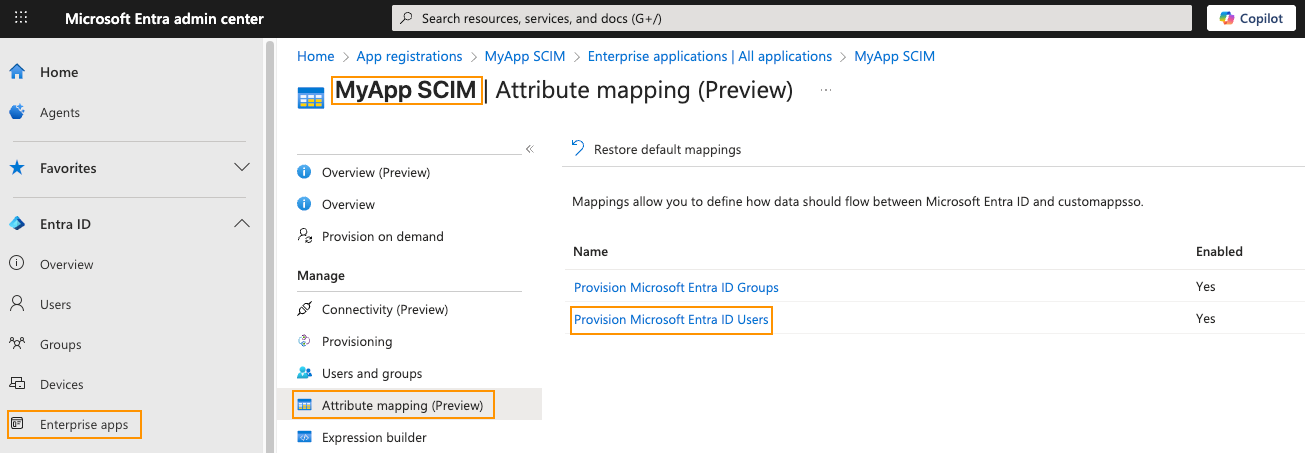
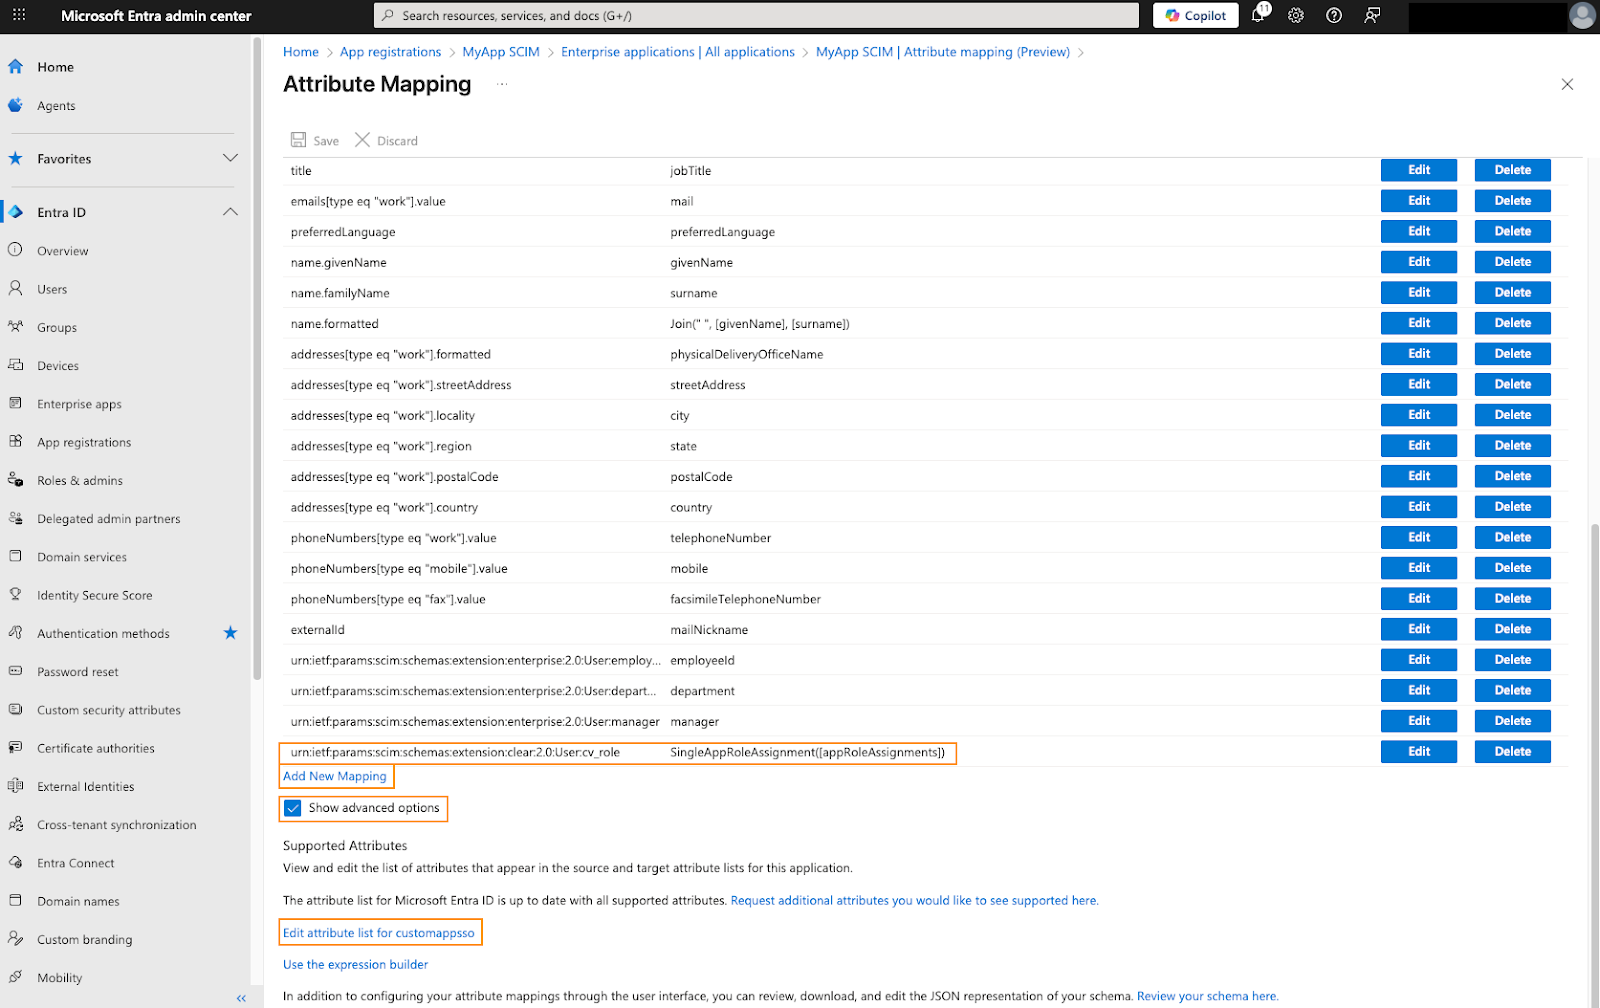
Click the Show advanced options check box and then click the Edit attribute list for customappsso.
Scroll to the bottom of the screen and in a blank box add the following attribute: urn:ietf:params:scim:schemas:extension:clear:2.0:User:cv_role and set the type to String.
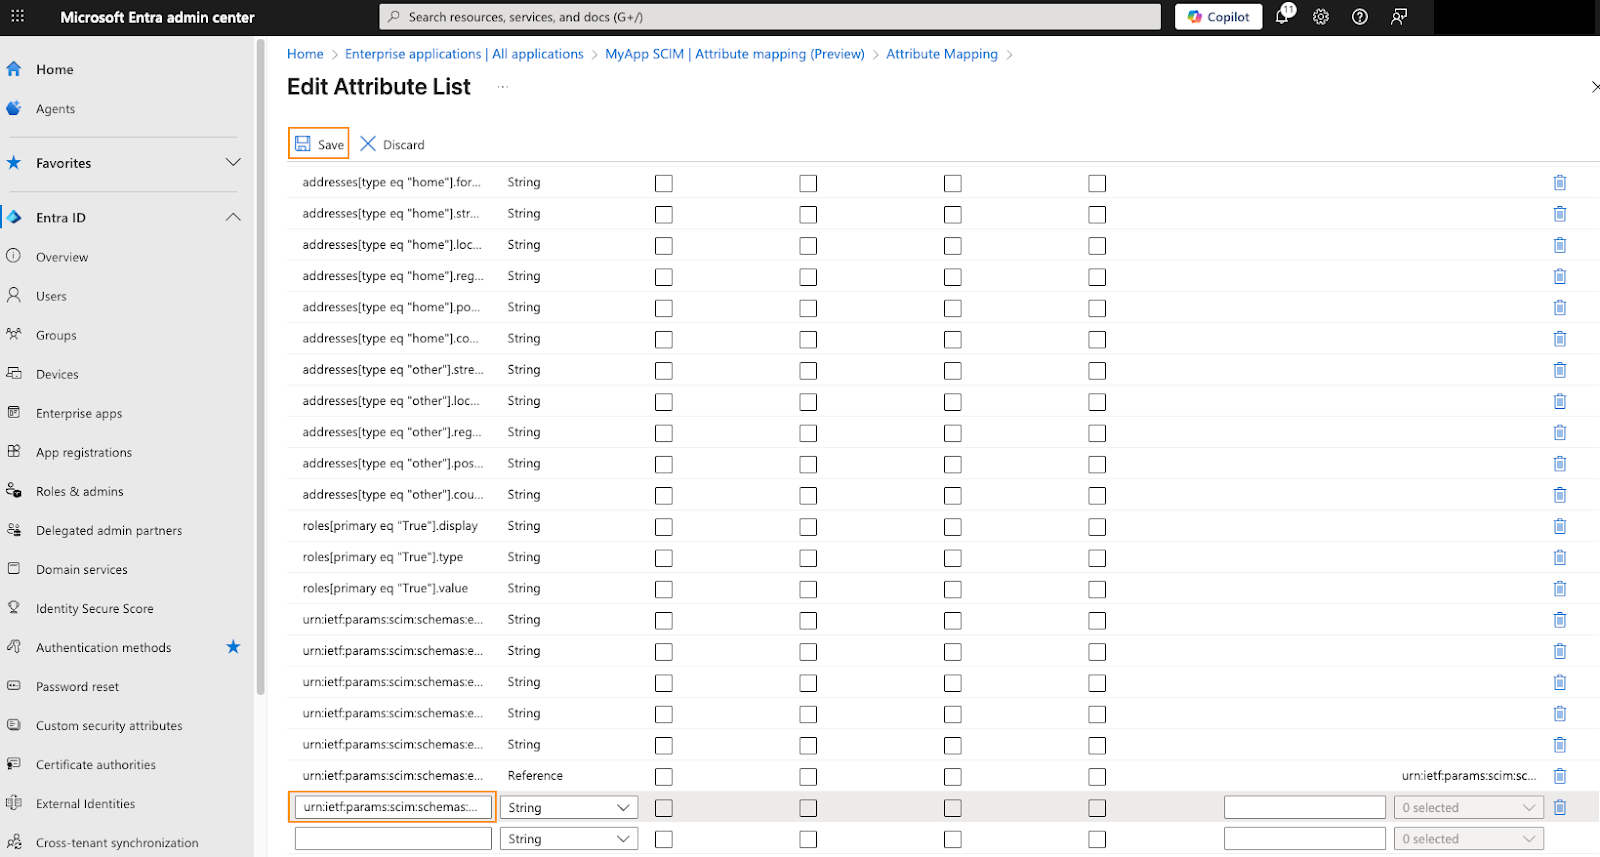
Click Save.
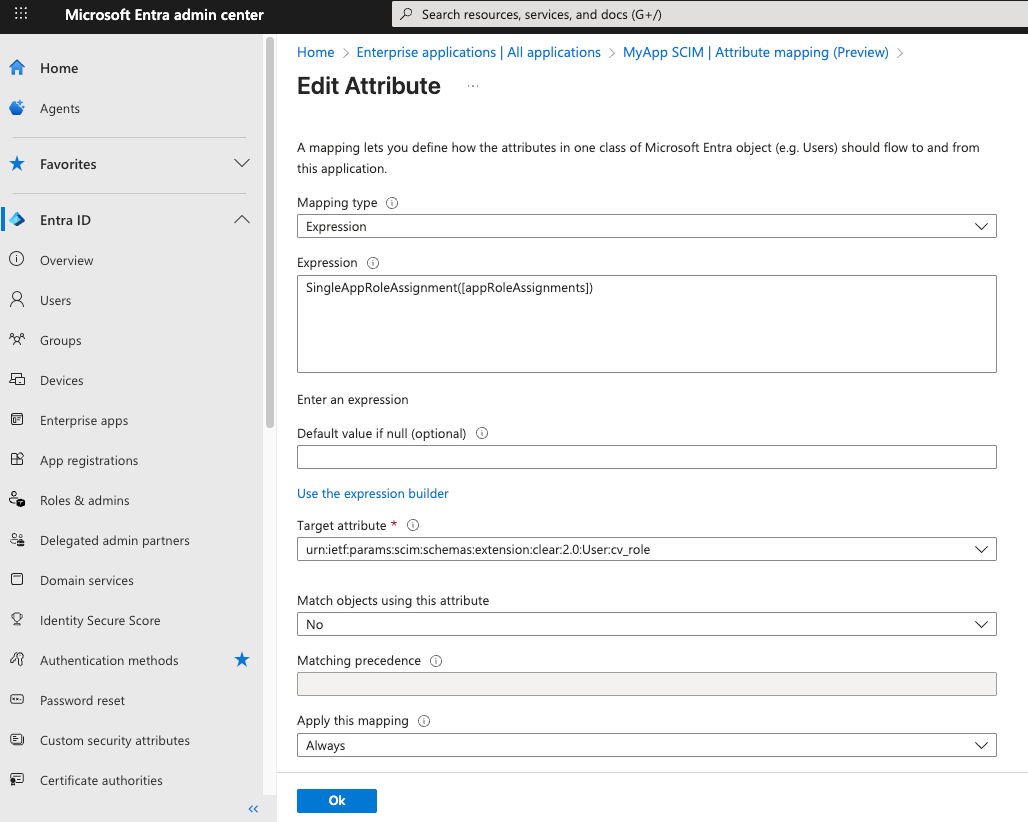
Click Add New Mapping on the Attribute Mapping Screen:
- Mapping type: Expression
- Source attribute: SingleAppRoleAssignment([appRoleAssignments])**
- Default value: (leave it empty)
- Target attribute: urn:ietf:params:scim:schemas:extension:clear:2.0:User:cv_role
- Matching precedence: (leave it empty)
- Apply this mapping: Always
Test Provisioning using Provision on Demand
This test verifies that role assignment is set up correctly.
Choose a user to test provisioning. If no roles are configured, the user will be created with the default Agent role. Then click Provision.
Messages from Provision on Demand:
CLEAR Authorized Users before Provision on Demand:
CLEAR Authorized Users after Provision on Demand:
Troubleshooting
If SCIM provisioning is not working as expected, check the following:
-
Users not provisioning:
Ensure users are assigned to the Enterprise App and the provisioning status is enabled in Azure AD. -
Connection issues:
Verify the SCIM Base URL and Bearer token are correct, and the Entra provisioning service can reach CLEAR. -
Roles or group claims missing:
Confirm attribute mappings include role or group claims and that values align with CLEAR roles. -
No updates applied:
Check provisioning logs for errors and ensure Azure AD is configured to push updates and not just initial creates. -
Deprovisioning not reflected:
Confirm “Send delete notifications” is enabled in Entra provisioning settings and CLEAR supports the action.
If issues persist, provide CLEAR Solutions Engineering with your Entra app name and example user email.
Updated about 1 month ago