
Ping SSO Setup
This guide walks you through configuring Ping Identity as a Single Sign-On (SSO) provider for CLEAR using OpenID Connect (OIDC). It also includes optional steps to enable SCIM provisioning for automated user and role management.
Prerequisites
Before you begin, ensure you have:
- A Ping Identity tenant with admin access
- A CLEAR organization with admin access
- A Ping Environment ID
- Ability to create applications, groups, and users in Ping
- Access to the CLEAR dashboard
Helpful references:
Step 1: Register the SSO Application in Ping
Sign in to Ping
- Go to
https://console.pingone.com/?env=<environmentID> - Log in using your Ping administrator account.
Replace
<environmentID>with your actual Ping environment ID.
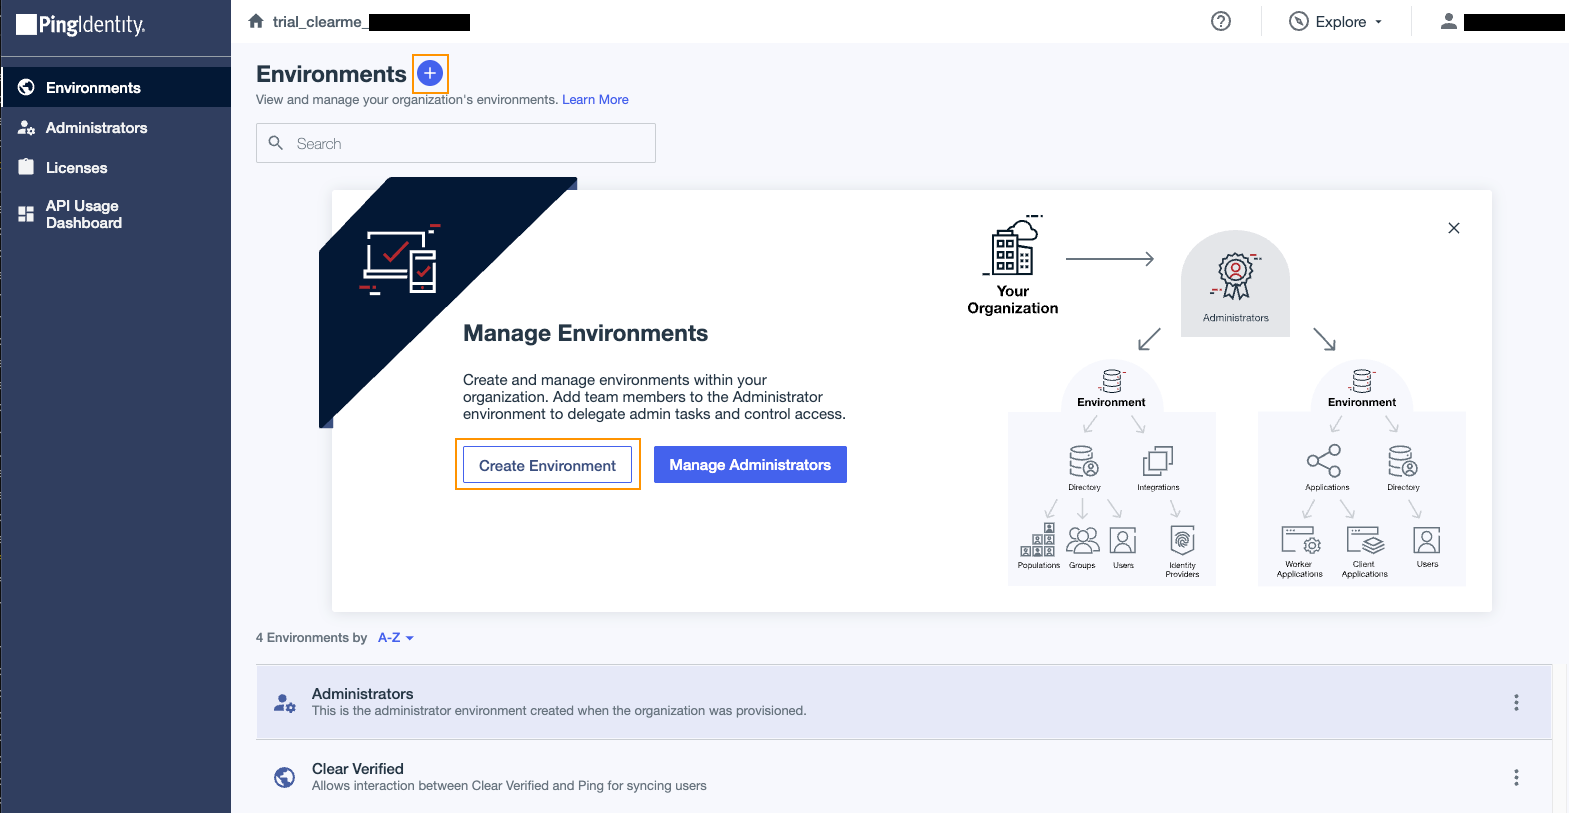
Create a New Application
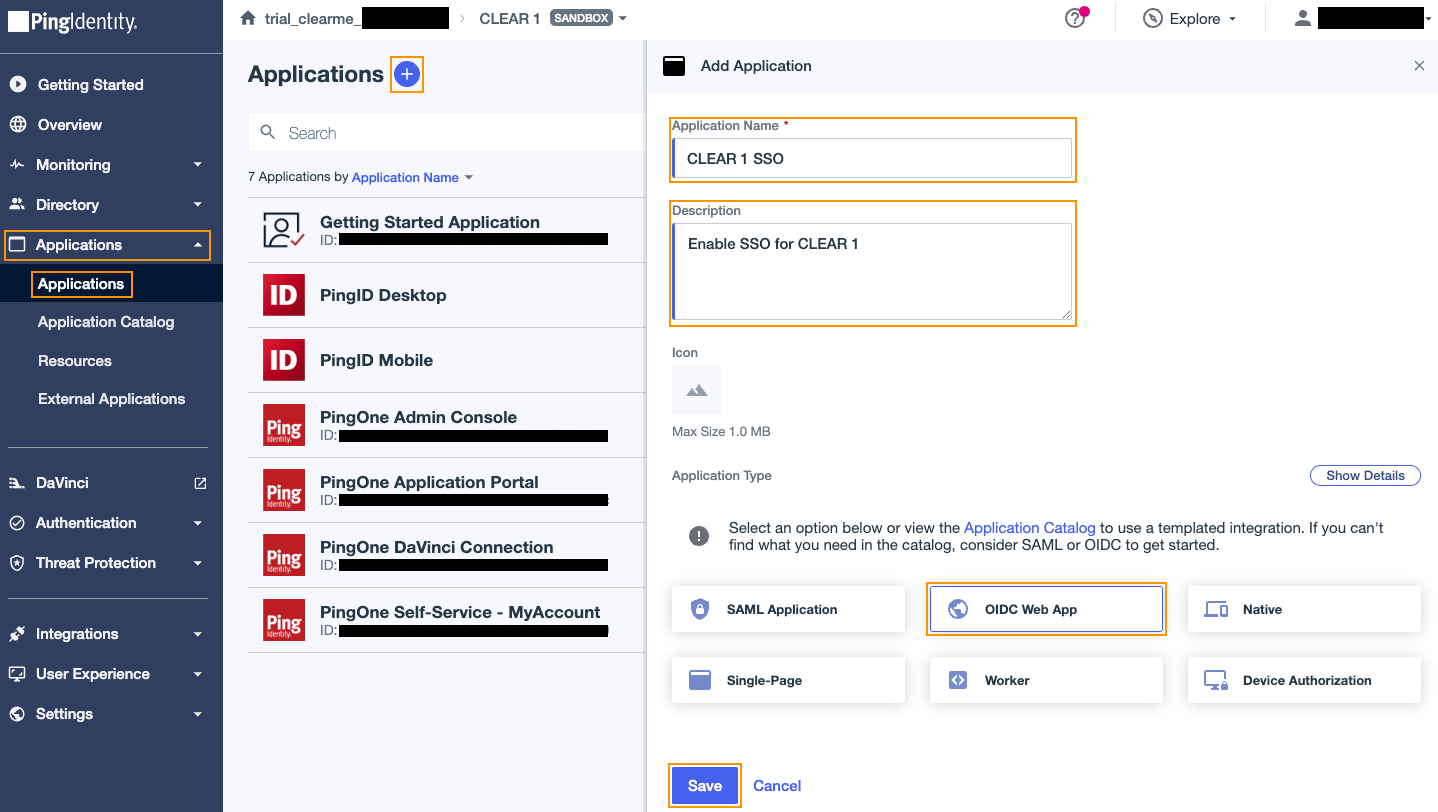
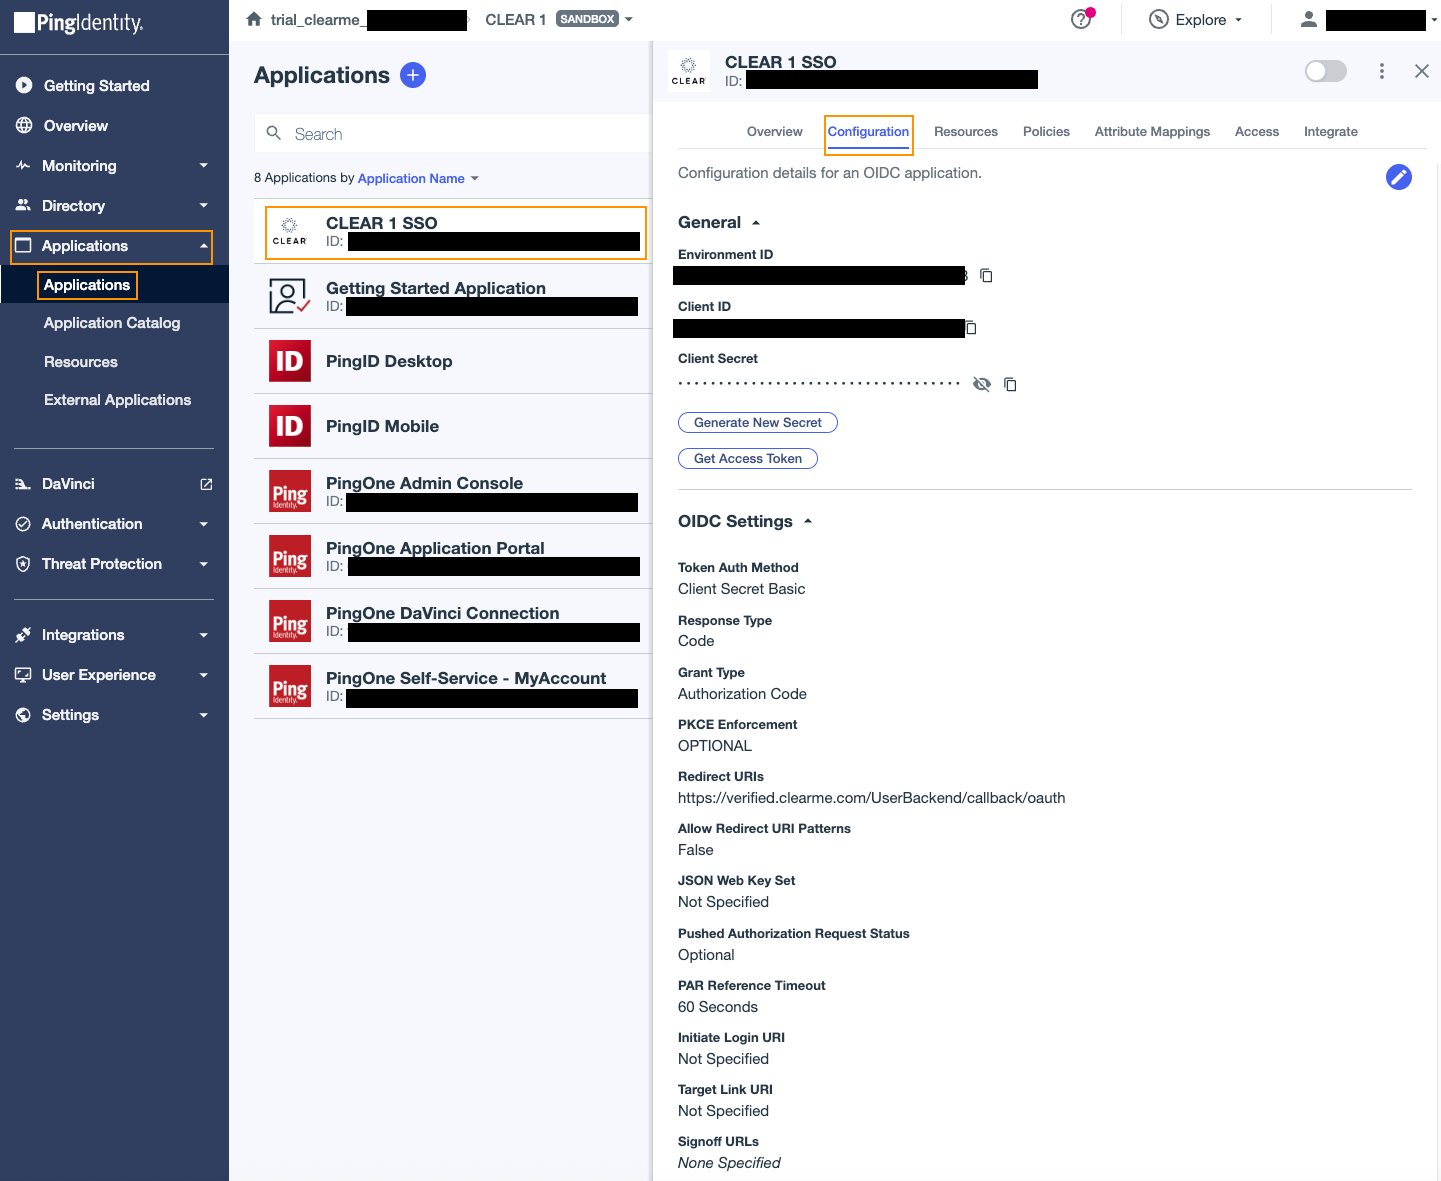
- From the Ping dashboard, select Applications
- Click the + (Add Application) button
- Enter:
- Application Name
- (Optional) Description
- Select OIDC Web App
- Click Save
Configure Redirect URI
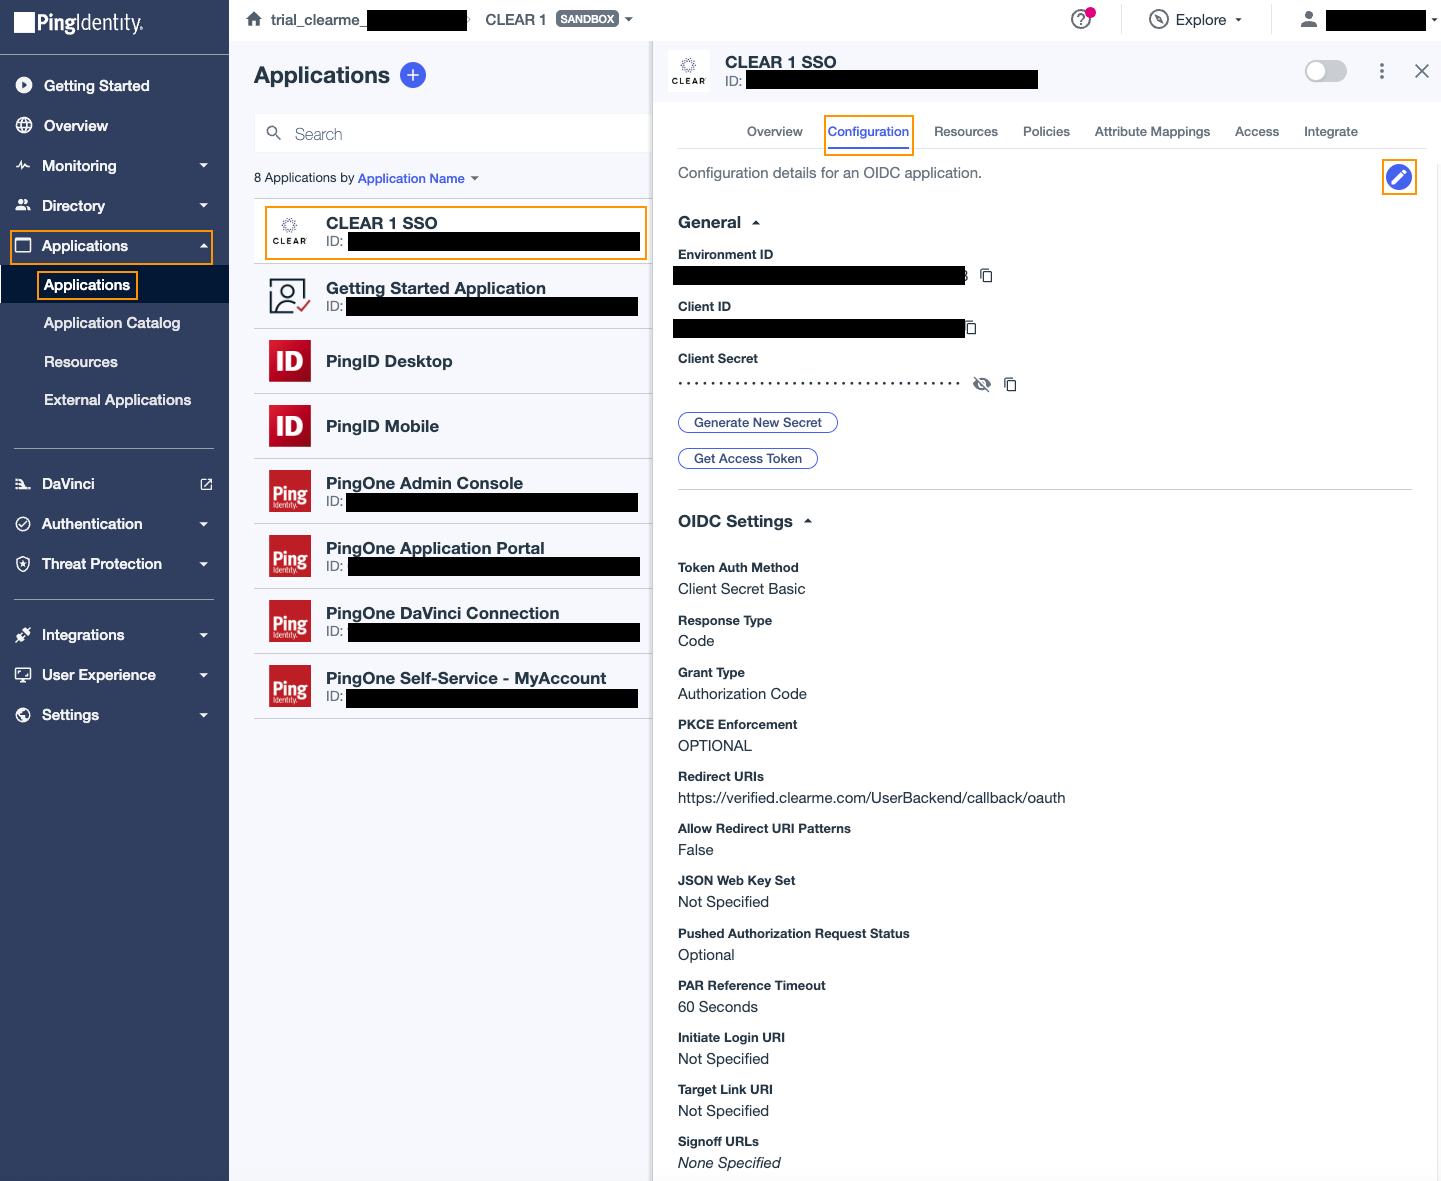
- Open the Configuration tab
- Click the pencil icon to edit
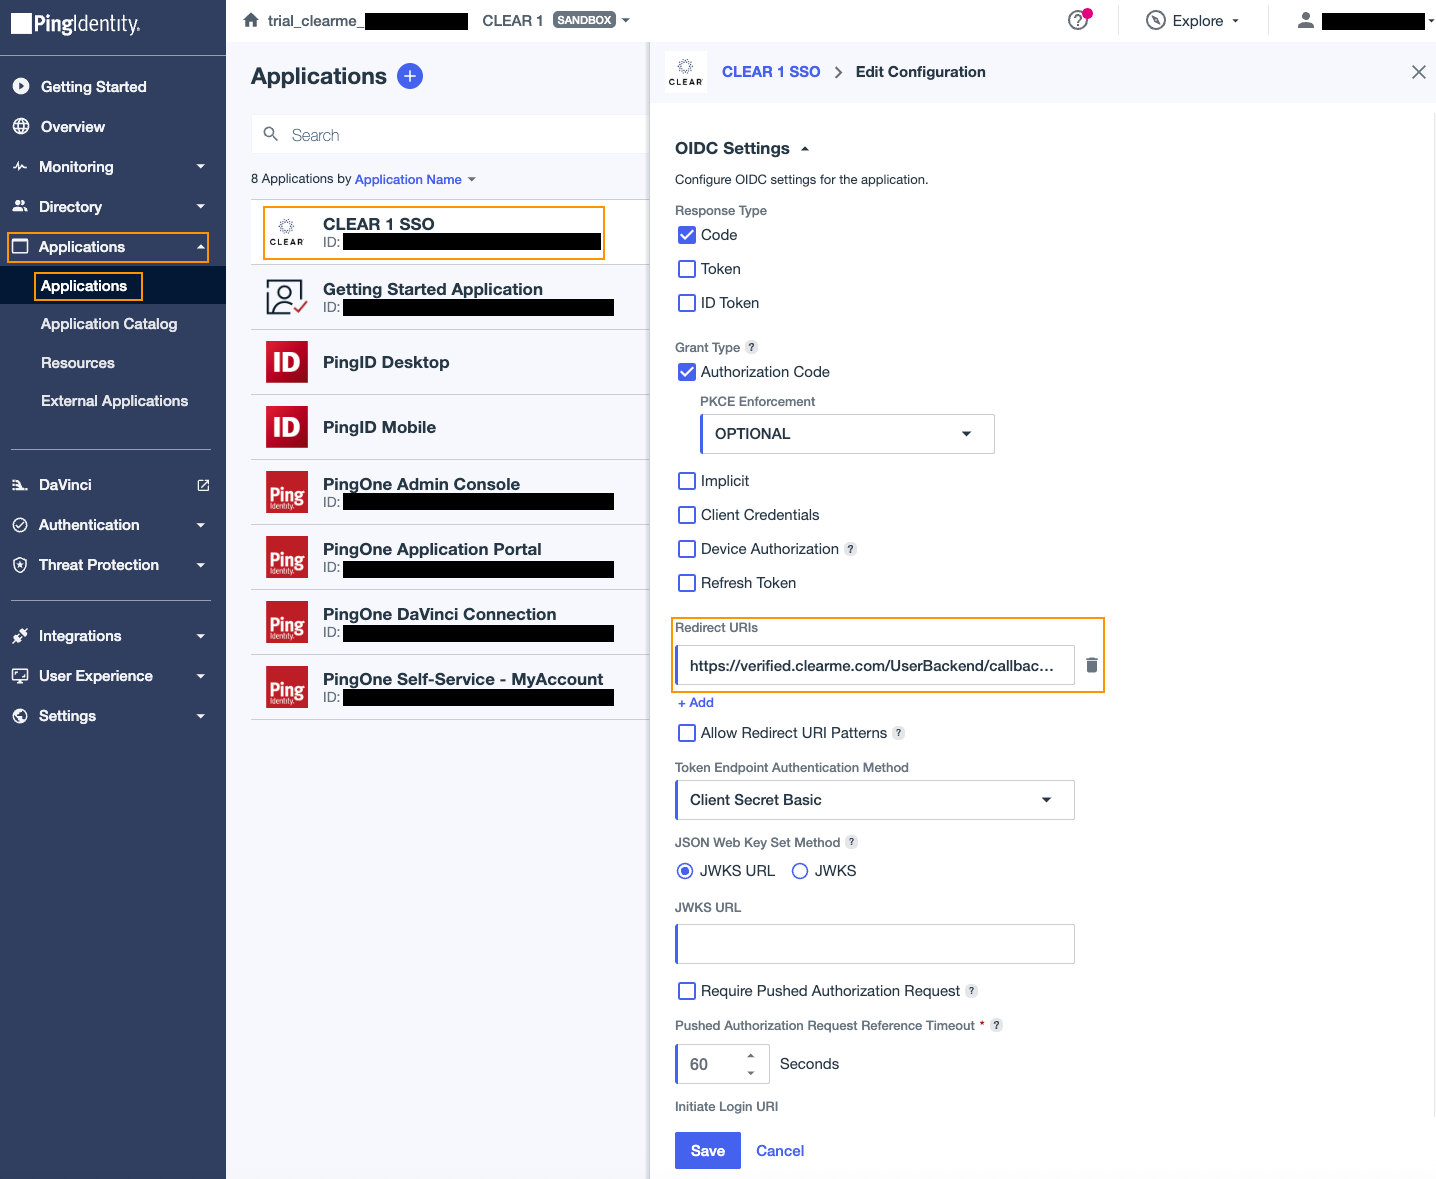
- Leave all defaults except:
- Add the Redirect URI:
https://verified.clearme.com/UserBackend/callback/oauth
- Click Save
Step 2: Gather Required Ping Credentials
From the application’s General section, copy the following:
- Client ID
- Client Secret
- Ping Environment ID
You will need these values when configuring SSO in CLEAR.
Step 3: Configure Ping SSO in CLEAR
This step is completed in the CLEAR dashboard.
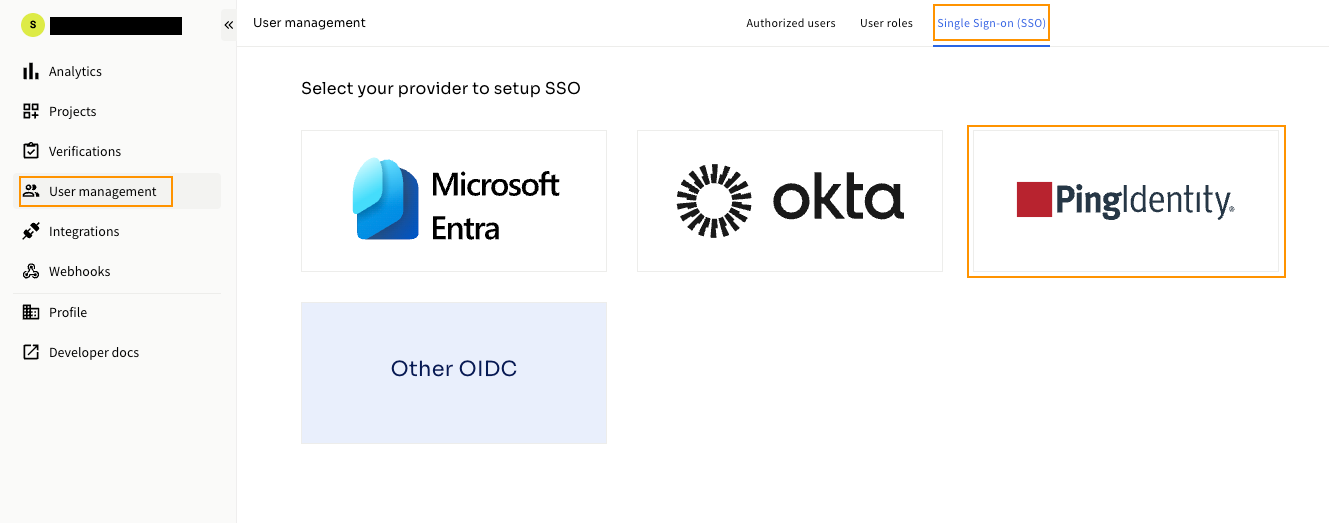
- Log in to the CLEAR dashboard: https://verified.clearme.com/dashboard
- Navigate to:
- User Management
- Single Sign-On (SSO)
- Select Ping Identity
Enter OIDC Configuration
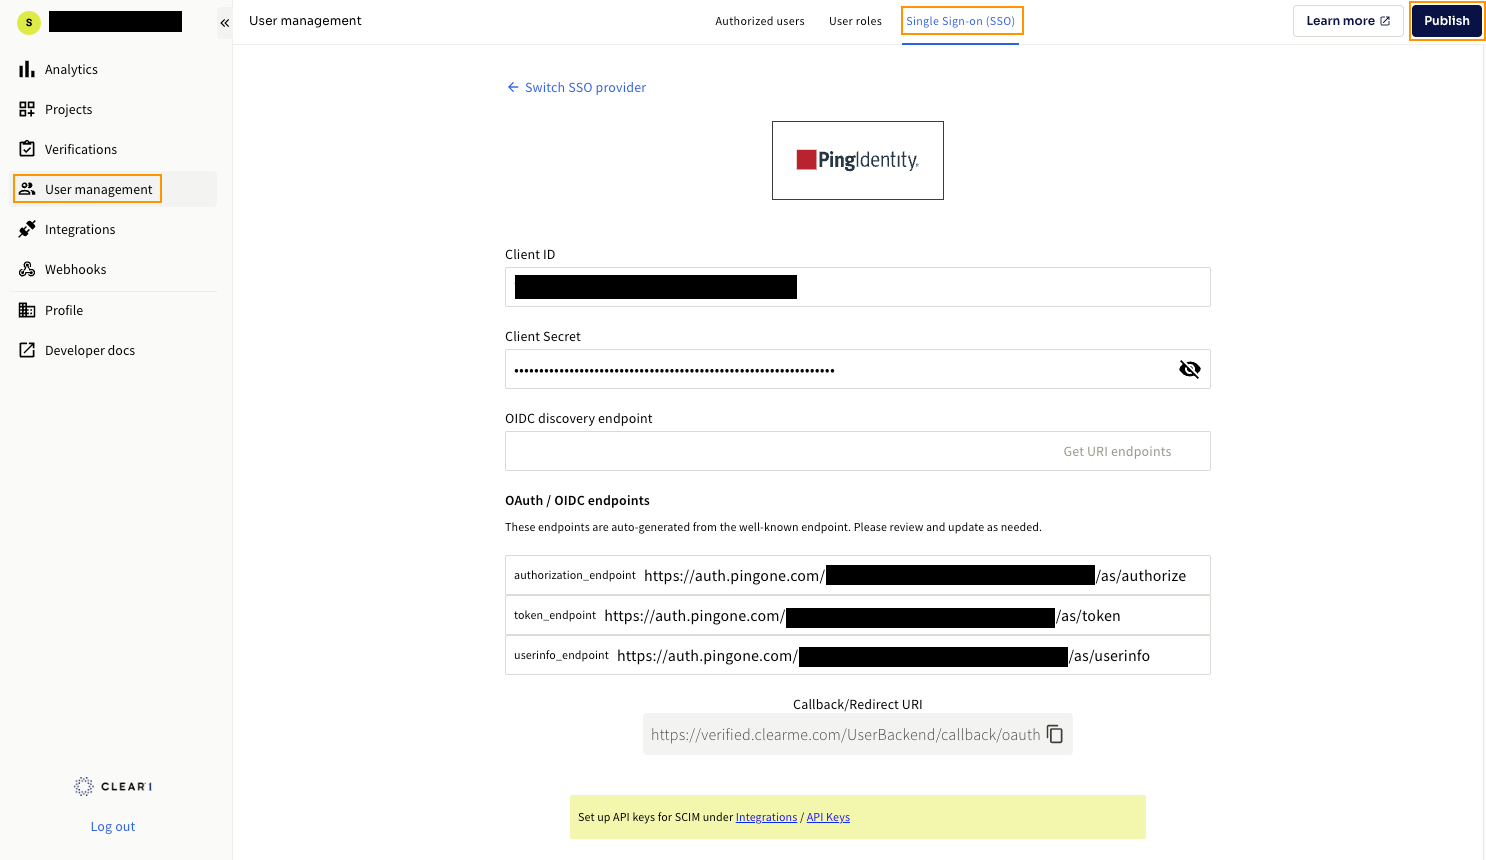
Provide the following values from Ping:
- Client ID
- Client Secret
- Ping Environment ID
OIDC Discovery Endpoint
https://auth.pingone.com/<environment_id>/as/.well-known/openid-configuration
Click Get URI endpoints to auto-populate:
- Authorization Endpoint
- Token Endpoint
- Userinfo Endpoint
If the discovered host does not end in
pingone.com, contact CLEAR Solutions Engineering to allowlist it.
Click Publish to save.
Ensure Users Exist in CLEAR
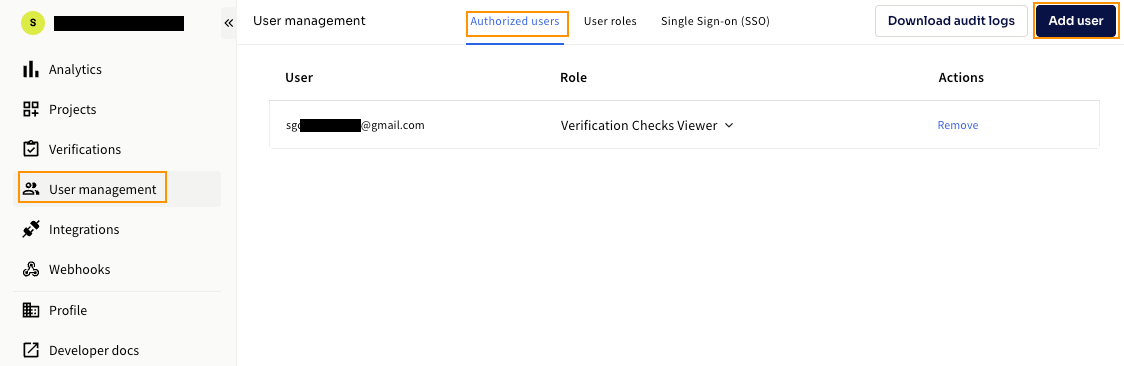
Users must exist in CLEAR with the appropriate roles. This can be done by:
- Manually adding users in User Management, or
- Using SCIM provisioning (covered here)
Step 4: Create Groups in Ping (Optional but Recommended)
Groups are used for both SSO access and SCIM provisioning.
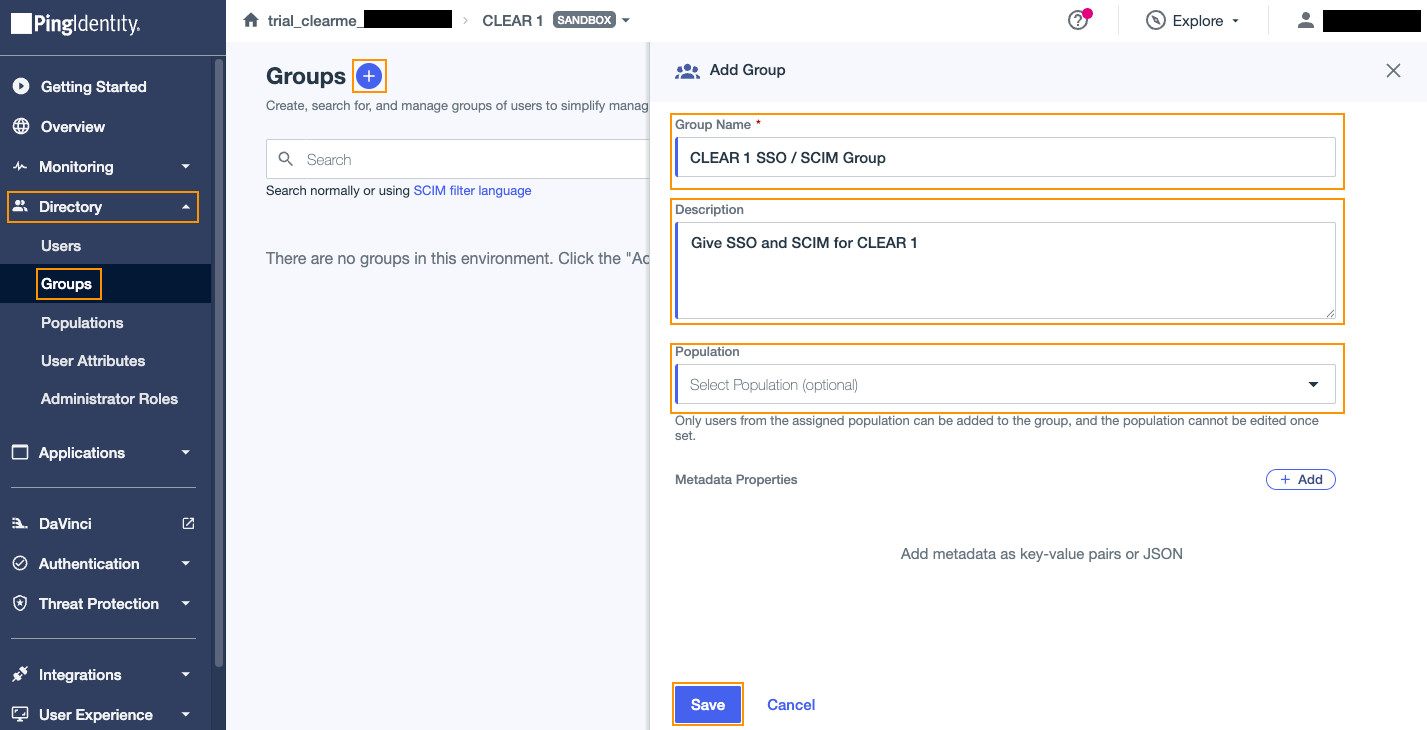
Create a Group
- Navigate to Directory → Groups
- Click +
- Enter:
- Group Name
- Description
- Save the group
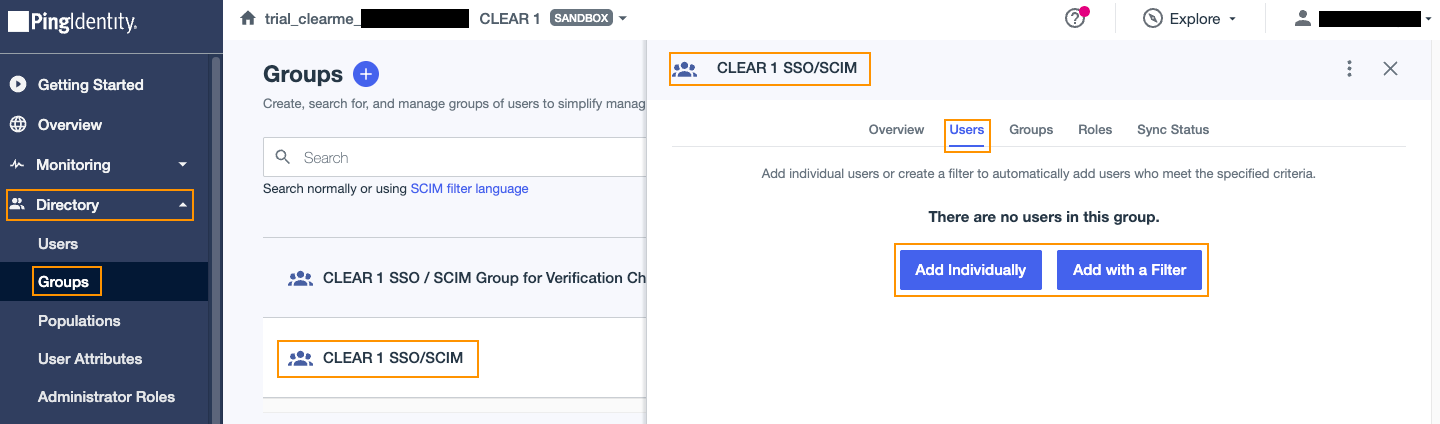
Assign Users to the Group
- Go to Directory → Users
- Create or select a user
- Assign the user to the SSO / SCIM group
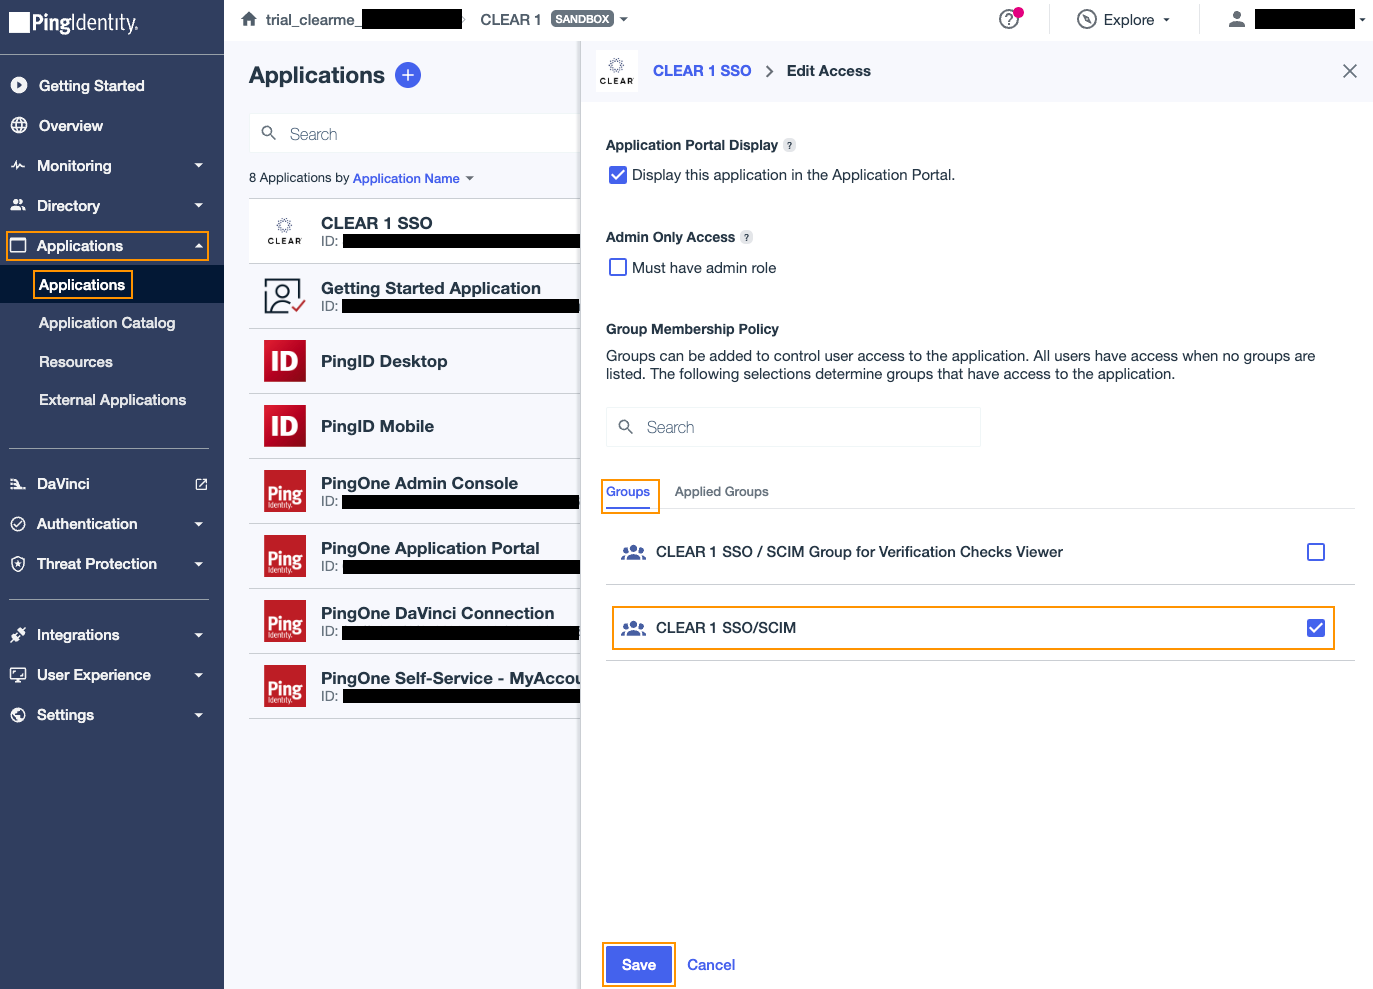
Assign Group to the Application
- Open Applications
- Select your SSO application
- Open Access
- Assign the group
- Save changes
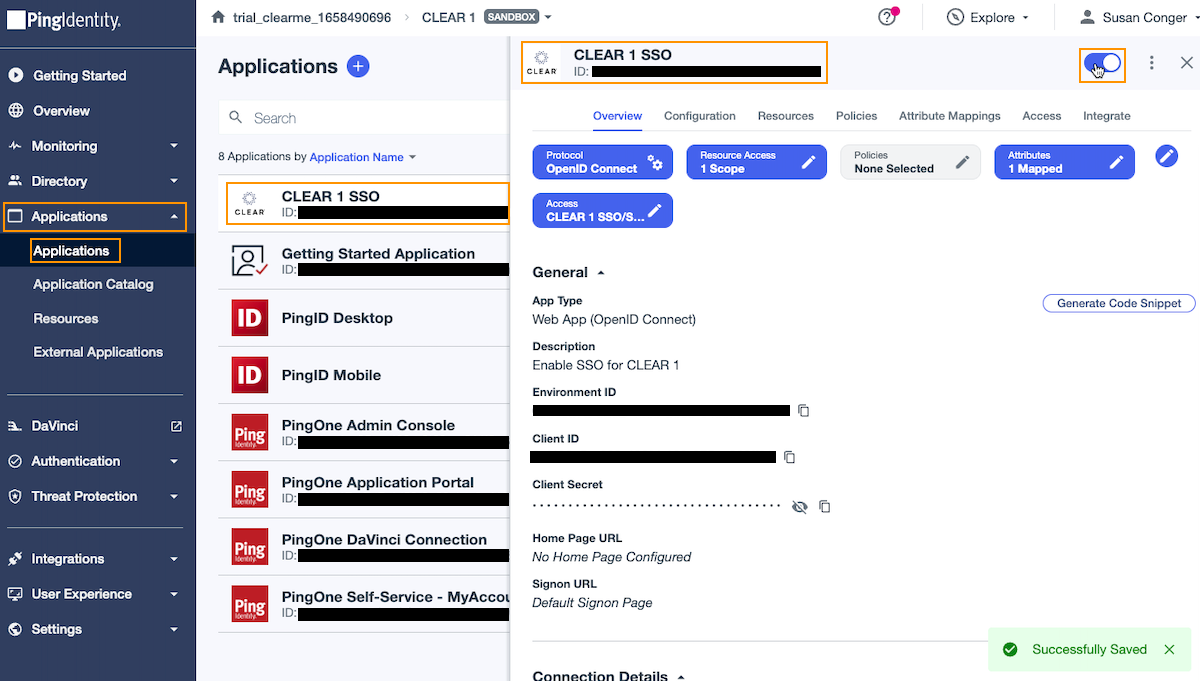
Enable the Application
Toggle the application ON to activate SSO.
Step 5: Test SSO Login
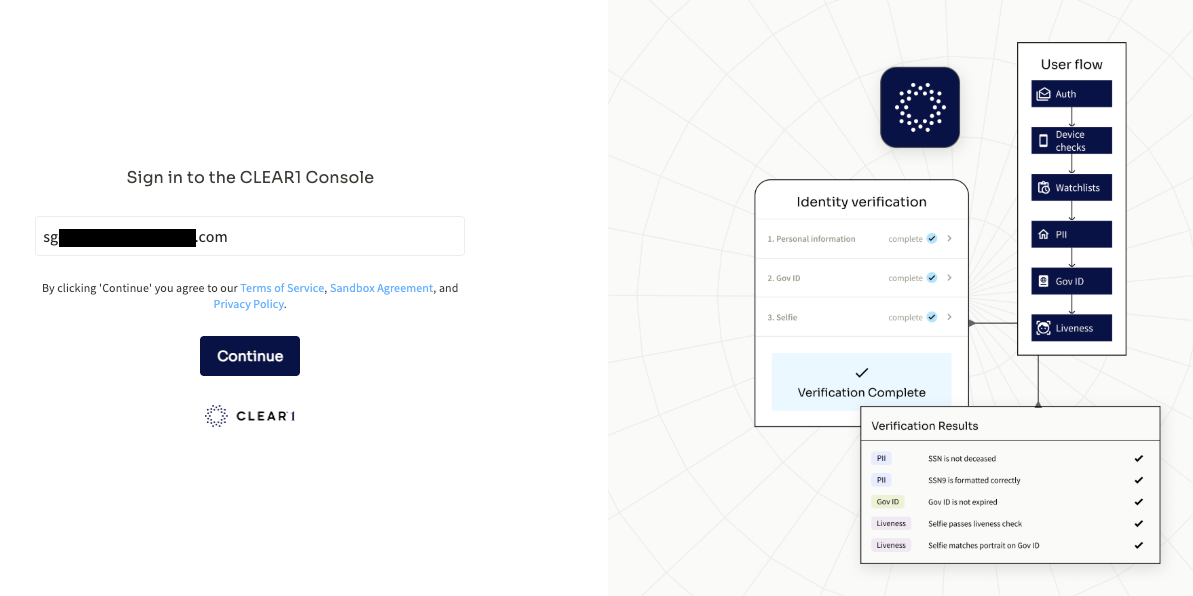
- Navigate to the CLEAR dashboard: https://verified.clearme.com/dashboard
- Initiate login
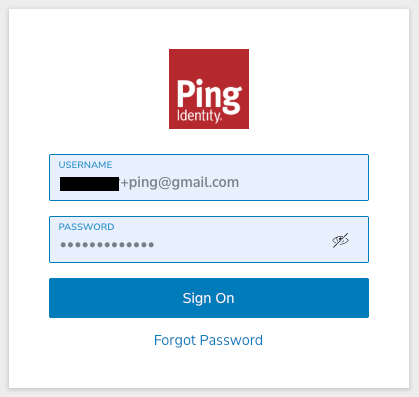
- You should be redirected to Ping for authentication
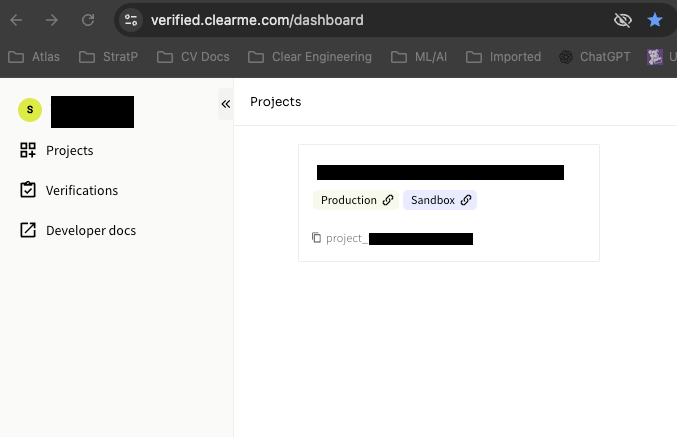
- Upon success, you’ll be returned to CLEAR
Once authenticated, users will not be prompted again until the token expires.
Troubleshooting
- Ensure Redirect URI matches exactly
- Verify users exist and have roles
- Confirm SCIM token is valid
- Validate OIDC endpoints are reachable
- Ensure hosts are not blocked by allowlists
Updated about 1 month ago