
Project Tuning & Configuration
There are two areas to configure when building a project:
- Verification Checks: By toggling these checks on and off you can define the checks that CLEAR will run on your users.
- User Flow: The user flow defines what the end user experience will look and feel like. Configuring the user flows allows you to control.
We'll walk you through how to think about these concepts and how to configure each area below.
Verification Checks
Verification Categories
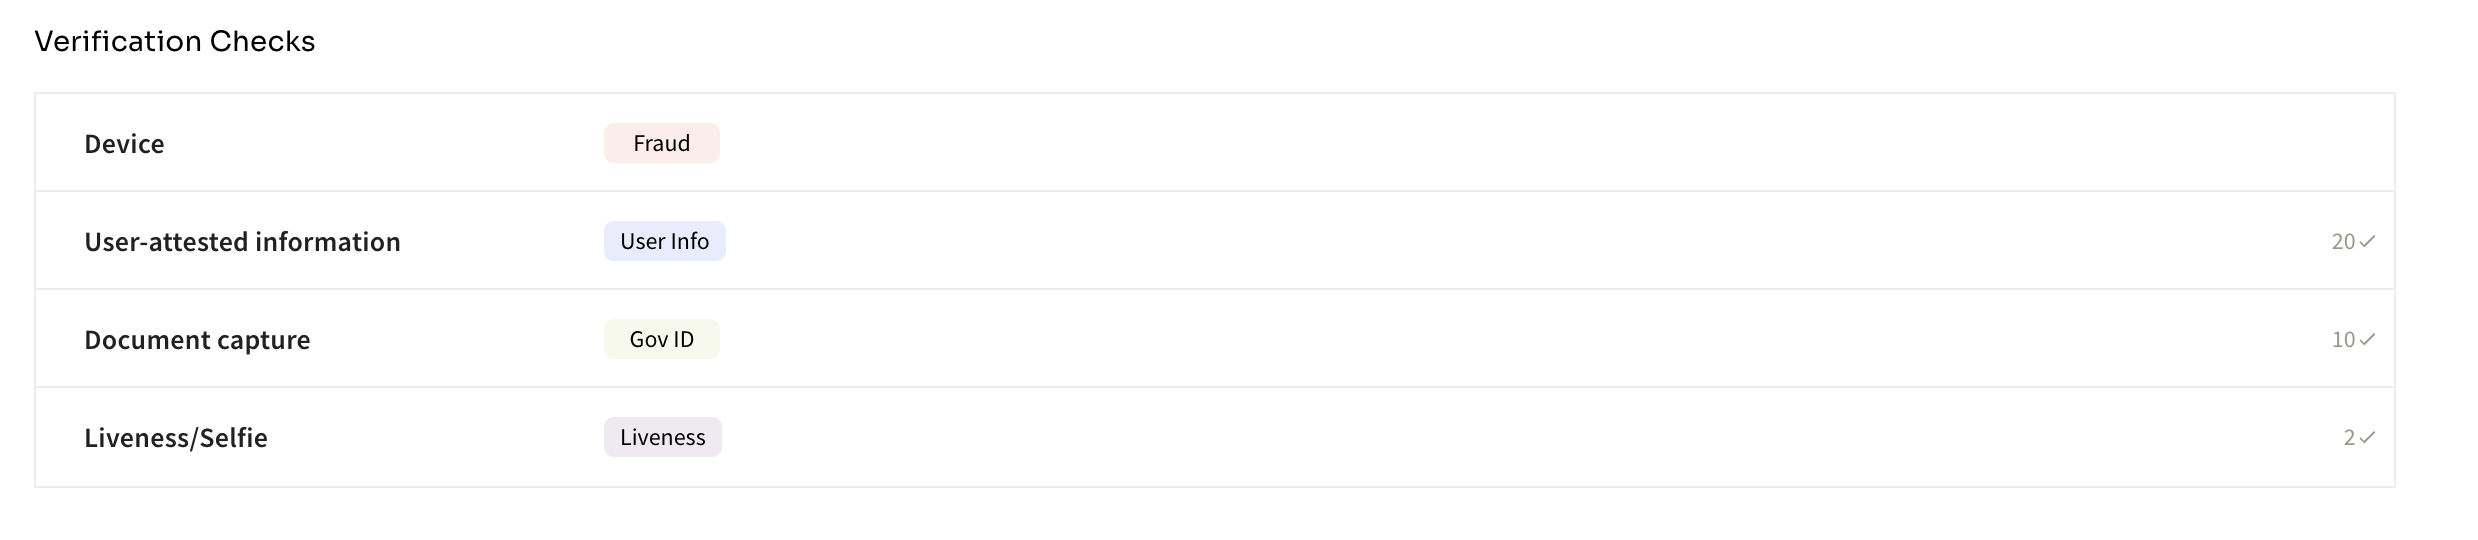
When configuring Verification Checks, CLEAR segments verification checks into four categories:
- Fraud: These are meta data checks about the users device, IP, and phone settings. Generally, any check within this segment does not add any steps for the end user to complete. All of these checks occur in the background of the verification
- User Info: Configuring checks in this area will prompt the user to fill in information about themselves. We then take that information and corroborate it against additional sources to ensure the information provided matches the information on record.
- Gov ID: Enabling any check in GovID section will prompt a new CLEAR user to upload an ID or if an existing member use the document on file, from here CLEAR will validate the IDs against the verification checks that are toggled on.
- Liveness:The liveness section adds a biometric selfie component to the verification session. Toggling on a check in this area ensure that CLEAR captures a liveness selfie of the user during the CLEAR flow.
When configuring Verification Checks its helpful to understand that CLEAR is a networked identity! This streamlines the verification process for our partners and end users.
- Users who use CLEAR for the first time will need to upload information to satisfy your verification requirements.
- If a user is a returning member and has and has the necessary information on file to satisfy your use case we will not prompt the user for any additional information and check the information they have on file against the checks you've configured.
- If a user is a returning member will some, but not all of the necessary information on file we will step them up to only collect the missing information.
Collect & Verifying Information vs Collecting Information
CLEAR provides the option to collect information about users and then verify that information. If our standard settings are turned on this means if CLEAR collects & verifies information from a user, and the user fails one of the verification checks you have toggled on, they will fail the overall verification.
What this means:
If you have checks toggled on in the Fraud section and a user fails a check Device is not using a VPN then the user will fail the entire verification even if they have passed other areas like User Info, GovID, and Liveness.
If you are interested in collecting the information from a user but not having the information affect the overall result of the entire verification session you have the option to collect but not verify information. This setting:
Will:
- Return data about the user
- Show that the user failed the check in the verification table and via API
Will Not:
- Impact the overall status of the verification. For more information about statuses please refer to Status Descriptions
Things To Note
- We recommend thinking through your use case and understanding where CLEAR slots into your current flow. Based on where CLEAR fits in your flow should define how you think which information is mission critical to have verified.
- We offer templates to get started and which have pre-set checks toggled on which optimize for user experience and conversion.
How To Configure Verification Checks
- Open a section
- Toggle the check on or off. If this is your first check enabled in the section you will see updates to the user flow on the left side of the screen. By enabling a check in sections User Info, GovID, and Liveness you are directly impacting the end user experience.
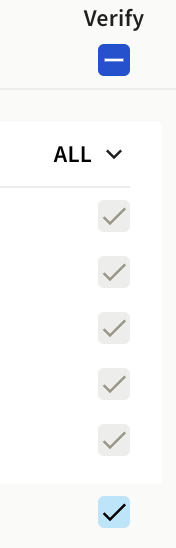
- [Optional] - Enabling Collect-only option: Select options > Show advanced collection options. Now two columns of checks will appear and you have the choice to collect or collect & verify.

- Custom Check settings. If a check has two parallel knobs it means there an option for further customization. Select the know to customize the check. In this example a user can customize the check "Age is 18 or over" and select and alternate age to check for like 21.

User Flow
The user flow defines what the end user experience will look and feel like. Configuring the user flows allows you to control:
- Authentication factors and types
- Pass or Fail Options
- Retries
- Data Sharing
- ID Types & Blocklisting IDs from countries
Authentication Factors and Types
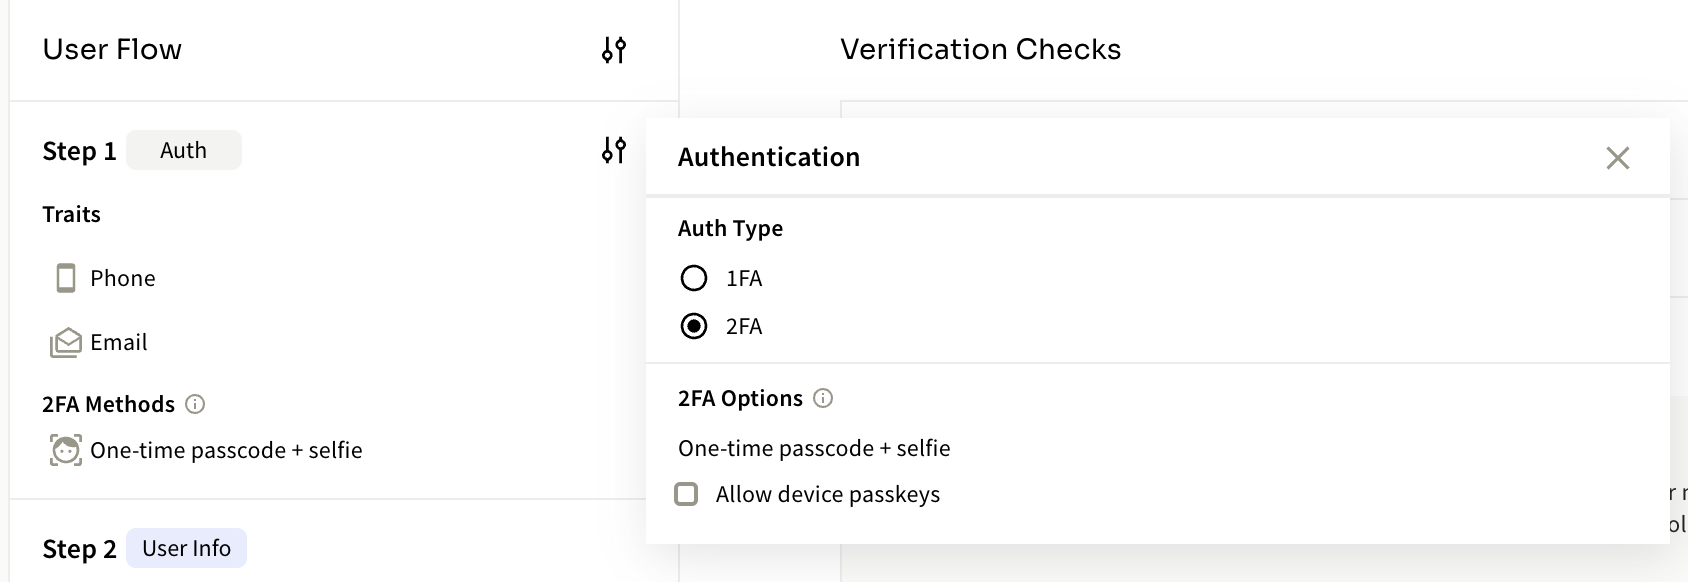
CLEAR offers 3 different options for authenticating into a verification sessions. The authentication layer is a critical vector to identity online. Enabling auth facotrs increases signal that a person is who they say they are. Our 3 authentication factors are
- Selfie Authentication (for more information visit: Selfie Authentication)
- One Time Pass Code (SMS code to cellphone that can be auto populated on iOS or copy/pasted from SMS application)
- Passkeys (FaceID/TouchID for iOS, & Android Fingerprint)
You have the option to configure Single-Factor Authentication or Two-Factor Authentication in our console.
Pass or Fail Options
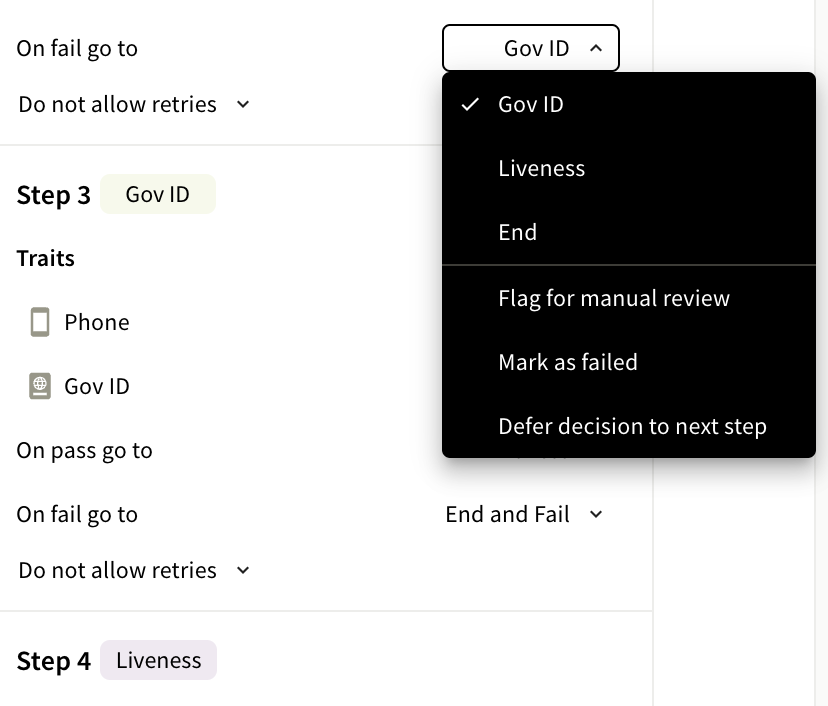
The user flow helps define what you'd like to happen if a user fails the step. You have the option to configure:
If a user passes:
- Continue to next section (GovID, Liveness)
- End: End the verification after this step and do not move on to the next step
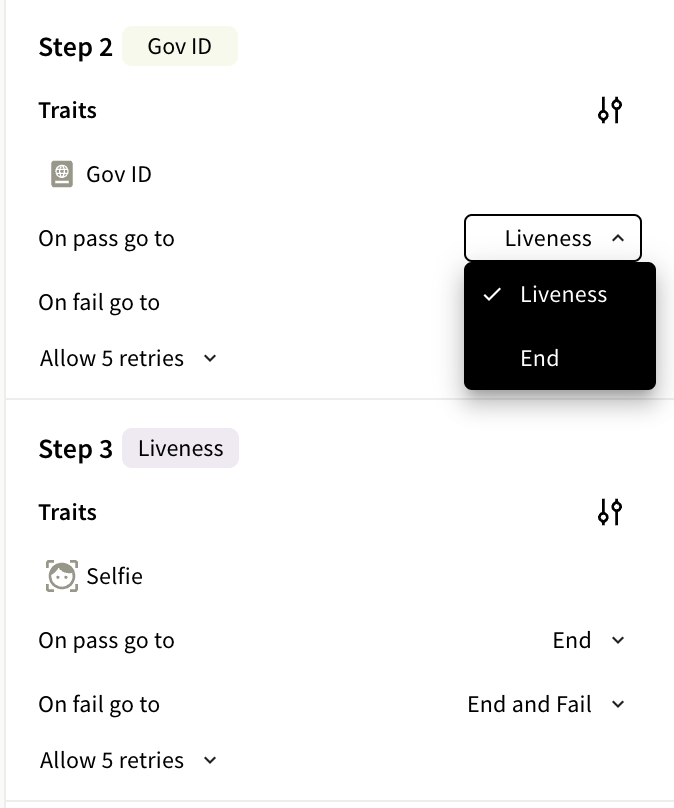
If a user fails:
- Continue to next section (GovID, Liveness)
- End: End the verification after this step and do not move on to the next step
- Flag for manual review: If seelcted the overall status of the verification will appear as
awaiting_manual_reviewYour team can go in to the console to review the verification session and update the overall result tomanual passormanual faildepending on your needs. - Mark as failed: By togginling this on you can expect to see that the check the user failed will be marked as failed in the verification session in the console and via API.
- Defer decision to next step: This means if they fail a step but move on and pass the following step the overall verification status will still result in success.
Retries
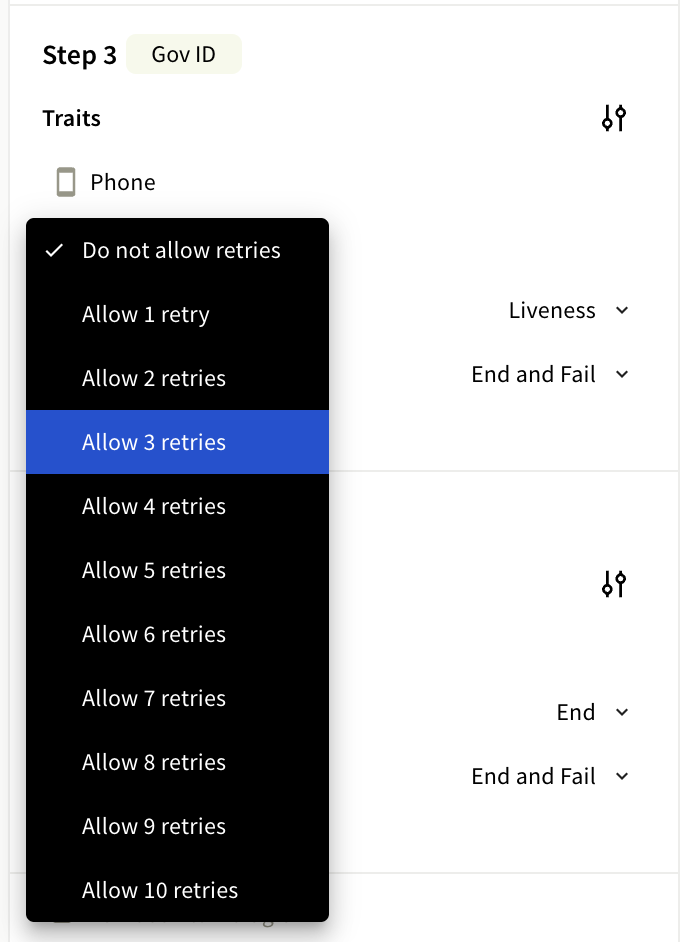
Configuring retries per step allows you to control the number of times the user can re-upload information. We allow up to 10 retries per step configurable by you.
Data Sharing
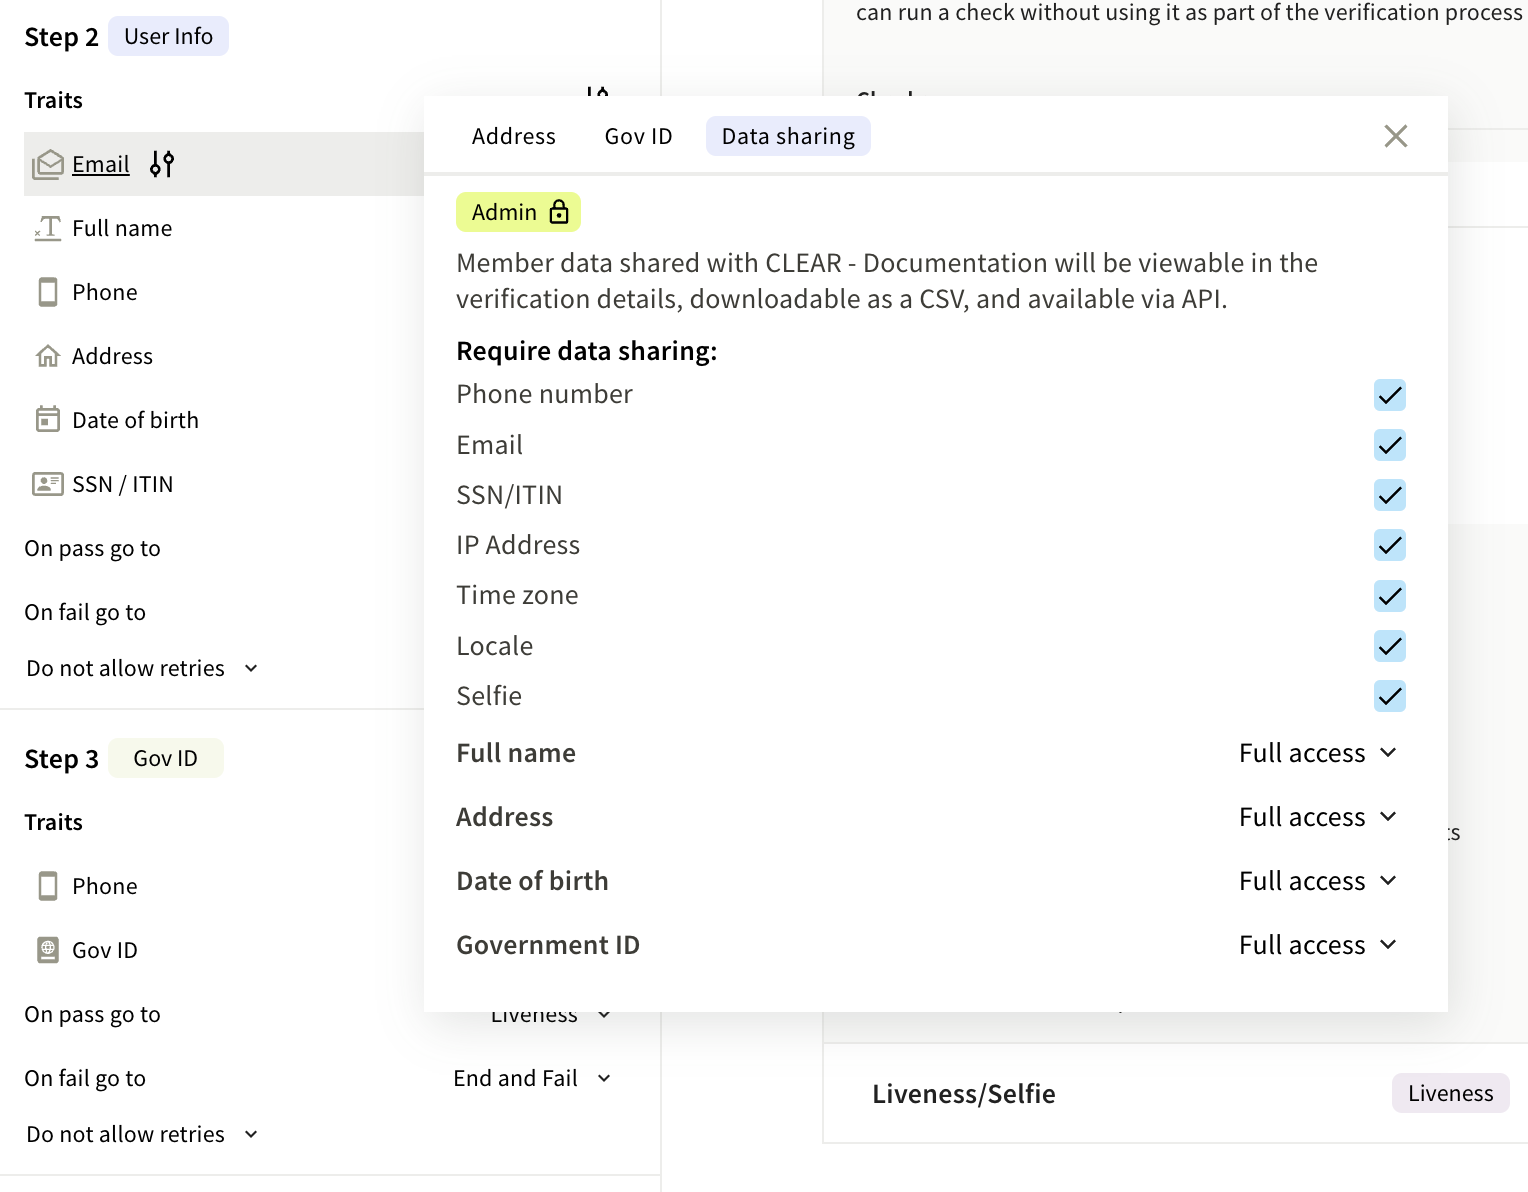
Console users have the option to define what end user information is shared back in the verification table and via API about users who verify.
Keep in mind that everything that is togged on to share, an end user will need to consent to. Toggling on checkboxes here impacts the initial "consent" page of a verification. Every data element is shown to a user and they will need to accept. To optimize conversion we recommend selecting the minimum viable data needed to satisfy your use case.
To enable click the parallel knobs under any step in user info and navigate to data sharing
ID Types & Blocklisting IDs from countries**
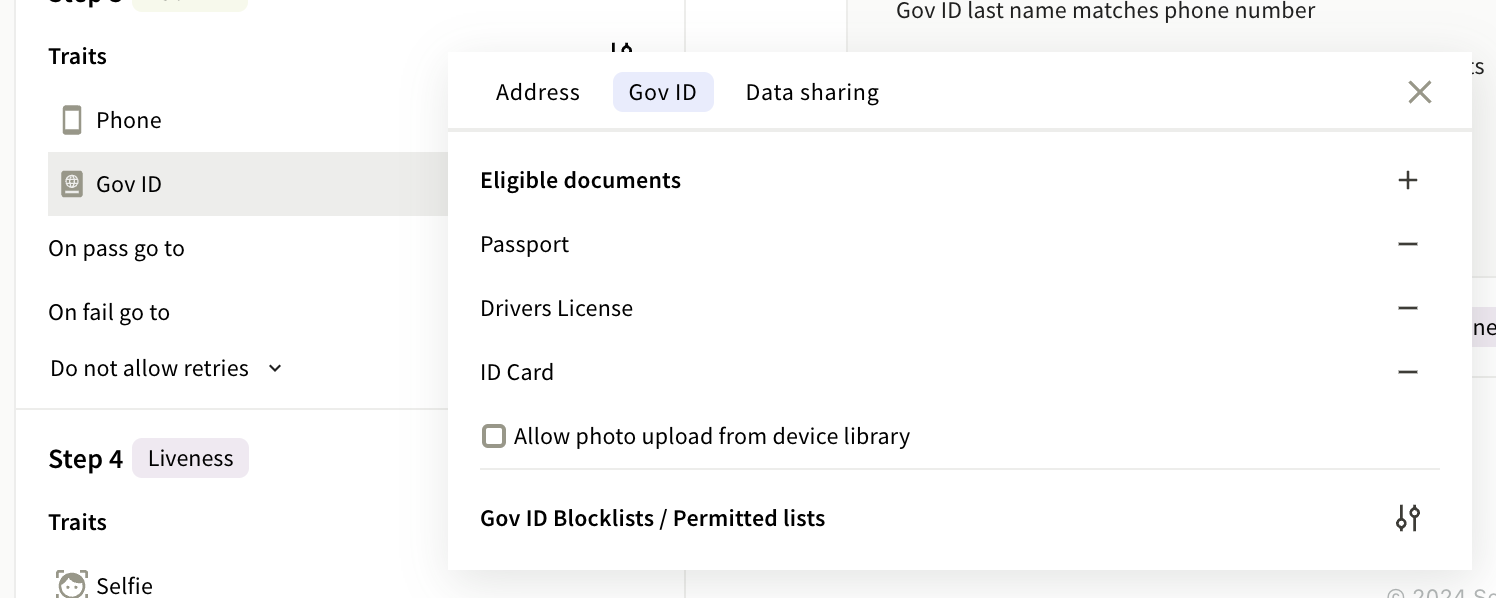
We offer your control over what IDs you would like to enable/disable for your project and the ability to allowlist countries. Navigate to the GovID step in user flow and select the parallel knobs.
How To Configure User Flow
- Define Authentication factors and types
- Select Pass or Fail Options
- Select Retries
- Choose Data Sharing Elements
- [Optional] Select ID Types & Blocklisting IDs from countries
🎉 Congrats, you've configured your a project!
Updated about 1 month ago