
Going Live With CLEAR
1. Review edge cases and handle API errors
Once you've integrated the happy path, you should also review some edge cases that may occur. You should test your integration using:
- Invalid data, correctly formatted
- Valid data, incorrectly formatted
- Incomplete verifications and users who retry verifications
You should also handle certain errors returned occasionally by our API. We use HTTP statuses for all errors. These include:
HTTP 400 (Invalid Argument)
Something was wrong with your request parameters. For example, you gave us a phone number when we were expecting an email address, or a field is missing or invalid. The response will indicate the precise nature of the error.
HTTP 401 (Unauthorized)
Your API key is missing or invalid.
HTTP 404
The requested resource could not be found (or you do not have access with this API key). For example, you specified an invalid ID when looking up a verification session.
HTTP 429 (Rate limit exceeded)
You have made too many requests in too short a time period. Rate limits are set high enough so that hitting one probably indicates a misconfiguration. If you see one of these errors and you're sure your system isn't misconfigured, you can use exponential backoff to determine when to retry the request.
Service rate limits for API endpoint's are currently configured to 1000 requests per minute, per organization. Separately, we allow a maximum 20 OTPs per verification to avoid SMS traffic pumping attacks.
While CLEAR has safeguards in place to limit the rate of API calls, we expect our partners to integrate in a way that reasonably optimizes the number of API calls. For example, please use our webhooks instead of long polling our service to detect changes in state. Please contact us regarding estimated API rates and let us know if you need to raise any limits.
HTTP 500
Something went wrong on CLEAR's side. These errors are very rare.
Requests resulting in HTTP 500 errors have their state rolled back after the response is returned, so they are always safe to retry. You should retry the request after waiting a couple of seconds.
2. Submit a video of the end-to-end experience for review by CLEAR
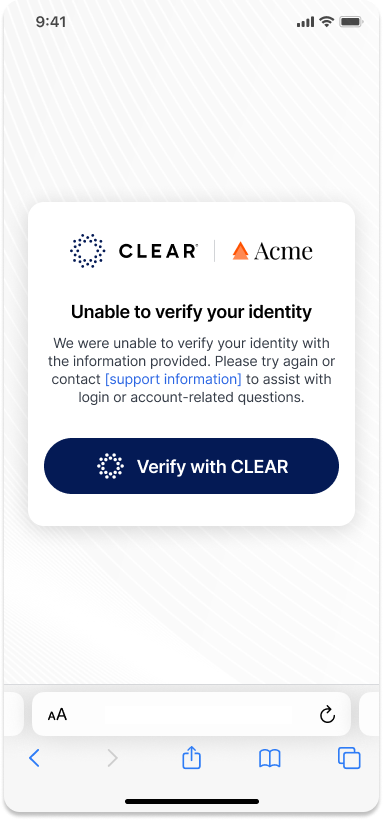
Before going to production, we will help you do a quick review of the end-to-end user experience. Please submit two videos to CLEAR's customer support team, one of a "happy path" and another of an "unhappy path" user experience.
| Video 1: "Unhappy path" experience | Video 2: "Happy path" experience |
|---|---|
| Please record a video of what the user sees when they fail the CLEAR verification process (or are flagged for review), starting with the screen that prompts the user to verify with CLEAR and ending with the screen the user sees after they fail. | Please record a video of what the user sees when they pass the CLEAR verification process, starting with the screen that prompts the user to verify with CLEAR and ending with the screen the user sees after they successfully verify. |
Example Unhappy Path:
3. Publish your project to production
In order to begin verifying live data, the CLEAR team will need to review and publish your project to production.
Partners are not able to push to projects into production on their own. Please contact CLEAR support or partner success to request
Once this is complete, you will be able to create a production API key / client, create a reusable production verification session link, create single-use production verification links, and create production verifications session via API under the project.
4. Generate and secure production credentials
You need a production credentials to authenticate your application with production data. After publishing a project to production, ensure you generate production credentials in the Integrations tab of the admin console.
You can create a production API key using the "Add API Key" or create a production client using the "Add Client ID & Secret" button at the top right of the Integrations tab in the admin console. If you don't see an option to create a production key or client, contact support to give your organization access to our production environment.
Production credentials must be stored securely. They should never be exposed in code repositories, application bundles, or any other public locations.
5. Set up production webhooks (if needed)
Webhooks are configured separately in sandbox and production. If you have set up webhooks as part of your sandbox integration, you may need to get a few fields from the webhooks page for production (select production at the top of the page)
- Note the Bearer token and HMAC Signature (if applicable), as these are different from the sandbox environment.
- Be sure that the webhook URL is set correctly for your production servers as well.
6. Launch
Before you go live, please give us a heads up on your go-live date. We'll also set up a product launch call afterwards to align on the rollout of any co-marketing and PR initiatives.
Updated 3 months ago